J
“Modeling A Salsa Dress in Hexagon for Poser” by John D. Johnson
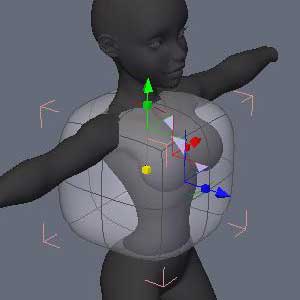
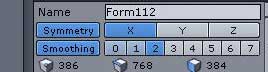
Let’s subdivide this thing so we can start shaping it. Click on the 2 over in the properties panel to apply 2 levels of smoothing to the dress.
The dress should look rounded now.

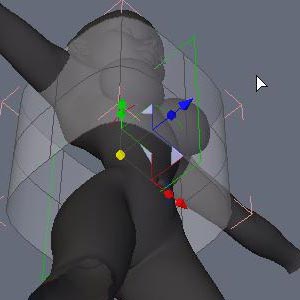
Subdivision (smoothing) allows you to work on the simplified geometry (less edges/ faces/ points) while manipulating the more complex geometry so you can see what it will look like when you export it. Here is the actual mesh of the dress with the smoothing applied so you can tell the difference.
You can see how much harder it would be to move all those points, faces, and edges around to get the shape we want.
Note! I rarely use more than 2 levels of smoothing. This level gives you plenty of polygons to work with for detail while maintaining a reasonable poly count.
The first step to making our dress model is moving the edges, faces, and points around until the fit her top like a piece of cloth would. Since I plan to make this into a dynamic prop in Poser™, it isn’t critical that every fold and seam fits her form perfectly. The cloth room simulator will take care of that for me. I just need to make it as close as I can.
Click the Faces tool near the top or press “F2” to enter the faces mode. This will allow you to select the individual faces on the model.
Then select the top two faces and hit delete. With symmetry on, the opposing faces should also have been selected and deleted opening the top of the model up.
Then select the bottom two faces on either side and hit delete. When you are done, it should look like this.

Select the Edge Tool (next to the Faces Tool or press F3) and choose an edge along the top of the model.
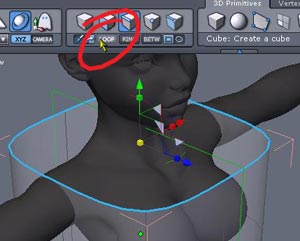
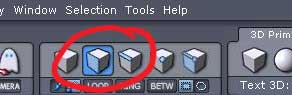
Click the Loop Tool (circled in red) to select all the edges that form an “edge-loop”.
Note! Remember these terms and steps. We will be doing this a lot and I will be referring to them this way throughout the rest of the tutorial. You may also want to add the Loop Tool to your keyboard shortcut menu. I mapped the ‘L’ key to it to speed things up. Go to the Edit menu and click the Shortcuts Editor \ Tools to do this.

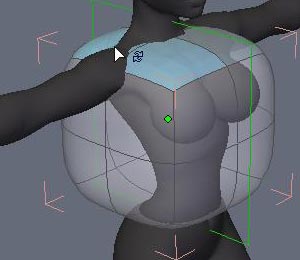
Click the universal scaling tool (circled in red) and drag away from it. The edge-loop will either get bigger in all directions (x & z) or smaller. Drag it in around the neck as shown.
With the edge-loop still selected, click the green arrow (y-axis translate) and drag it upward until you reach the base of the throat.
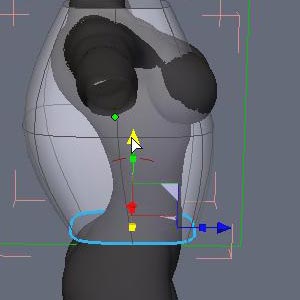
Repeat the process with the bottom edge-loop and then position it around the waist of the mannequin.


Latest Comments