“Hand modeling” by Sean Hewitt
In this tutorial we will cover some of the methods I use to model a hand. A lot of the knowledge you need to do this is anatomy and observation. I’ll cover some of the tools I use and more importantly the patterns I implement.
Writing a tutorial for something like modeling a hand is a difficult thing. It’s something very dependant on the type of hand you want to make. Young, old, male, female, high poly, low poly, in pose, for rigging, etc and on and on. It really depends on what you want it to look like and what you want it to do. What I can provide you with are general patterns of geometry that usually give you a foundation to keep carving more and more geometry on and end up with what ever model you like.
3Dtutorials.sk recommendation:
To maximise the realism of your 3D models we recommend to use high quality human photo references from the #1 texture website www.3D.sk
When it comes to characters, or any other complex things that I know I will have to model over and over, I will sit down and spend time developing these patterns. Patterns that if I start with, as I go on the amount of work I have to do, such as trying to figure out how to cut in a shape has become limited. If I can develop some sort of work flow, the production becomes easier and quicker, which is always one of your goals in production. This tutorial is merely a suggestion. By no means what I am about to show a rule of any kind. No two hands I’ve ever built use the exact same patterns of geometry. I just start out in one place with my patterns I’ve developed, but each model takes me to a different result depending on its look and function. These patterns work in some extent from low poly up into high poly models. Where you stop depends how many of them you use and again what you’re needs are of the model. Don’t hesitate to try your own methods when it comes to your own models.
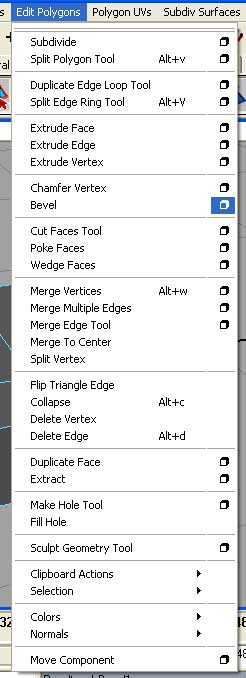
The tools I use here in Maya are May’s Split Polygon tool, Maya’s Split Edge Ring tool, Extrude Face, MJ Poly Tools, APE Split, NEX and Active smooth. Of course there will be a few other features I use here and there as well. All these tools I have set up to hot keys so I can access them quickly and easily, because I’ll be using them frequently. Personally I find it extremely frustrating and time consuming to try and sculpt without these tools set to hot keys any more.
So here’s the premise I’m working on. There are three stages of working up to high poly. Volume, Surface and then detail. First we’ll block out the underlying structure of the model low poly. This is where those underlying patterns become important as they will guide the rest of the geometry to start to cut it. After you’ve taken care of that it’s onto smoothing out the surface. Defining the surface as you want it. Not quite things like wrinkles but generally the over all shape of everything. After you’ve gotten that into place we add the finishing details. Wrinkles, seems, finger nails, eye lashes, etc. The reasoning here is you’re looking to have to move geometry around as little as possible. If things are mostly in the right place as you’re cutting in new geometry, it’s much less movement to place those new verts. Moving around large masses of geometry it time consuming to even and smooth out. So we’re going to try to avoid it in the first place.
A note before we actually start modeling. I really don’t ever using image planes to rotoscope when it comes to hands. It just never works out well trying to get things like fingers to line up and the perspective to match. You already have the best reference you can get and they’re probably on the mouse and key board right now. Take a good look at your own hands from every angle possible while doing this tutorial. Ideally we want a nice relaxed posed, which will be most suitable for rigging later. Nothing flexed and nothing clenched. If you’ve heavily relied on templates up to now it’s time to let go a little and become an actual sculptor rather than a tracer.
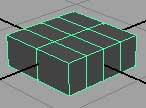
So let’s start this thing off by making a cube. We’ll subdivide its width 3 times and it’s length once so we have something that looks like this.
The four faces on the front will later be where the fingers come out of the face on the side, on the opposite side from the fingers will be where we extrude out the thumb. The single sub division across the center of the length will be where the knuckles of the palm are. Let’s slide that up closer to the fingers and the space below that will be the palm of the hand.
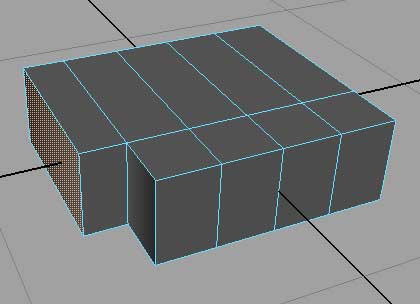
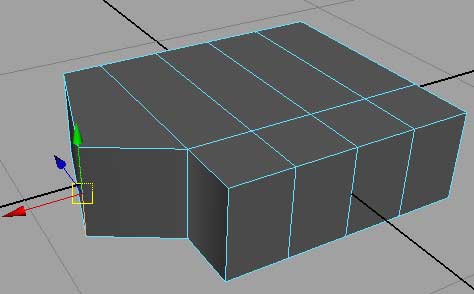
Select one of the faces on the side of them palm to extrude out the thumb. We’ll angle this a little so we can easily extrude out the thumb at a little more natural angle.
Here is the shape we’re trying to mimic if you’re still unclear.

To give ourselves a little more room we’ll start to extrude out the first segment of fingers. So that all the fingers aren’t extruded as one piece, we’re going to bevel the edges between each finger first. Select the three edges in the front of the palm. And bevel them a little.


hello..i want learn imp hand maya..pls re
amazing modeling steps gr8 help . . . !
I appreciate your tutorial, while you omitted some critical details I still was able to figure out most of ’em, I guess we are just lazy to think on our own. So dude thanks again and keep ’em coming.
i missed out at the last stage, i know i will cope if i give it a 2nd shot… that is a good job sean hewitt. though i have done some hands before but not as realistic as this!
Agreed. This is a poor tutorial, You miss out all of things making it impossible to carry on to next steps, I got to page four and have no idea wtf to do.
I agree with Darren, when I’ve tried to followed those steps I can’t figure out on what to do.
seriously, you left out a ton of steps, and your written descriptions of what you are doing are like those “how to draw” books that go like, “step one- make a circle….step two- now you are done…” and the picture they are asking you to make is all shaded and rendered out…..needs way more pics of what you are doing here…almost missed the step where you moved the verts of that original bevel/merged em with that one edge loop….Also better angles + different ortho views of what you are doing might help….other than that, thanks for the tutorial!