“Hand modeling” by Sean Hewitt
From here it’s really just spending some time and sculpting the geometry we already have in place. Examine your own hand and just look at your model from every angle possible and examine its features, and try to incorporate what you see on yourself.
You may find it difficult to work on the middle and ring finger just because it’s surrounded by other geometry. Flying inside the model can be helpful at times to deal with that. But don’t forget it’s the outside that matters.

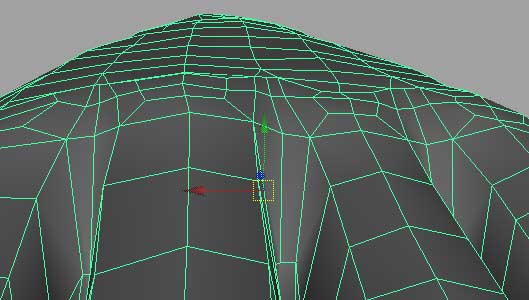
The last cut I’ll make for now is I’m going to curve out and pull back the webbing between each finger a little.

From this point on I’m adjusting the shape of everything and making sure my proportions are all right. Observing things like where the knuckle of the thumb lines up with other knuckles. Where the tip of the thumb lines up with the rest of the hand. Observing where one part lines up with another is how you model without templates. It takes time and practice to get good at it. The more hands you make the better you’ll be. You’re first had won’t be that great. Just accept it and make another one. And then another one and another one, and just try to make each one better than the last. Repetition is a great teacher for speed and quality so sometimes building as many as you can as quick as you can can teach you much more than spending a ton of time on a single model trying to get it right in the first shot. The short lesson is that learning by failure can often be a much better teacher than only learning by success. Spot your mistakes from your first attempt and then start all over trying to avoid them the second time around.
Here’s what I’ve ended up with after spending a bit of time shaping this. I’ve adjusted a bit of the proportions too just from observations of my own hand. The palm needed to be a little longer, the base of the thumb pulled back some. I haven’t added finger nails in this case, but I’m sure you can figure out multiple ways to add them. This is smoothed, and if I was leaving it smoothed, I’d sculpt it more even here. There are lots of directions you could go from here or you could call this a finished product. It really just depends on your needs.
Hand modeling tutorial
7 comments
Leave a Reply
You must be logged in to post a comment.
Popular Tutorials
-
 Free set of photo references for our members
Posted on Nov 15, 2010
Free set of photo references for our members
Posted on Nov 15, 2010
-
 Photo References
Posted on Oct 6, 2010
Photo References
Posted on Oct 6, 2010
-
 Modeling Competition
Posted on Dec 10, 2010
Modeling Competition
Posted on Dec 10, 2010
-
 Modeling a High Definition Building – part 1
Posted on Dec 9, 2010
Modeling a High Definition Building – part 1
Posted on Dec 9, 2010
-
 FREE photo reference sets for you – only for registered members
Posted on Oct 2, 2011
FREE photo reference sets for you – only for registered members
Posted on Oct 2, 2011
Try something new

hello..i want learn imp hand maya..pls re
amazing modeling steps gr8 help . . . !
I appreciate your tutorial, while you omitted some critical details I still was able to figure out most of ’em, I guess we are just lazy to think on our own. So dude thanks again and keep ’em coming.
i missed out at the last stage, i know i will cope if i give it a 2nd shot… that is a good job sean hewitt. though i have done some hands before but not as realistic as this!
Agreed. This is a poor tutorial, You miss out all of things making it impossible to carry on to next steps, I got to page four and have no idea wtf to do.
I agree with Darren, when I’ve tried to followed those steps I can’t figure out on what to do.
seriously, you left out a ton of steps, and your written descriptions of what you are doing are like those “how to draw” books that go like, “step one- make a circle….step two- now you are done…” and the picture they are asking you to make is all shaded and rendered out…..needs way more pics of what you are doing here…almost missed the step where you moved the verts of that original bevel/merged em with that one edge loop….Also better angles + different ortho views of what you are doing might help….other than that, thanks for the tutorial!