“Dino” by Glen Southern
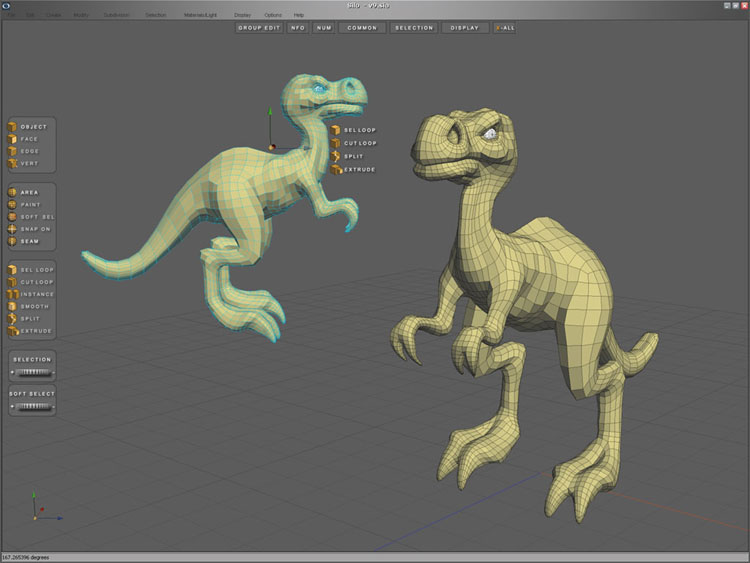
This tutorial is aimed at 3D artists that are new to SILO but have some knowledge of Polygonal modeling. Box modeling can be achieved with most sub-division modeling packages ( Silo, Wings, Lightwave, Maya, C4D etc.) and the process described in this Silo tutorial can be applied to many of them. The screen shot below gives an idea of how the tutorial progresses from a polygonal box into a Basic dinosaur.
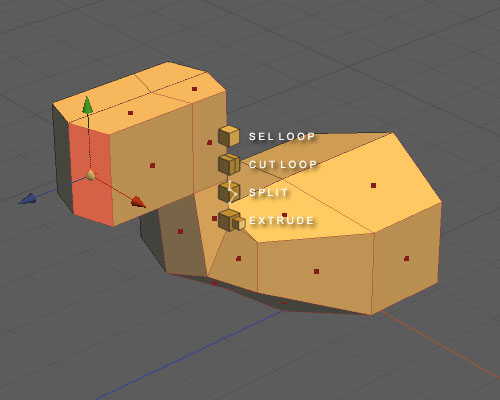
In this tutorial you can see screen shots of an Orange interface with a range of icons attached to the manipulator. This is not the one supplied with Silo but rather my custom designed UI. Silo is built to be configured to suit the 3D Artist own style allowing you to configure the keyboard shortcuts, the interface, buttons and even the colors.
3Dtutorials.sk recommendation:
To maximise the realism of your 3D creatures we recommend to use high quality animal photo textures from the #1 texture website www.3D.sk
There are a couple of things to do before we start the modeling:
Start Silo up.
Go to the top menu and enable Selection>Snapping
and Selection>Enable seam preserve
Right click in the screen and create a default CUBE
Key board W to show the MOVE manipulator
Grab the RED arrow and slide the CUBE so that a face lies along the Centrex axis as per below

Keyboard D to enter FACE mode
Highlight the face that sites on the Centrex axis

Hit DELETE and remove the face

Keyboard F to enter OBJECT mode.
Right click, hit INSTANCE MIRROR. This creates a mirror version of your object and allows you to work on one side of the object and see the other side automatically update.

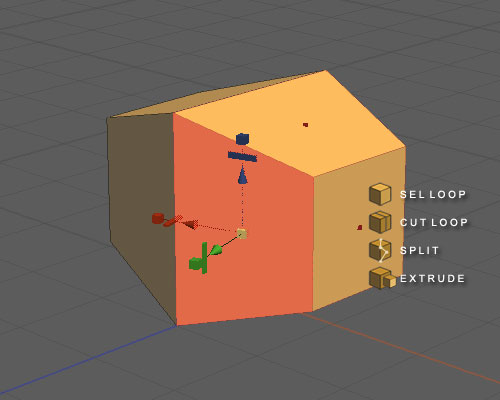
Keyboard Q to enter UNIVERSAL MANIPULATOR
Select the polygon on the side of the cube
Use the yellow square to decrease the size of the side polygon

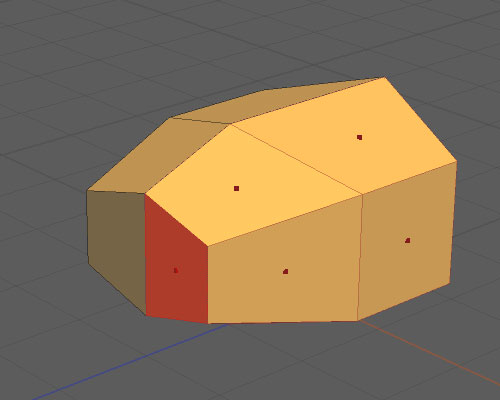
Select the polygon at the front of the model.
Use MODIFY>EXTRUDE and extrude the front face out. You will need to be in either Universal manipulator Q or Move manipulator mode W
Key board E for scale and use the yellow square to scale the face down.
TIP: If the seam opens up simply move the face back to the Centrex and it will snap back.
This will be the neck area. Move the face up using the move manipulator
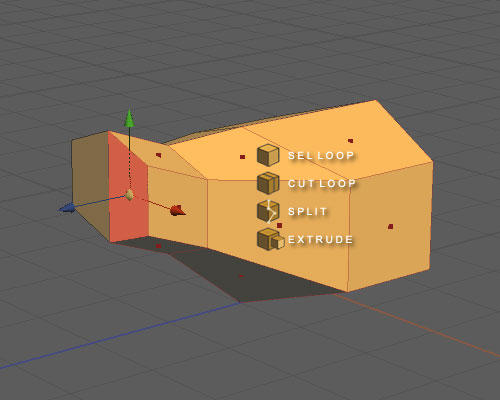
Rotate the face backwards using the Rotate manipulator R

Extrude again, rotate the face until it is horizontal.

Extrude vertically again to form the first part of the head. Then select the face on the front as shown below.

Extrude outwards to create the bulk of the head.


Latest Comments