“Making of Paragalis – part 1 ” by Marcus Dublin
2. Next, I click on “PolyTopo”. Polytopo is a topology brush that draws surface lines across your selected mesh. The Tool has a free form feel to it unlike ZBrush’s which tends to create a set of ridged interconnecting vertices.

3. At this point I start drawing on my mesh. I like to make sure to only draw on the surface area I can view comfortably, much like ZBrush Polyboost has a hard time figuring out certain angles.
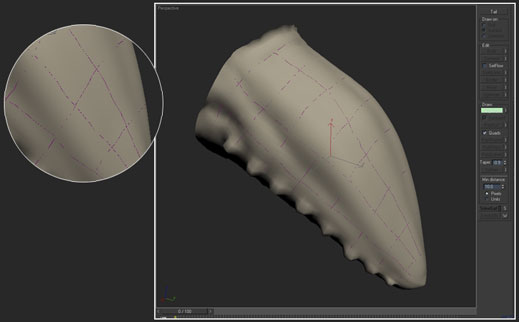
4. When I want to view the mesh I just “Right Click”, this deactivates the Polyboost tool set.

5. Then I continue retopologizing my new mesh around the tail by selecting the retopo mesh and going into vertex mode.

6. Then under “Edit” I select “Build” and start adding additional vertices. The vertices will automatically conform to mesh surface.
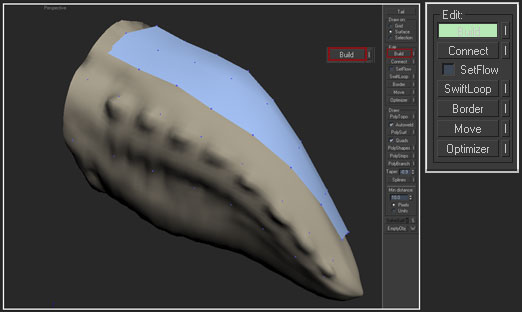
7. Now it’s time for me to connect the vertices to make new faces. I do so by Holding “Shift + Drag”, this will automatically create faces in between the vertices filling in the gaps.

And that’s it, I simply rinse and repeat the process until the entire mesh is retopologized.
Making of Paragalis – part 1
Popular Tutorials
-
 Free set of photo references for our members
Posted on Nov 15, 2010
Free set of photo references for our members
Posted on Nov 15, 2010
-
 Photo References
Posted on Oct 6, 2010
Photo References
Posted on Oct 6, 2010
-
 Modeling Competition
Posted on Dec 10, 2010
Modeling Competition
Posted on Dec 10, 2010
-
 Modeling a High Definition Building – part 1
Posted on Dec 9, 2010
Modeling a High Definition Building – part 1
Posted on Dec 9, 2010
-
 FREE photo reference sets for you – only for registered members
Posted on Oct 2, 2011
FREE photo reference sets for you – only for registered members
Posted on Oct 2, 2011
Try something new

Latest Comments