“Making of Paragalis – part 1 ” by Marcus Dublin

3Dtutorials.sk recommendation:
To maximise the realism of your CG creatures we recommend using high quality animal photo references from the #1 reference website www.3D.sk
Introduction:
This tutorial will cover my personal workflow for 3d modeling, 3d sculpting, retopo / optimizing, UV’s, normal map generation, light map generation, and texturing.
The Creature Summary:
Paragalis is literally a walking parasite that’s approximately the size of a large dog from tentacle tip to tale. The creature is an ambush predator who catches its prey with a tongue that can extend to twice the size of its body. Paragalis’s tentacle like mouth contains rows of teeth for gripping its prey, with a barb at the end its tongue that injects toxic venom! Once the prey has been caught its then quickly digested with its remains excreted from the creatures back hump in a gassy form! “I’d suggest that if you were to run into this thing to run the other way, quickly!”
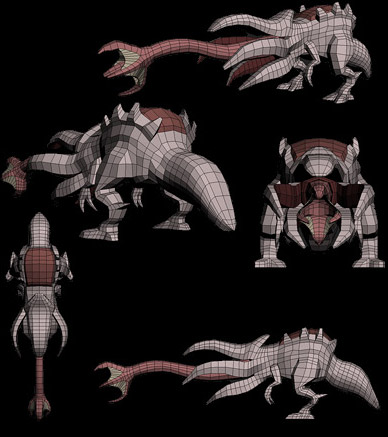
The Specs: Lowpoly model / 7,000 triangles, Textures / 2024×2024 / diffuse, spec, normal
Tools: 3ds max 8 / 9, Photoshop, Mudbox, Zbrush 3.1, Crazybump, Polyboost
Step One: From concept to model
Once I have the design of the creature illustrated I then proceeded to the modeling phase. I find it helpful when making a symmetrical creature to at least have some sort of concept or rough outline to work from. This makes things easier on the modeling end and cuts out the guesswork when trying to nail the profile. I used a simple box modeling technique to quickly rough out the base mesh, just remember that I wasn’t going for any high-level detail and only focused on the broad strokes. This is important to remember since the model will change to some degree in the sculpting stage. When modeling the base mesh I try to keep in mind how much detail will be required in certain parts of the model, for instance I know that the tongue, tale and tentacles will need a good amount of detail. I also use this level of thinking when I work on characters as well, hence extra edge loops in the head, hands, etc.
Anyways as you can see from the images below I simply extruded a bunch of edges and faces in 3dsmax “editable poly mode”. I switched over to the perspective viewport once I was satisfied with the profile and began roughing out the form and proportions making sure the design held up in 3d. Since I didn’t draw a front sketch of the creature I had to use a bit of imagination on how wide it would look. I usually judge width by heads but I had to use its tail and a pig’s body instead due to the creature’s unusual design. As an artist it’s always good to reference actual creatures, people, places and things when making judgment calls on forms and proportions’, having this extra tool work wonders. Anyway the total modeling time was around an hour and a half and it’s completely made up of quads.
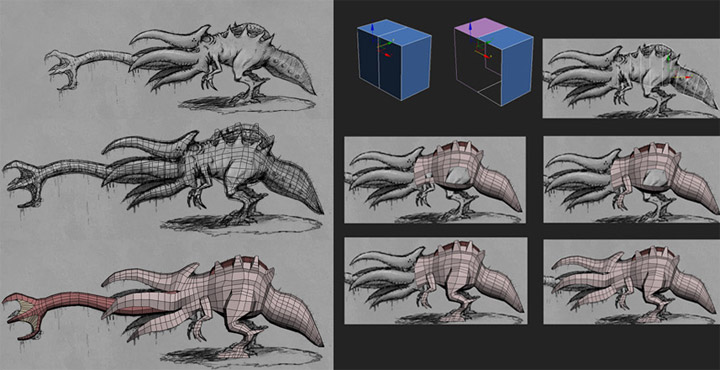
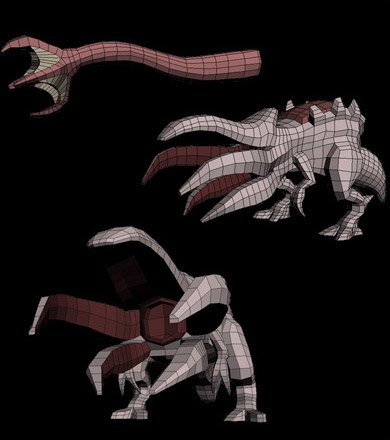
Step Two: Separate Elements
When it comes to creating a base mesh it’s always good to think two steps ahead so you don’t run into any issues later on down the road! This is why I created the tongue separately; doing so will free me up in the sculpting stage too not only hide that part of the mesh easily but also subdivide the hell out of it for more detail. I can get away with this method since the tongue goes pretty far back in its mouth and doesn’t contain any obvious skin interaction.


Latest Comments