“The secrets of Swimsuit babe ” by CGriders
2.6 UV Mapping
This is the most tedious and the least enjoyable task in the character making process. I always want to automate it as much as possible. As I wanted to texture it by projection rather than painting on the UV plane, UV distortion is not an issue as far as the resolution is high enough to cover the details. So I used Pelting Tools to perform this task. (Refer to section 6.3 for download URL.)
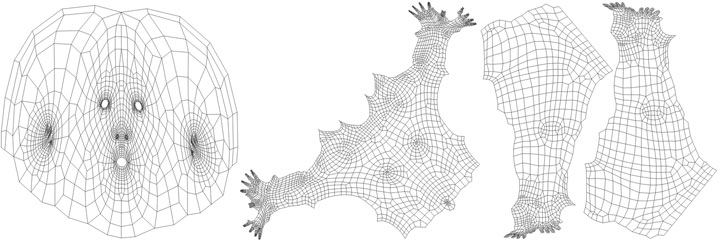
Fig. 2.6.1 UV map
The UV map is separated into 3 regions. The head is in U=0-1, upper body in U=1-2, lower body in U=2-3 as shown in Fig. 2.6.1. So there are three pieces of textures. All their resolutions are of 4096 x 4096 so that details can be well covered. There’re several reasons why I did this. One obvious reason is that it can increase usable texture resolution because I can have 3 pieces of 4096 x 4096 textures. Another reason is that I want maximum resolution for the face. The third reason is that it is a more economical use of UV space. If you put the whole body into one piece of texture, the percentage of used space would be smaller, probably less than 50%. The next reason is that the seams between these three pieces would not be visible. I can safely hide them away. Finally I want to prepare for displacement map generation in ZBrush. Because its Multi Displacement 2 Plugin can detect UV regions and can generate separate maps for them.
2.7 Rigging
The purpose of rigging is to let me pose the character rather than animate it. So the consideration is biased for realism rather than mechanism. For example, rotation plane is not considered at all. I tried to imitate the actual bone structure and so there’re joints for scapula, two for the knee, shoulder and hip. Some of them are actually not necessary, technically speaking, because they don’t rotate at all.
I just followed the general rules for joint placement. For example, don’t place the backbone too close to the back, knee joints are close to the front, elbow joints are close to the back, head joint is under the ear, neck joint is close to the middle, etc. If you’re unsure, do some tests to see if the deformation looks good. Fig. 2.7.1 shows the skeleton and the pose.
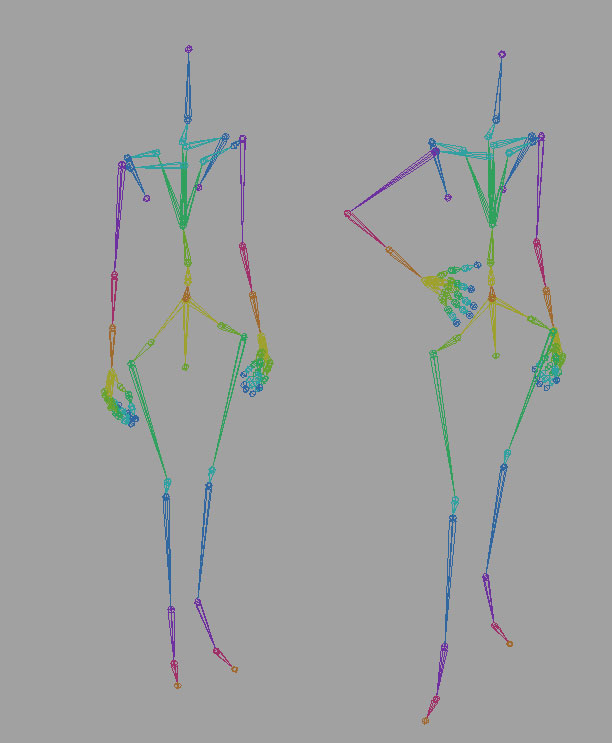
Fig. 2.7.1 Skeleton and pose
It doesn’t matter how you bind skin as long as it’s smooth bind. There’s no need to perform detailed painting for the skin weight. Use the smooth button extensively to smooth out the weights.
I used keyframes to save poses. Go to bind pose, set time=1, key rotations of all the joints, set time to something else, pose the character and then key joint rotations, repeat this process to save more poses.
No matter how you bind the skin, the shape has to be tweaked after it’s posed. The technique of negative blendshape was employed: duplicate the posed shape twice, add them to the blendshape node, set their weight contributions to become 1 and -1 respectively, tweak the one those weight is 1. In this way, you can tweak a posed character. Fig. 2.7.2 shows the pair of targets which fixes the right elbow. You can see in the time slider that time=1. The character on the left is at its bind pose. The two shapes on the right are duplicates of the target pose. The one at the back is the negative one whose elbow is unfixed. The fix applied to the shape in front is reflected in the character on the left.

Fig. 2.7.2 Blendshape targets (right) to fix elbow


Latest Comments