“The secrets of Swimsuit babe ” by CGriders
How to start
Actually, it doesn’t matter from which feature you start your modeling process. You can start from the eyes, lips, or the head. The thing is that you must feel confident from the first few steps you start. If you don’t, you’d better drop it and start it all over again. This is particularly true if you model for likeness. I suggest starting out from the most recognizable feature of your character. That is, the feature that you can recognize the character by just looking at it. If you can make it right, you can see the character through it and the rest of the process will be very smooth as you’ve gained confidence already.
The usual ones you can start from are eyes, lips or head. Because their structures are simple. You can quickly rough out the shape and start tweaking until it looks like what you want. But there’s no need to put too much details in it. Construct a simple topology as much as you can. This is only the first pass in the process. After you’ve finished other features, you may find its likeness is not enough compared with them. Then you can refine it and complicate it if necessary. The thing is to keep all features in proportion and harmony throughout the process. Details are not important until the very end.
Eye
If you start from the eye, here is what I’ll do. Create a NURBS sphere whose numbers of sections and spans are 8 with axis along Z direction. The first span along U will be roughly the size of iris. Position and scale the sphere such that the it matches the iris in your image planes. Then a circle of 14 spans on XY plane. Tweak it until it matches the outline of the eye. Duplicate it, move it forward or backward a bit and then loft a surface. Convert it into polygon, delete history and throw away the curves and the NURBS surface. Extrude the outside and inside borders until you’ve got a rough shape for the eye area. The following figure depicts this process.
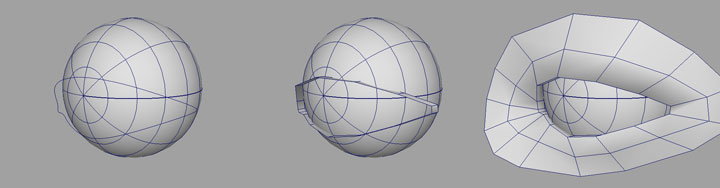
Fig. 2.4.2 Construct polygon patch around the eye
The only objective of this process is to create the outline of the eyes. The eyelid is not important while a rough shape is needed. There’s no need to model up to the brow. Its topology and edge flow are trivial.
Lips
Lips are particularly important if you want to achieve likeness. In my opinion, they are the most difficult features to model. Through eyes, you recognize character by looking at the outline and the iris shape. Through lips, you recognize character by looking at the shape of the shadow formed by the upper and lower lips. This is headache. So you can imagine that its topology and edge flow would hugely affect the shape and therefore likeness.
Similar to building the eyepit patch, create a circle with 16 sections, adjust its shape to become the outline of the lips, duplicate, scale it down to become the inner edge. Loft and convert it into polygon. Throw everything away except the polygon. Insert a ring edge in the middle and sculpt until you’ve reached the basic shape of the lips. The following figure depicts this process.
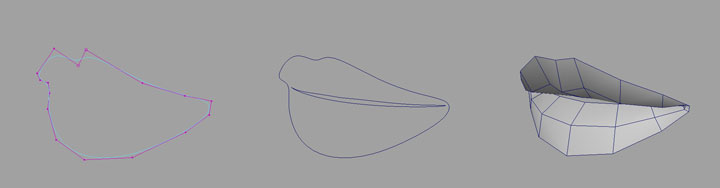
Fig. 2.4.3 Construct polygon patch for the lips
Tweak it until it looks like what you want. Insert edges wherever necessary. Watch out the edge flow along the depth, the number of edge rings and the number of sections around. The following figure shows a couple of examples.
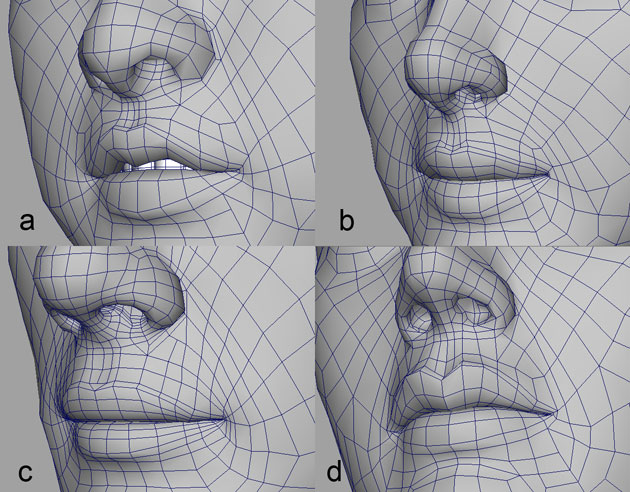
Fig. 2.4.4 Different mouth topologies


Latest Comments