"Making of Mouses" by Michael Little
One final thing, the right left and middle mouse buttons. Because this is a vertical mouse these are on the Y axis. Clever men (and women) than me would probably build these in a flash with the skinning tool, but being perverse and as you already know lazy I decided to rely on my trusty knife tool. First I made a sphere then using the scale tool flattened it on the Y axis. The shot above is taken from the left side view. I then hollowed it out using either the shell tool or sometimes I just duplicate the object, scale it down and do a boolean subtract from the original body. The next step is to make an ellipse with the ellipse primitive line tool and position it in the front view before cutting the shape.

Above I have deleted the surrounding part. Using the unjoin tool from the booleans palette, select what’s left and double click. This will allow me to manipulate the items as separate objects. Rounding the edges and flattening the shape a bit more with the scale tool finishes them off and I can now duplicate them and move them into position as you can see above right.
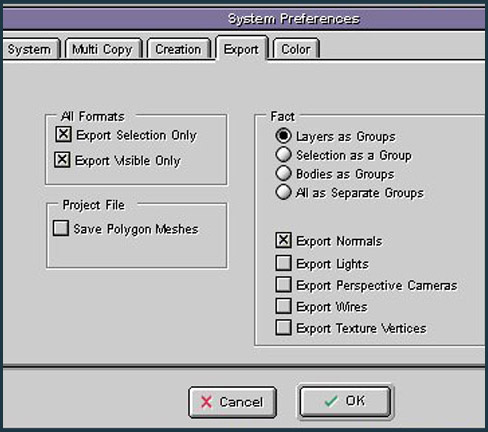
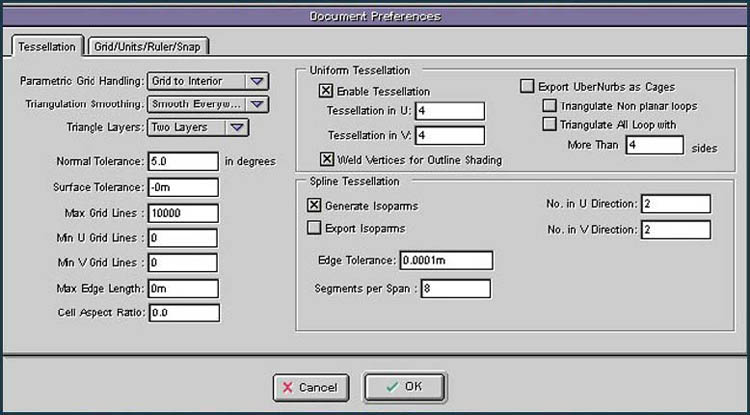
That’s about it. To finish here are two shots of preferences boxes. One shows the global System prefs for the app. and the other is the Document Preferences window that gives the all important control over tessellation. I have the normal Tolerance set very low at 5 – the default is 15. This would generate far to many polys for an animated version of the mouse, but I am a print guy and never know when I will want to render out a detail so I go for a high poly count that I know Animator can still deal with – with ease.
Hope this has been of some use to you and when I get time I will take the model into Animator and explore the intricacies of texturing and lighting.
(c) Michael Little, www.ideasinkdesign.com


Latest Comments