"Making of Mouses"
by Michael Little
Having established the right radius I did an undo and then selected the object pick tool before selecting the wheel object and double
clicking to perform the operation. Sometimes on a complex object this can take a while. On this one it didn’t take long before a box
appeared, which anyone using the software will become very familiar with in its various incarnations. Access violation. EEEEEkkk.
OK, don’t freak out. The bevel tools can be very picky when it comes to which edges or surfaces it likes to round first. You may have
to spend a bit of time experimenting on the order it will accept before you get the right combination.


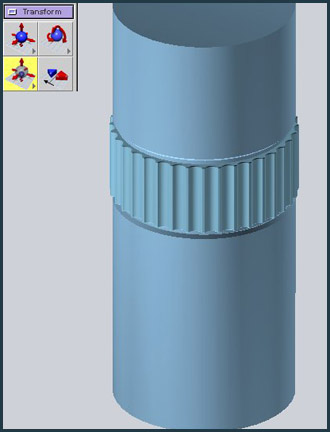
In this case I was pretty sure that the top and bottom faces would have to be deselected before the round tool would work. Selecting
the face tool in the pick icon box, holding down the shift key and clicking on the top and bottom isoparms deselects all the edges on
the outside top and bottom rim.
Sure enough when I double clicked with the round tool everything went smoothly and the result was as you see above left. Afterwards
it was simple left to click on the same top and bottom isoparms to select those outside edges and they also rounded without any problem. Finally I used the scale tool to adjust the size of the wheel slightly to fit into the space. (The scale tool uses the same right -increase
size, and left – decrease size mouse drag conventions).


The second element that I want to cover in detail is the handle. Now if I were a bit more proficient in subdivisions surfaces then I could have used the Ubernurbs part of the app. Sadly, due to rapidly dying off brain cells I have never been able to penetrate this substrata of Modeler. This is a shame because it also has some unique capabilities – being able to cut and boolean subdivision shapes as if they were normal nurbs objects for instance. However if you doubt their effectiveness please have a look at Malcolm Thain’s site. As you will see he is a master of the Uberworld. http://www.telegraphics.com.au/3dgallery/main.php?g2_itemId=964
As it is I am going to cheat and use the revolve tool to start. This needs a nurbs or bezier curve as a profile and as you can see in the image to the left I have used the existing geometry to help give the position and size of the bezier curve where I want the wooden handle to be. The second step is to enable point snapping and using the straight line curve primitive tool drag a line between the start and finish points of the bezier curve.
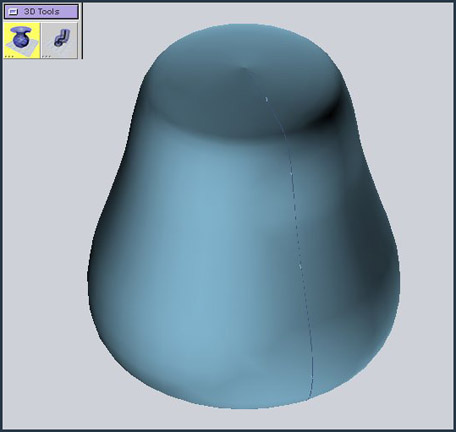

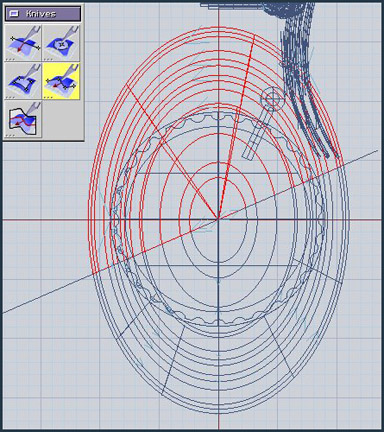
Using the revolve tool I clicked on the profile and then on the straight line and get the shape you see at the left. Utilizing the scale tool constrained to the X axis in the front view, (holding down the X key while dragging to the left), gives me the image you see in the center. I don’t want the handle to wrap more than about half way round the main cylindrical body so another wire drawn out in the top view provides the means to cut the revolved object. With the excellent knife tool I selected the object I want to cut first and then the wire I want to use as the cutting agent – end by double clicking. The object is cleanly cut and I can get rid of the half in red.
Making of Mouses
Popular Tutorials
-
 Free set of photo references for our members
Posted on Nov 15, 2010
Free set of photo references for our members
Posted on Nov 15, 2010
-
 Photo References
Posted on Oct 6, 2010
Photo References
Posted on Oct 6, 2010
-
 Modeling Competition
Posted on Dec 10, 2010
Modeling Competition
Posted on Dec 10, 2010
-
 Modeling a High Definition Building – part 1
Posted on Dec 9, 2010
Modeling a High Definition Building – part 1
Posted on Dec 9, 2010
-
 FREE photo reference sets for you – only for registered members
Posted on Oct 2, 2011
FREE photo reference sets for you – only for registered members
Posted on Oct 2, 2011
Try something new

Latest Comments