"Making of Mouses" by Michael Little
3Dtutorials.sk recommendation:
To maximise the realism of your 3D models we recommend using high quality photo references from the #1 texture website www.environment-textures.com
This is a modeling tutorial using the Electric Image Modeler or EIM. Since not even many people in the 3D community are familiar with Electric Image it may come as a bit of a surprise that the Electric Image Animation System has been around for years. It’s main claim to fame is its rendering engine (Camera) which has been utilized by biggies like ILM in the famous pod race in Star Wars for instance. Able to deal with insane poly counts with excellent anti-aliasing and superb image quality, combined with very fast render times, the renderer was the main reason I was originally attracted to the software. That and the fact that it is comparatively easy to get beautiful renders very quickly – and of course the price.
In 1999 EI introduced Modeler, a stand alone solids nurbs modeler with the added advantage of a subdivision surface suite built into the app. Unfortunately the software was discontinued in 2005 leaving those of us who had been using it spoilt by the numerous advantages it offered compared with its competition. Happily EI is reintroducing a new modeling application sometime this year,
with the working name of Tesla. Hopefully this will build on the strengths of Modeler and improve on it. Both EIM and EIAS are cross platform.
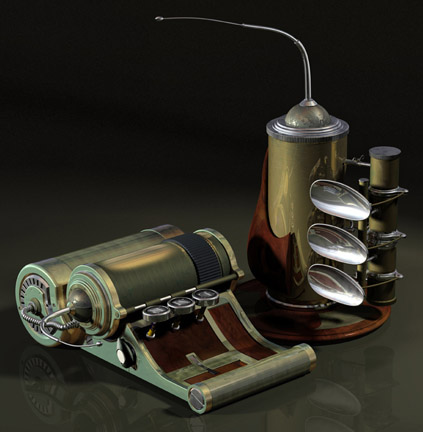
OK, enough with the background. A couple of years back I made ‘Mouses’ two retro, steampunkish computer mice. In this tutorial I will cover some of the basic construction techniques used in making the upright mouse. It was inspired (after I had built the first one) by my own use of an ergonomic ‘Evoluent’ upright mouse.
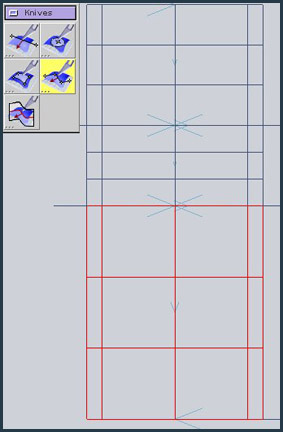
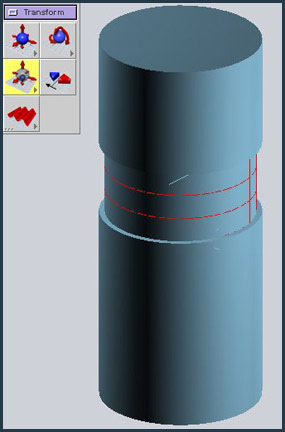
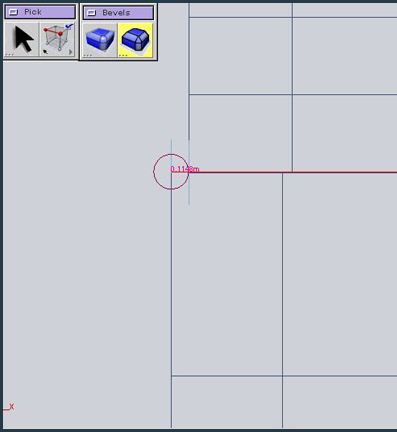
A lot of modeling is based on standard primitives and this is no exception. Since anyone with a modicum of common sense can work out how to use these basic tools I’ve concentrated on a couple of the more difficult pieces that go to make up the geometry.
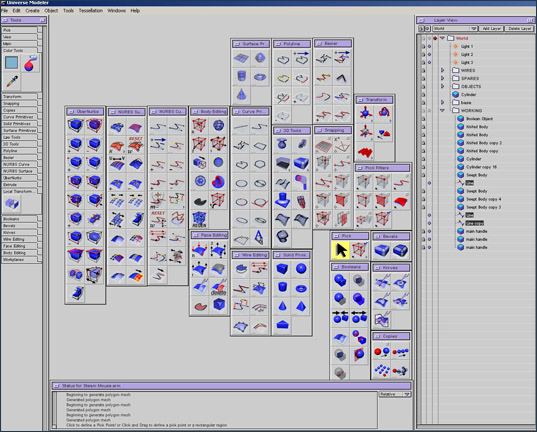
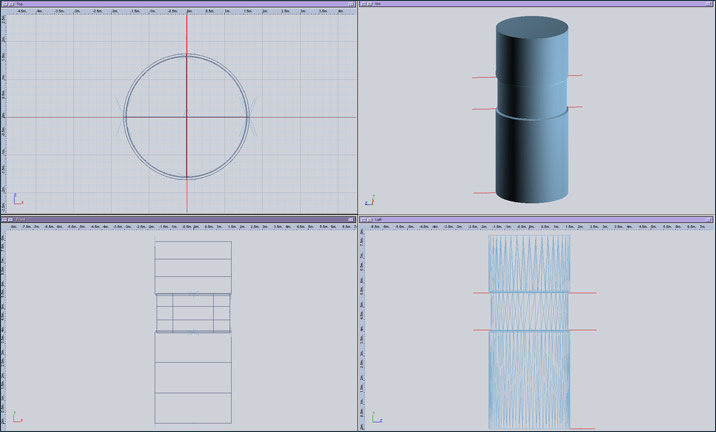
I use a duel monitor setup that allows me to keep all my palettes and individual tool icons open on the second monitor. On the left is the tool palette that you would have to access if you didn’t have the space to display all the individual tools. In the center are the tools all contained in their own expanded palettes. On the right is the layers window (incidentally the best I have ever used. It puts Maya, Rhino – in fact any other program I have used to shame). At the bottom is the feedback or status window. The main monitor is devoted to the working views and each can be expanded to fill the screen by clicking the button in the top right hand corner.


Latest Comments