“Upside down ” by Mathias Koehler
scary 🙂

Unwraping was very straightforward. I’ve used cylindrical and planar projections as a base and then had to tweak the UVs somewhat.

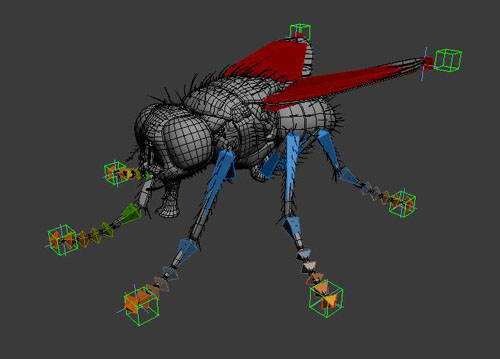
I decided to rig this guy, to be able to pose him to some degree. The rig is very simple – just some bones and IK solvers. Since there don’t occur any deformations, I could simply link the leg parts and hairs to the bones.
Since the compound eyes are made of many tiny eyes I decided to rebuild them. I’ve used a geosphere this time. Read below why.
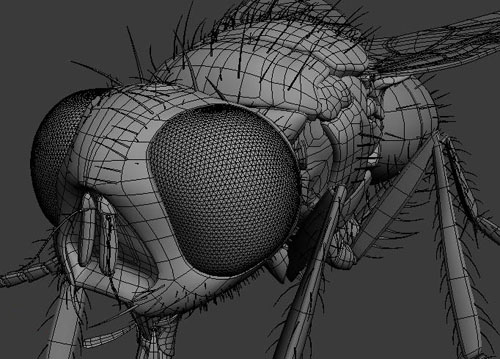
Using the scatter compound object, I could put a tiny sphere on every vertex of the geosphere. The resulting alignment is exactly the same as in nature. The scatter object(including all those tiny spheres) was then baked as a height map to the geosphere. I could then use the height map, to displace the geosphere.
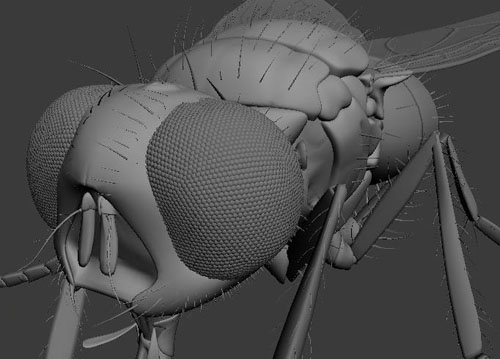
This is the complete model with all displacement maps assigned. The maps were created in photoshop and are very simple. They consist of some noise layers, blured with different degrees, to create bumps with different sizes. I’ve handpainted a bump on the base of every hair, as well. I’m always creating displacement maps before any other texture maps, because they deform the mesh itself, which feels like I’m still modelling. Displacement maps are also great to use as a guid fore(or even as a part of) the color maps.

Upside down
Popular Tutorials
-
 Free set of photo references for our members
Posted on Nov 15, 2010
Free set of photo references for our members
Posted on Nov 15, 2010
-
 Photo References
Posted on Oct 6, 2010
Photo References
Posted on Oct 6, 2010
-
 Modeling Competition
Posted on Dec 10, 2010
Modeling Competition
Posted on Dec 10, 2010
-
 Modeling a High Definition Building – part 1
Posted on Dec 9, 2010
Modeling a High Definition Building – part 1
Posted on Dec 9, 2010
-
 FREE photo reference sets for you – only for registered members
Posted on Oct 2, 2011
FREE photo reference sets for you – only for registered members
Posted on Oct 2, 2011
Try something new

Latest Comments