“Invisible Tutorial ” by Jason Godbey
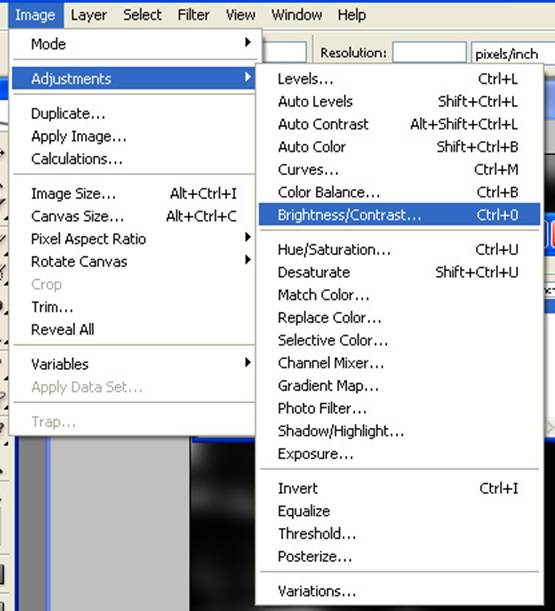
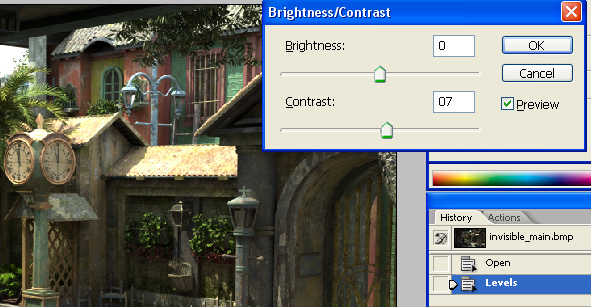
Then I add more contrast to the image by adjusting the Brightness/Contrast values. For this image I increased the contrast to 7.
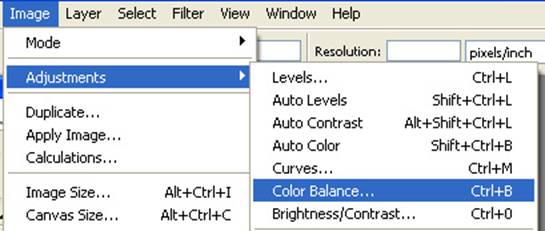
Then to give the image a warmer feel I adjusted the yellow midtones to -8 using the Color Balance tool.

The last thing I do is use Neil Blevins’ specular bloom method to add an even more dramatic effect to the lighting. The tutorial for this can be found here:
http://www.neilblevins.com/cg_education/specular_bloom/specular_bloom.htm
I will outline it quickly here too. The first thing to do is to duplicate the Background Layer. Then add an extreme amount of contrast to the image and lower the brightness. For this image I raised the contrast to 90 and lowered the brightness to around -100. This will differ for each image. Basically what you see highlighted will received the bloom effect. When your contrast and brightness values are less extreme more of the scene will receive the bloom. In some cases this may not be what is wanted since it can wash out the image overall.
Invisible Tutorial
One comment
Leave a Reply
You must be logged in to post a comment.
Popular Tutorials
-
 Free set of photo references for our members
Posted on Nov 15, 2010
Free set of photo references for our members
Posted on Nov 15, 2010
-
 Photo References
Posted on Oct 6, 2010
Photo References
Posted on Oct 6, 2010
-
 Modeling Competition
Posted on Dec 10, 2010
Modeling Competition
Posted on Dec 10, 2010
-
 Modeling a High Definition Building – part 1
Posted on Dec 9, 2010
Modeling a High Definition Building – part 1
Posted on Dec 9, 2010
-
 FREE photo reference sets for you – only for registered members
Posted on Oct 2, 2011
FREE photo reference sets for you – only for registered members
Posted on Oct 2, 2011
Try something new

Wow, impressive!! 🙂 Thanks!