
This is a third part of our tutorial on how to create fantastic photo manipulation. You can find first part here, and second part here.
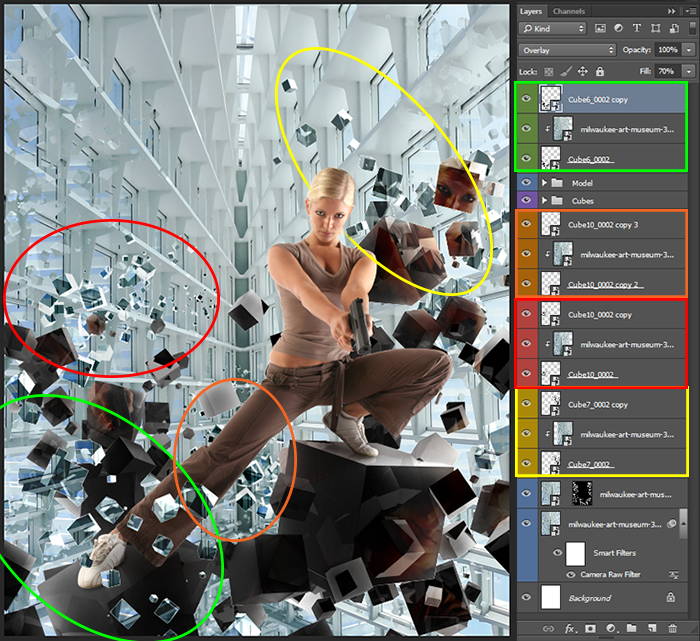
Step 22
With the first effect is completed. Now create glass cubes. Place any cube layer (I use images “Cube0005”, “Cube0008” and “Cube0004”) above textured background layer. Reduce Fill to 70%. Duplicate textured background layer (Cmd/Ctrl + J or go to Layer > Duplicate Layer), delete a layer mask and move it above placed cubes. Make from it a Clipping Mask (Cmd/Ctrl + Opt/Alt + G or hold Opt/Alt and click between layers) to cube’s layer. Change the Blending Mode to “Linear Dodge (Add)”, Fill to 84%.

Step 23
Duplicate original layer with cubes (don’t move it but place above in Layer stack) and change the Blending Mode to “Overlay” and. That’s all! You get the glass cubes. The most important thing is to choose an interesting texture to the cube. You can weaken the effect by reducing Opacity of “Linear Dodge (Add)” or “Overlay” layers. Repeat steps 22 – 23 to create more glass cubes in different parts of the picture. Try to maintain a dynamic picture, choosing the correct cubes. In total I used this effect 4 times: 3 on background and 1 on foreground (the same thing only this layers placed over a group of model and original layer with Fill: 100%).
Step 24
Add some dynamics in the form of a laser. I do not know how you perceive it, but I see a huge laser that broke space into cubes. Although the whole picture is an abstraction, a certain sense you can catch :). So, create a new layer (Cmd/Ctrl + Shift + N), take a Rectangle Marquee Tool (M), draw approximately in the middle third of the image a rectangle and fill it with color # 9e0b0f (Edit > Fill… > Color or set background color and use Cmd/Ctrl + Del). Change layer Blending mode to “Color Dodge”.

Step 25
Now let’s add some style to a layer. Click on “Add a layer style” icon and choice “Inner Glow” or go to Layer > Layer Style > Inner Glow. In window that appear set Blend Mode: Screen, Opacity: 60%, Noise: 80%, Source: Edge, Size: 250px. Set checkbox on “Outer Glow” and in this tab set Blend Mode: Overlay, Opacity: 59%, Color: #fb0000, Spread: 6%, Size: 51px. Click OK to apply changes.

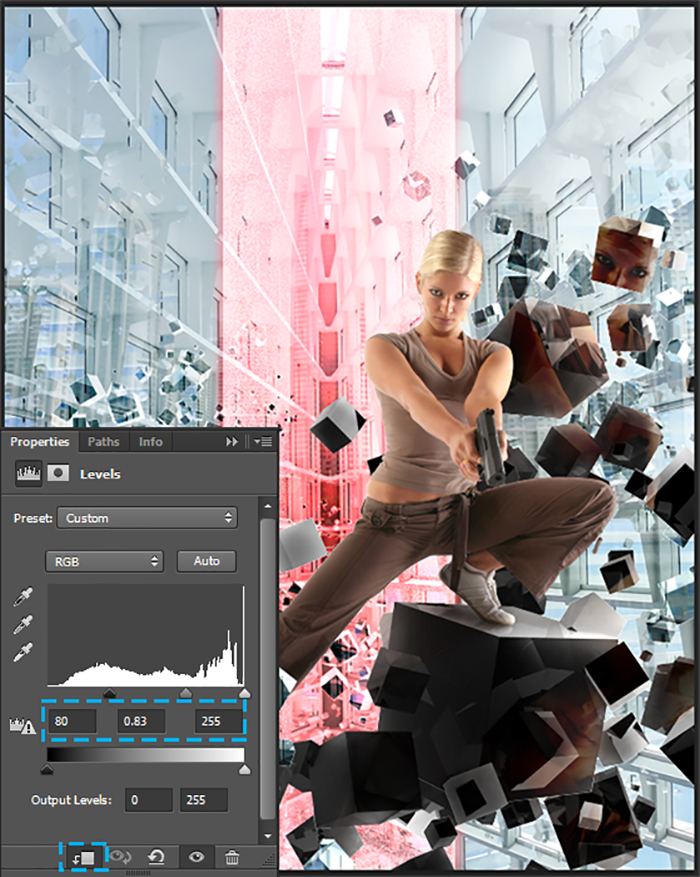
Step 26
Add a bit of texture. I think that up to this point you have not noticed around the city (maybe with the exception of the tower :)). I think this piece gives a picture of the volume and effect of the puzzle. Go to File > Place/ Place Embedded and open image “dubai-639302”. Resize it as shown in the image below. Add layer mask and with black soft brush remove the lower part of the image to buildings. Set layer Blending Mode to “Soft Light”.

Also add an adjustment layer “Levels” and clip it. Change the settings to Blacks: 80, Mid-tones: 0.83, Whites: 255. On adjustment layer mask remove some effect from left and right parts of image.
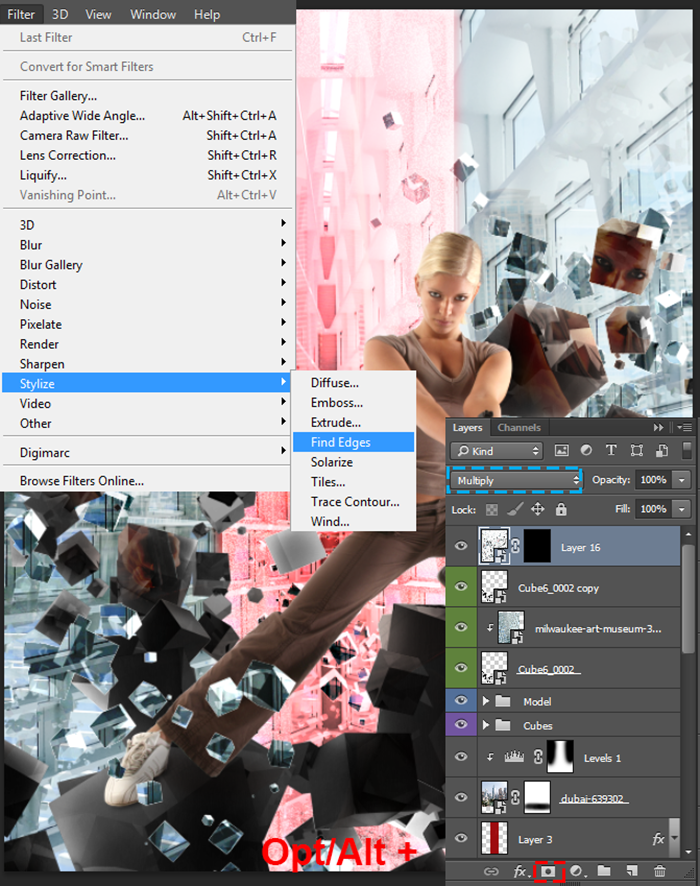
Step 27
We are going to work at the top of the Layers panel. Select the top layer and press Cmd/Ctrl + Opt/Alt + Shift + E to create a merged copy of entire image and duplicate this (Cmd/Ctrl + J). To a first copy add a filter “Find Edges” (Filter > Stylize > Find Edges). Change Blending Mode to “Multiply” and add inverted layer mask (hold Opt/Alt and click on “Add layer mask” icon or go to Layer > Layer Mask > Hide All).
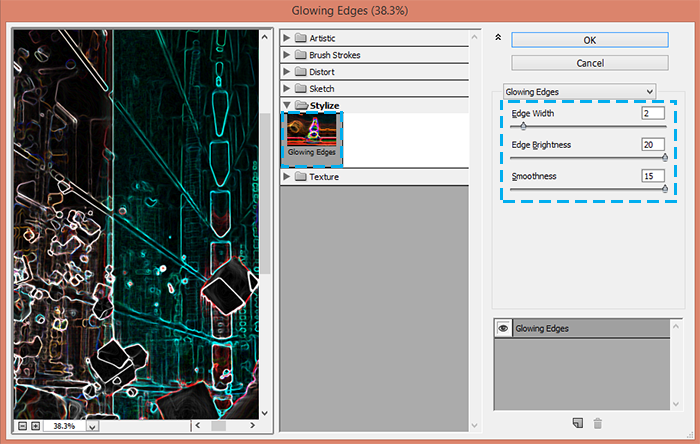
For a second layer add filter “Glowing Edges” (Filter > Filter Gallery… > Stylize > Glowing Edges). Set following values: Edge Width: 2, Edge Brightness: 20, Smoothness: 15. Set layer Blending Mode to “Screen” and add inverted layer mask.
Pages: 1 2


Latest Comments