
In this tutorial I’ll show you how to create fantastic photo manipulation.
I’ll tell and show you a lot of interesting effects, fast and good example of retouching, how to work with different tools and adjustment layers, creating a harmonious composition with the correct lighting. We will get acquainted with the filter “Path Blur” in Adobe Photoshop CC 2014 and much more. Read this tutorial and immerse yourself into the world of cyber fiction!
What you’ll be creating
Let’s start creating this picture with the construction of the base composition. This addition of the background, model and basic cubes. The next step will be to work to improve the atmosphere, retouching and effects. In the final part, we will work with adjustment layers and filters to improve image quality. You will need to download all attachment links, a little logic, a good mood and be sure to have Photoshop beginning with CS version.
Tutorial resources
Model – Photo reference for comic artists
Background – Pixabay
City – Pixabay
Cubes – Maria Semelevich
Lens Flares – daWIIZ
Step 1
Create a new document via File > New or use Cmd/Ctrl + N. Set following settings: Width: 3000, Height: 2400, resolution 300ppi.
First, we need to add a background in the working document. Such abstract backgrounds are very good when you create this kind of picture or portrait. It does not weigh down the composition and gives a good depth to the image. Go to File > Place/ Place Embedded… and open image milwaukee-art-museum-3984.

Step 2
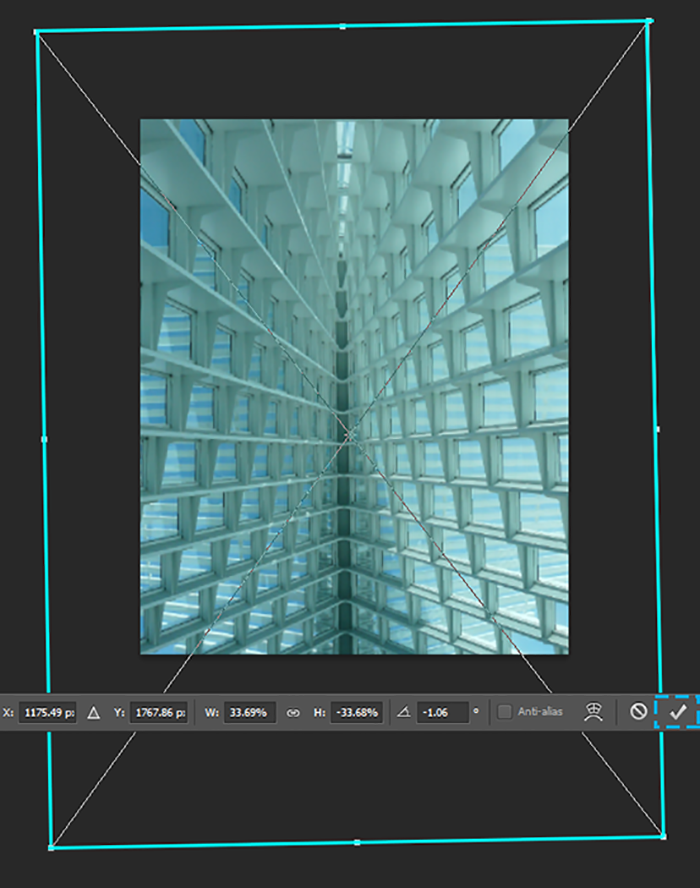
In Free transform mode (Cmd/Ctrl + T or Edit > Free Transform) to increase the size of the image and lower it, so you can see most of the ceiling. Hold Shift key to increase image proportionally. Use the image below to see how I did it. Tap Enter/Return key or check mark at the Properties bar to apply changes.
Step 3
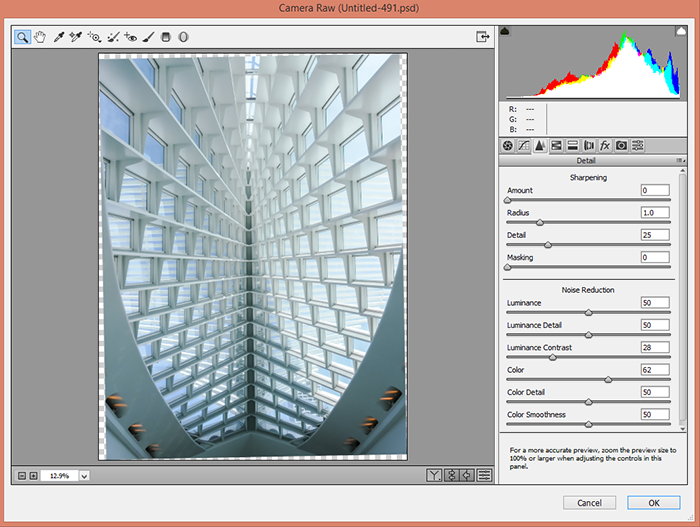
To get rid from the blue – green hue in the image I used the filter “Camera Raw” because this filter has excellent opportunities for correction of material without the use of a whole bunch of adjustment layers. Go to Filter > Camera Raw Filter… or use shortcut Cmd/Ctrl + Shift + A. First you need to change the white balance (add the opposite color). Set Temperature: +14, Tint to +43. Exposure to -0.50, Contrast: +34, Highlights: -88, Whites: +23, Blacks: +40, Clarity: +36.

Go to tab “Sharpness” (black & white triangles) and set following values – Luminance: 50, Luminance Detail: 50,Color: 62,Color Detail: 50,Color Smoothness: 50,Amount: 0, Radius: 1.0, Detail: 25 and hit OK to apply changes.
Step 4
Add the main character. From her we built all further composition. Go to File > Place/ Place Embedded and open image with a model. Increase image a little and Rotate on -22.26 degrees it to give more dynamism to pose.

Step 5
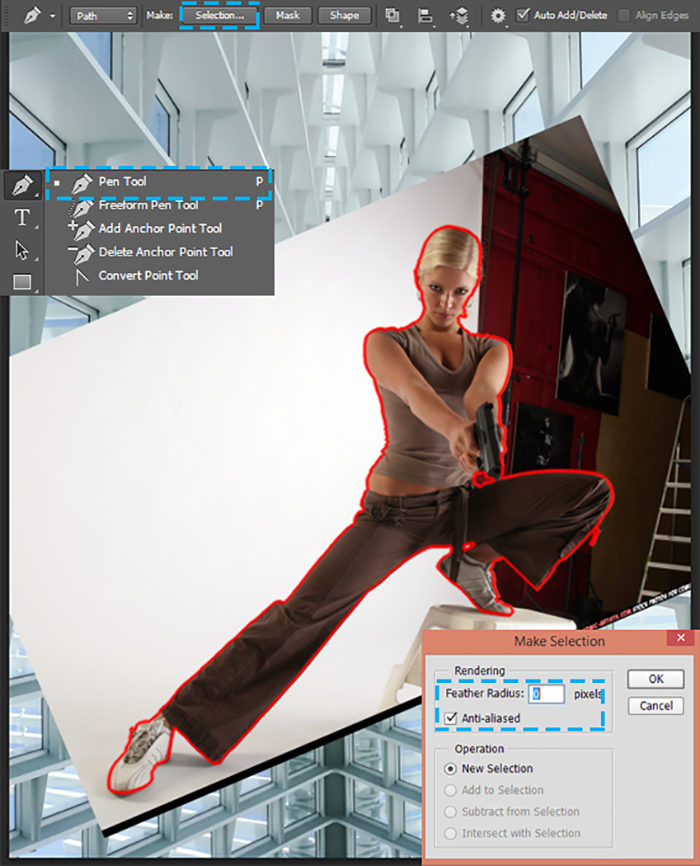
Now remove the background. I recommend you to use Pen Tool (P) to create a path of a model. After having done the path create a selection from it. Carefully create a path around model. Try to to the circuit did not get the background and clothing did not go beyond the path. Around the model’s hair, leave a bit of background, we remove it later. Right click on working area > Make Selection… or use button on Properties bar. In window that appear set Feather Radius to 0px and click OK. Add layer mask to hide background by clicking on “Add layer mask” icon at the bottom of Layer panel or go to Layer > Layer Mask > Reveal Selection.
A model is separate from the background we can see the remains of the background. To remove them take a Brush Tool (B), right-click to get the Context Brush Panel. Select the Soft Round brush preset, and set the brush Size to 200px, Opacity to 100% (Spacing: 1% in Brush Panel (F5)). Use black color on a layer mask and remove all remnants of background.

Step 6
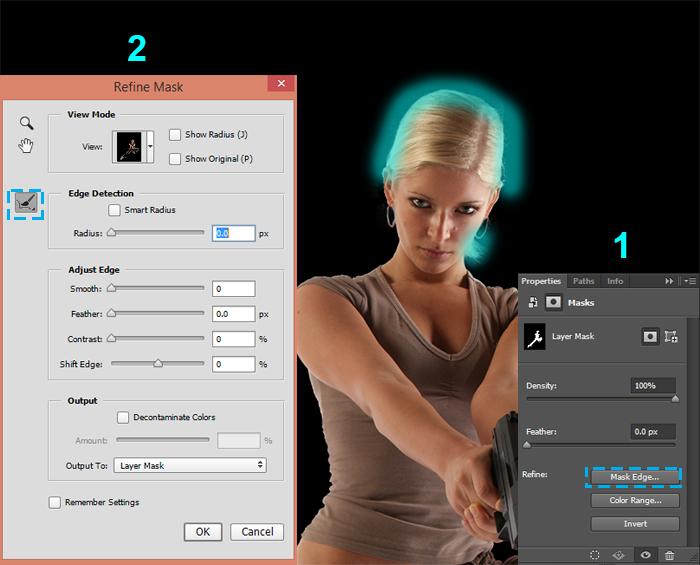
Now cleanse hair. Fro do this make double click on a layer mask. In Properties panel click on “Mask Edge…” button. You will see a window “Refine Mask”. We will not change anything in the settings so as not to damage the mask. Change “View” to “On Black” to see better background. Use the brush on the left side of the window and brushed model’s hair to background disappeared. Click OK to apply changes.
Pages: 1 2


Latest Comments