
This is a second part of our tutorial on how to create fantastic photo manipulation. You can find first part here.
Step 12
Add cubes. I have prepared for you a great set of cubes and you can use any of them. Go to File > Place/ Place Embedded and open image “Cube0001”. With Free Transform Tool (Cmd/Ctrl + T) place the first cubes under the foot of the model as shown in image below (layers must be below a “Model” group in Layer stack).
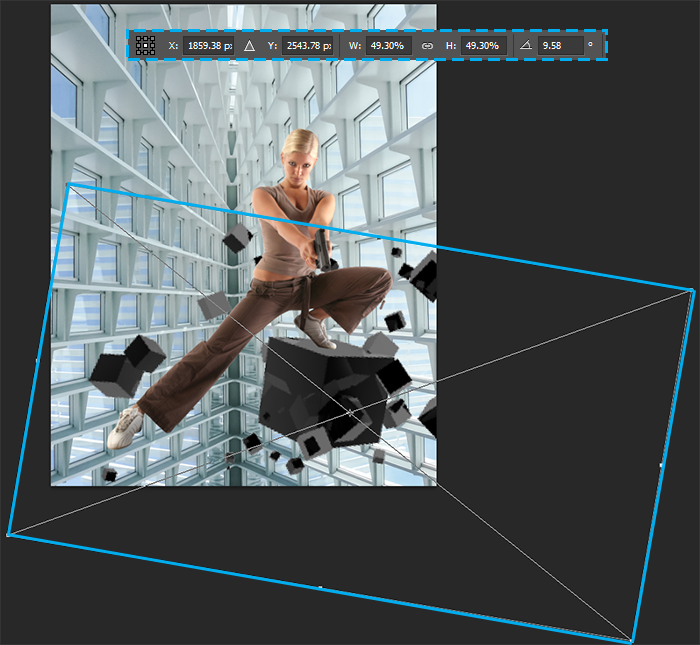
Same thing with the second leg. Place image “cube0002” and position it as shown in image below.

The most important thing is to catch the correct perspective of the cube and legs. Because if you choose the wrong perspective model’s foot will “hang in the air” and we do not need it. Place more cubes to create more interested composition. Most importantly, these layers were under the layers with the basic cubes.
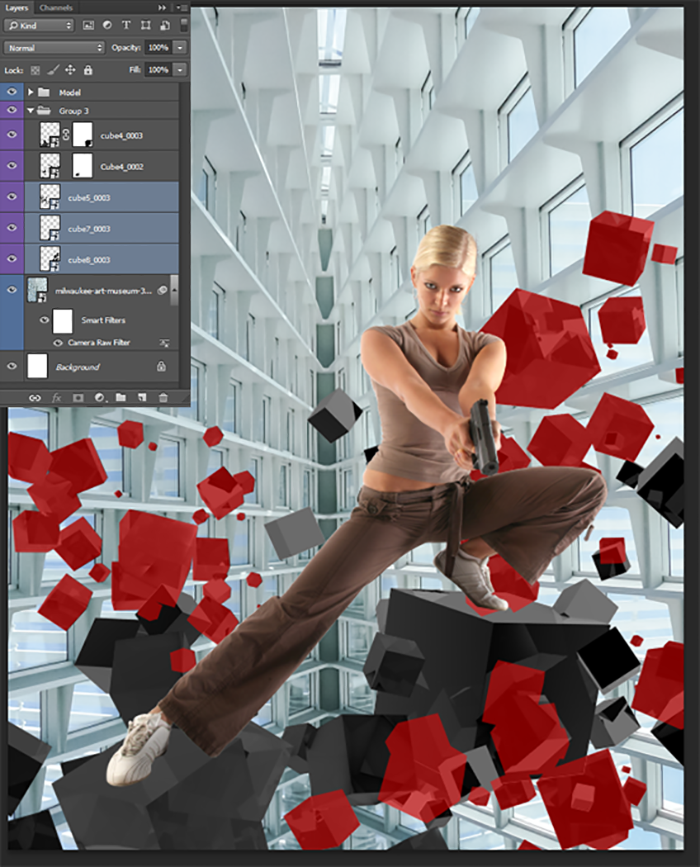
Step 13
For a start they need to apply the right lighting. Let’s begin with a simple. Create a new layer for each of the main cube (which is model’s leg) and clip it to the corresponding layers. Set Blending Mode to “Soft Light”. Select the Soft Round brush preset, and set the big size (500- 800px), Opacity around 30 – 50% and white /black colors to create lighting/ shadow from windows. Try not to catch the other cubes because for them the lighting will be added later. If you need to remove unnecessary lighting, use Eraser Tool (E).

Step 14
Combine all layers of cubes in the same group. Select all layers and press Cmd/Ctrl + G or go to Layer > Group Layers… Now do the same thing only for the group with cubes. Use a smaller brush and apply light and shadow on the rest of cubes. Necessarily to clip ((Cmd/Ctrl + Opt/Alt + G) this layer to a group to effect is applied only to cubes and not to the entire image. All further steps with cubes we clip the layers to the group, so do not forget about it.
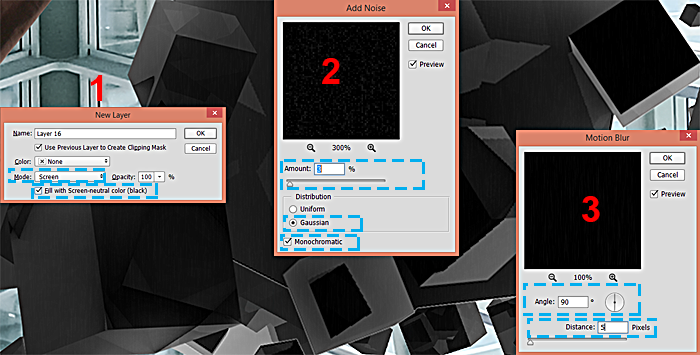
Step 15
Hold Opt/Alt and click on “Create a new layer” icon. In window that appears set Mode to “Screen” and check box on “Fill with Screen – neutral color (Black)” and click OK. Go to Filter > Noise > Add Noise and set Amount to 3%, Distribution to “Uniform” and checked “Monochromatic”. Set Layer Fill to 50%. Go to Filter > Blur > Motion Blur… Set Angle to 90 degrees and Distance to 5.0 pixels. This texture makes it more realistic cubes.
As in the case of the model, to increase the contrast I used adjustment layer “Levels” (use “Create a new Fill or Adjustment layer” icon or go to Layer > New Adjustment Layer > Levels…) with the settings to mid-tones: 0.75, for whites: 170. Clip this layer to cubes group.

Step 16
Now a little about reflection and abstraction. First, select “Model” roup and duplicate it (Cmd/Ctrl + J). Then merge it in a single layer (select layers > Cmd/Ctrl + E). Move this copy to a cubes group. Flip this image vertically (Edit > Transform > Flip Vertical). Move model until reflection is not connected to the leg. Use layer mask and black brush on it to remove all except the reflection on the cube. Set layer Blending Mode to “Hard Light” and reduce Fill to 50%. Do not worry about the right leg, because we look at it a little straight, so not have to see the reflection.
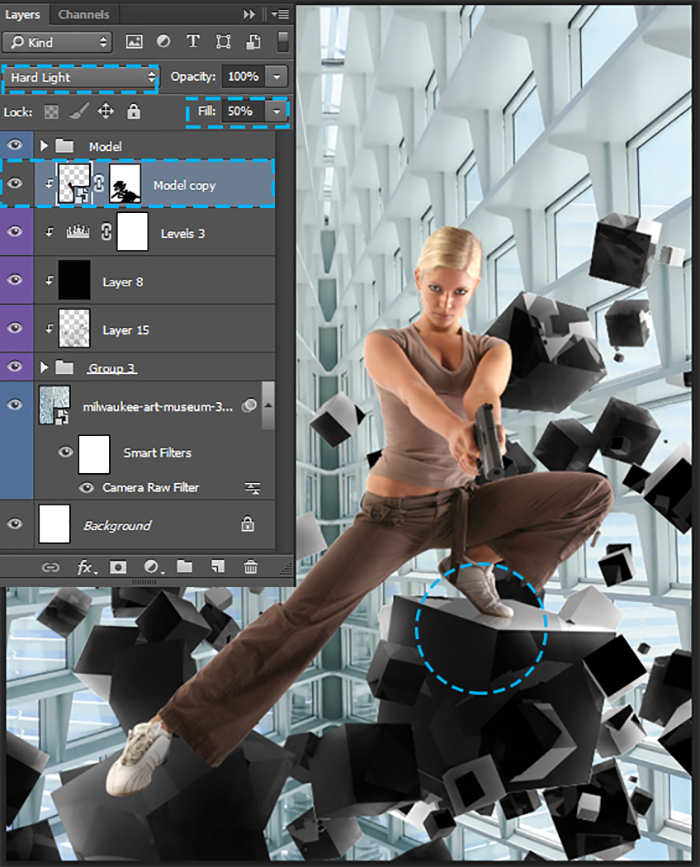
Step 17
I made a few copies of the model, move them to the group and set up a small cubes abstraction on cubes. Resize, rotate photos, and position them to different parts on cubes using Free Transform Tool (Cmd/Ctrl + T) and layer masks to remove unwanted effect from some cubes. Layers Blending Mode “Hard Light” and Fill: 50%. All there layers must be clipped to a “Cubes” group (Cmd/Ctrl + Opt/Alt + G).

Pages: 1 2


Latest Comments