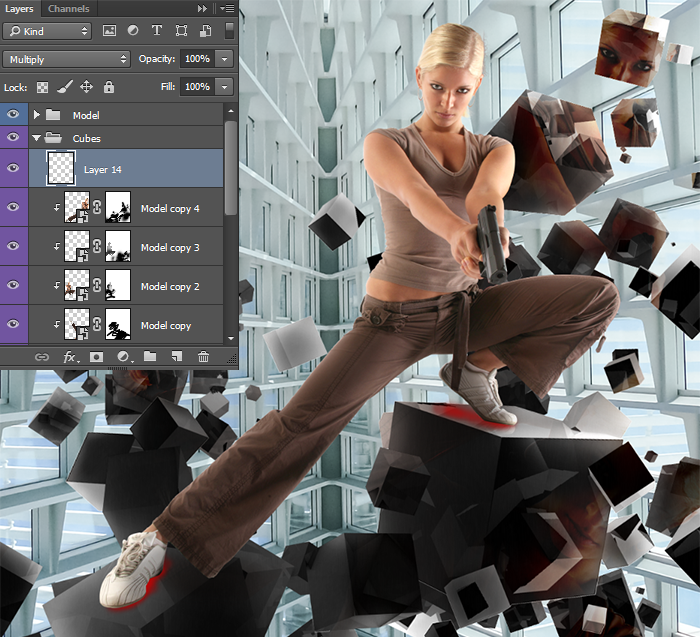
Step 18
Add the shadow of the legs. Create a new layer (Cmd/Ctrl + Shift + N) with Blending Mode “Multiply” (don’t clip this). Use soft black brush with 100%, Opacity: 35% and Size around 70px to draw a shadow. The room is very light so the shadows will be tight and short, remember about this. Group cubes into one group “Cubes” (Cmd/Ctrl + G). In this group work is finished and we can proceed with the creation of the environment and the effects.
Step 19
Pay attention to improvement. Start by creating the effect of breaking the wall cubes. This is a very interesting effect visually and gives the impression of breaking space. Duplicate layer with background image (Cmd/Ctrl + J or Layer > Duplicate layer…) and increase its size with Free Transform Tool (Cmd/Ctrl + T or Edit > Free Transform).

Step 20
Create a new document (File > New or Cmd/Ctrl + N) exactly as for photo manipulation (Width: 3000, Height: 2400, resolution 200ppi). Place in this document cubes (File > Place/ Place Embedded), reduce their size and position on the edges of the image. Cubes can be used any, the main thing that they were small.

Hide Background layer via clicking in eye icon near layer. Right click on cube layer > Merge Visible or go to Layer > Merge Visible…or Cmd/Ctrl + Shift + E. Invert image to make cubes are white (Cmd/Ctrl + I or Image > Adjustments > Invert). Hold Opt/Alt and click on cubes thumbnail to select them. Copy selection by Cmd/Ctrl + C or go to Edit > Copy.

Step 21
Go to working document. Add an invert layer mask to this increase background image (hold Opt/Alt and click on “Add layer mask” icon or go to Layer > Layer Mask > Hide All). Click on link between layer thumbnail and layer mask that the mask does not depend on the layer. Hold Opt/Alt and click on a layer mask thumbnail. Now you have a black working field. That’s okay, now you’re editing a layer mask. Paste cube selection here by using Cmd/Ctrl + V or Edit > Paste.

To cubes were on the edges of an image you need to increase the layer mask with Free Transform Tool (Cmd/Ctrl + T). Place a layer mask so that the cubes were on the edges of the working field. Hold Opt/Alt and click on thumbnail to finish editing the layer mask.

This is the end of 2nd part. We will continue with 3rd tutorial in near future.
Pages: 1 2


Latest Comments