“Understanding Lights in Maya – part 1 ” by Aziz Khan
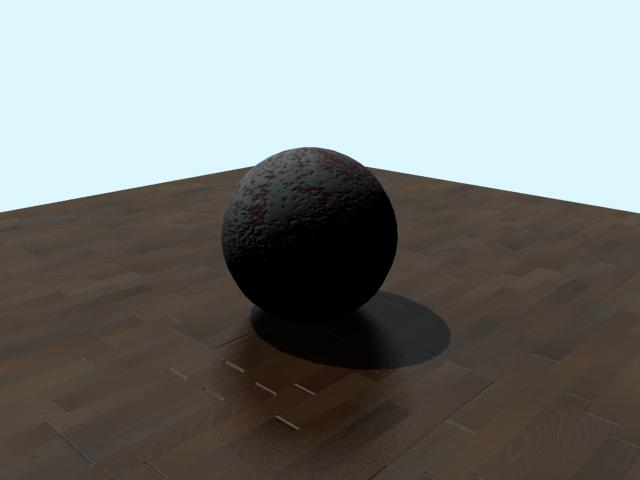
5-as you see the shadows are too dark because we don’t have any fill lights in the scene that is why they are looking too dark, for the sake of these tutorials we will just keep focusing on one single light to see the result of our changes,
you could also increase the shadow color to see the changes, but you wont make and difference except tad bit changes,
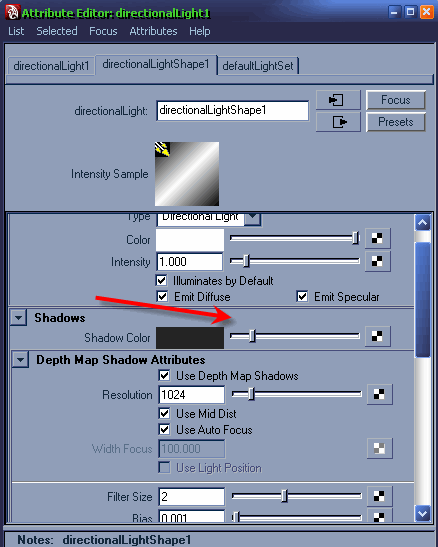
6-and hit render,
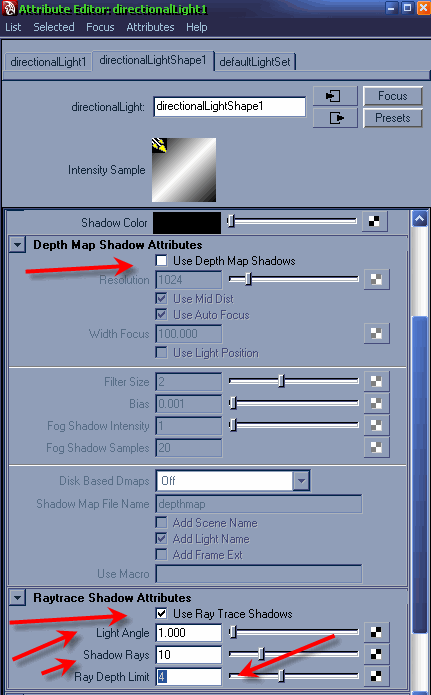
7-ok now uncheck the Use Depth Map Shadows and scroll down to bottom and check (Use Ray Trace Shadows),
Light Angle = will help you to smooth out shadows around the edges of objects,
Shadow Rays and Ray depth Limit = will help you to remove grains from your shadows, this works conjunction with Ray Tracing in the render settings as you will see next,
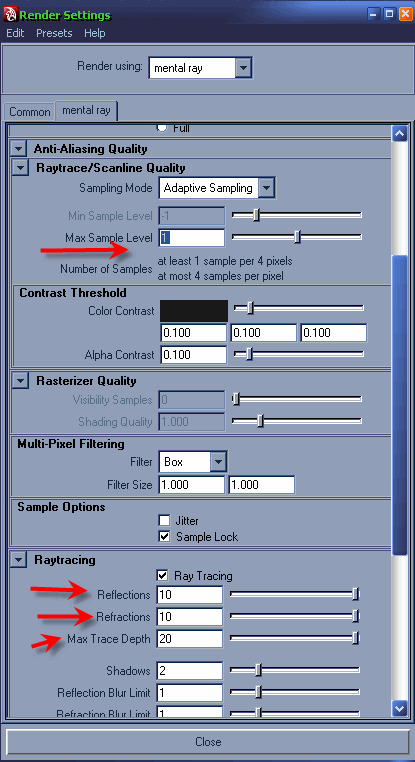
8-open up (Render Settings) and then expand the (Anti Aliasing Quality) tab,
Max Sample Level = this is pretty nice will help you to get rid of your jagged edges, if you render your scene and you could see that your objects looking jagged this is the option where you could control it out, well don’t crank it up more then 3 otherwise you will compensate with huge rendering time,
Ray Tracing = this works fine with (Ray Trace Shadows) crank the values to the end and will help you to remove grains from your shadows,
Understanding Lights in Maya – part 1
One comment
Leave a Reply
You must be logged in to post a comment.
Popular Tutorials
-
 Free set of photo references for our members
Posted on Nov 15, 2010
Free set of photo references for our members
Posted on Nov 15, 2010
-
 Photo References
Posted on Oct 6, 2010
Photo References
Posted on Oct 6, 2010
-
 Modeling Competition
Posted on Dec 10, 2010
Modeling Competition
Posted on Dec 10, 2010
-
 Modeling a High Definition Building – part 1
Posted on Dec 9, 2010
Modeling a High Definition Building – part 1
Posted on Dec 9, 2010
-
 FREE photo reference sets for you – only for registered members
Posted on Oct 2, 2011
FREE photo reference sets for you – only for registered members
Posted on Oct 2, 2011
Try something new

Thank u Aziz Khan!