“Understanding Lights in Maya – part 1 ” by Aziz Khan
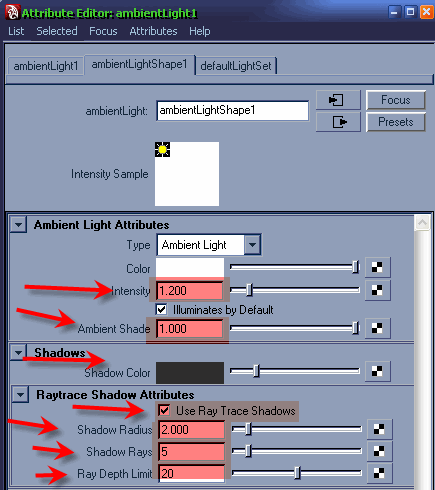
7-ok once the light created move it up a bit on the top of your object, and then hit CTRL+A to bring attributes editor or in the other words to brings its parameters,
Color = this is the color of your light you could change the color of your light to any color you like,
Intensity = this controls the amount of your light, more values the brighter result and lower value the darker result,
Illuminates By Default = with this option you could ON and OFF the light,
Ambient Shade = i don’t think you will need to play with it, the default value is 4.50 keep as it is, if you want to play please feel free, by increasing the value you will have a bit soft and darker light,
Shadows = its pretty self explanatory, if you change the color you will have the same shadow color you gave in the color chooser,
Use ray Trace Shadows = if you check this out your object will start casting shadows, and this works nice with Mental ray,
Shadow Radius = this will soften the edges of your shadows,
Shadow rays and Ray Depth Limit = works almost together these could help you to achieve smoother shadows result,
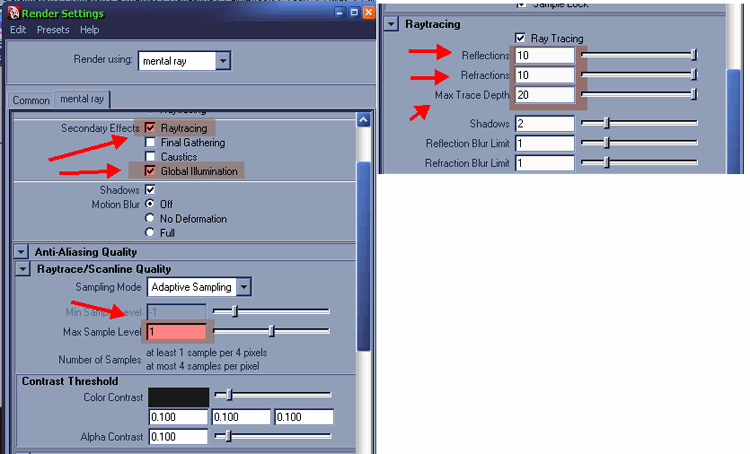
8-in the render settings do the same settings as in the images below,
Global Illumination is dealing with indirect illumination, specially works fine with photons, we will talk about photons in the part 3 of these tutorials,
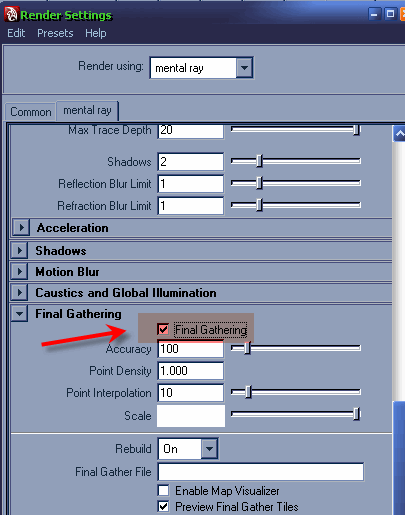
9-last but not the least still in the render settings check (Final Gathering) this option will help us to illuminate more and to get overall smoother result of our final output,
here is the final result with the same settings we did,
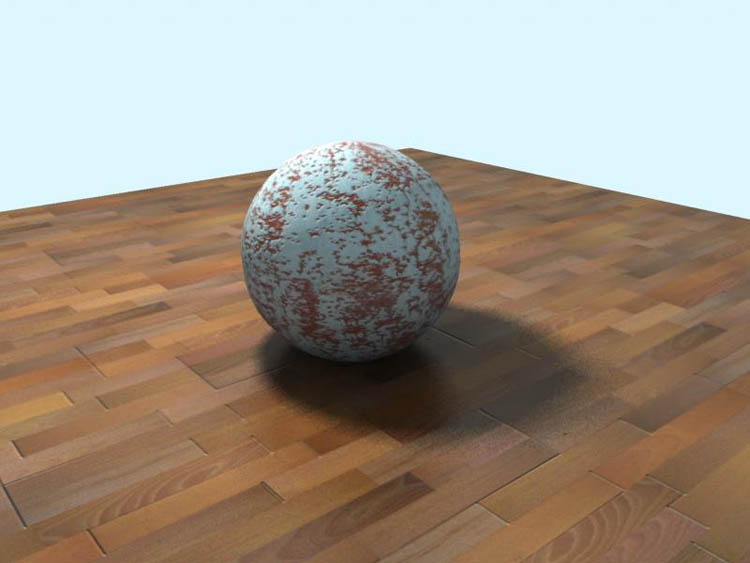
Note: these kind of lights uses to fill the scene, these lights Usually calls (Fill Light)
This was the end of first light next we will start working on Directional light.
Understanding Lights in Maya – part 1
One comment
Leave a Reply
You must be logged in to post a comment.
Popular Tutorials
-
 Free set of photo references for our members
Posted on Nov 15, 2010
Free set of photo references for our members
Posted on Nov 15, 2010
-
 Photo References
Posted on Oct 6, 2010
Photo References
Posted on Oct 6, 2010
-
 Modeling Competition
Posted on Dec 10, 2010
Modeling Competition
Posted on Dec 10, 2010
-
 Modeling a High Definition Building – part 1
Posted on Dec 9, 2010
Modeling a High Definition Building – part 1
Posted on Dec 9, 2010
-
 FREE photo reference sets for you – only for registered members
Posted on Oct 2, 2011
FREE photo reference sets for you – only for registered members
Posted on Oct 2, 2011
Try something new

Thank u Aziz Khan!