“Yellow house – part 1.” by Huseyin Karaaslan
Hello friends. Based on my work ´The yellow house´, I have tried to sum up how it was created. It consists of 3 parts: modelling, texturing and rendering.
Part 1: Modelling
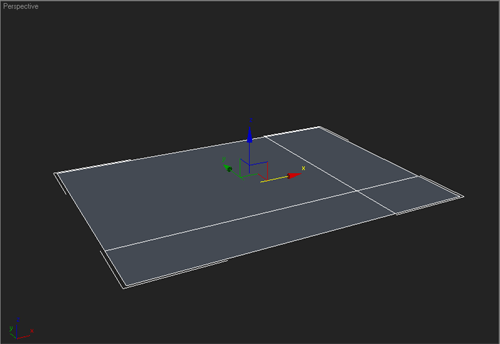
1) Let us start by drawing a ´plane´ with the same measurements of the house and then let us convert it to an ´editable polys´. If the house is not going to have a square shape, then let us define the ´faces´ that will signify the walls.
3Dtutorials.sk recommendation:
To maximise the realism of your 3D buildings we recommend to use high quality architecture photo references from the #1 texture website www.environment-textures.com
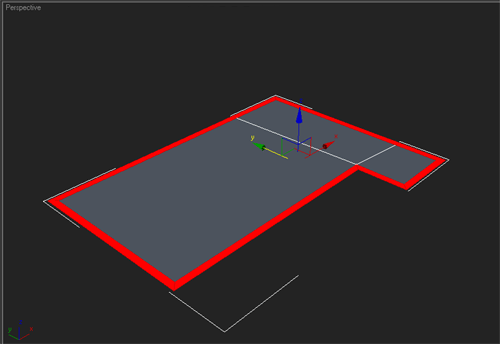
2) After having deleted all the unnecessary ´faces´, let us click the surface and use ´inset´ to specify the thickness of the walls.
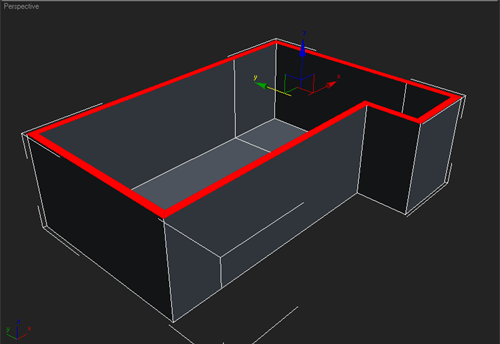
3) Now let us click the surfaces we created with ´inset´ and ´extrude´ until we reach the height we desire for the ceiling.
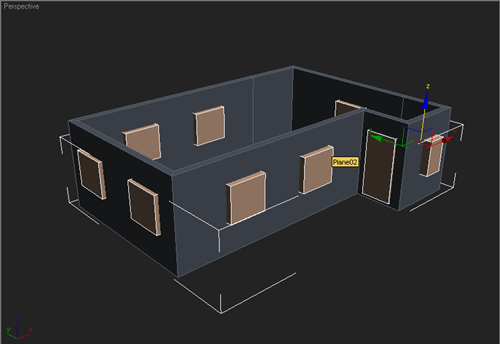

4) For the windows and doors, let us draw boxes. After having placed them, let us ´attach´ them to each other.
Let us click the wall and use ´boolean´ to create the window and door holes. Let us then switch it to poly and after having used ´boolean´, let us delete the unnecessary ´edges´.
Where the windows are concerned, let us cover the gap between the outer and inner wall using ´bridge´.
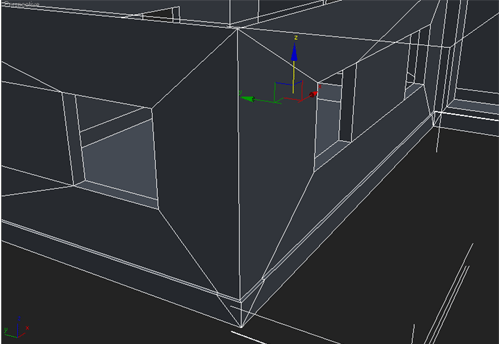
5) For the building stone of the house, let us ´extrude´ the bottom of the house down. Then by choosing the side or frontal view, let us ´extrude´ these outwards and specify the thickness of the building stone.
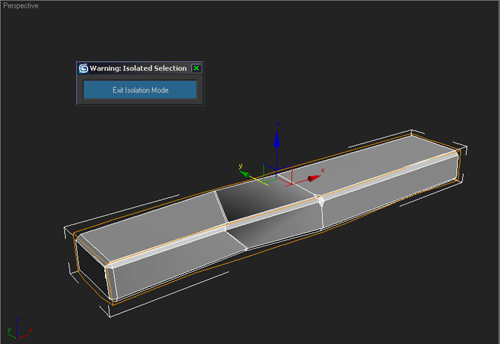
6) To form the building stone around the window, lets us first draw a box. Let us add a few ´faces´ to the box, then let us deform some parts of it manually. After that, for the sides to not be too soft, we apply ´chamfer´ and add ´smooth´.
For the boxes which we have added ´smooth´, we use the ´noise´ modifications to deform them.


Latest Comments