“Painless Organic Unwrapping” by Bill Quillinan
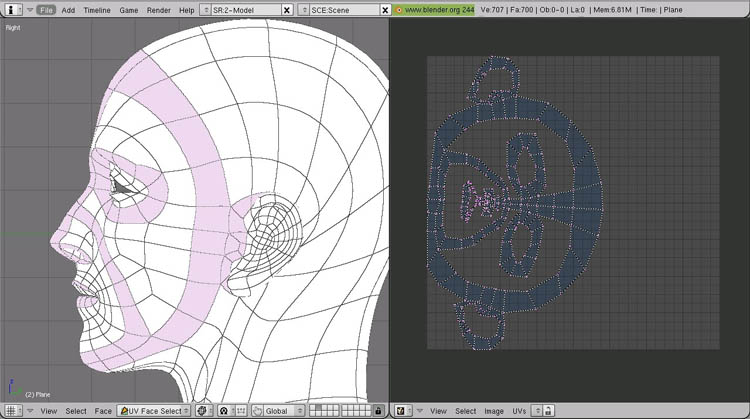
Fig 03 Face Loops Unwrapped
With these faces selected, unwrap the selected faces (see note iv). Here’s the initial unwrap. Already it looks better, even seen sideways. Use the UV Image Editor tools to select the map, rotate it so Adrianna’s Face is upright, and scale it up in the y direction (see note vi) to better match the proportions of Adrianna’s Face.

Fig 04 UV Map Rotated and Scaled
At this point, spend a few minutes tweaking the mesh to get the loops in the UV map looking closer to the loops on the model. In this case, the chin needs rounding, the mouth can move down a bit, the top of the ears up a bit, and the general blockiness made into smoother curves. To make it even easier, switch to full screen mode. After a few minutes of tweaking (even moving individual vertices one by one, this shouldn’t take too long) be sure to pin all the vertices. If we don’t pin them all, our tweaking will be lost the next time we unwrap any more faces, and we still have some more to do.
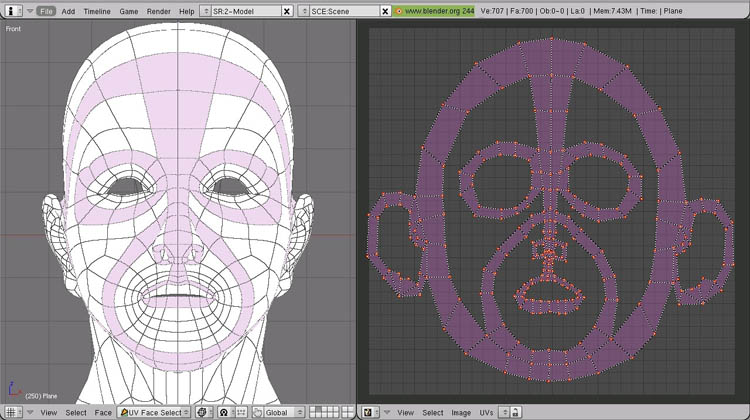
Fig 05 UV Map Tweaked and Pinned
Now that we have the hard parts pinned where we want them, it’s time to cut a seam and let Blender do some of the heavy lifting. Mark one seam running from to middle of the forehead to the back of the neck. I expect this seam will be covered with hair in the finished model.
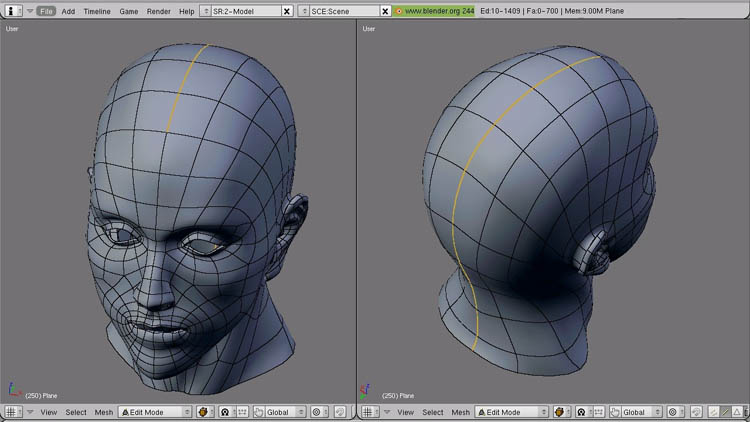
Fig 06 The Seam
With the seam in place, one of the viewports to 3D View, UV Face Select Mode, the other open to the UV Image Editor, select all faces and unwrap. Your UV map should now look like this.

Fig 07 Second Unwrapping
Painless organic unwrapping tutorial
Popular Tutorials
-
 Free set of photo references for our members
Posted on Nov 15, 2010
Free set of photo references for our members
Posted on Nov 15, 2010
-
 Photo References
Posted on Oct 6, 2010
Photo References
Posted on Oct 6, 2010
-
 Modeling Competition
Posted on Dec 10, 2010
Modeling Competition
Posted on Dec 10, 2010
-
 Modeling a High Definition Building – part 1
Posted on Dec 9, 2010
Modeling a High Definition Building – part 1
Posted on Dec 9, 2010
-
 FREE photo reference sets for you – only for registered members
Posted on Oct 2, 2011
FREE photo reference sets for you – only for registered members
Posted on Oct 2, 2011
Try something new

Latest Comments