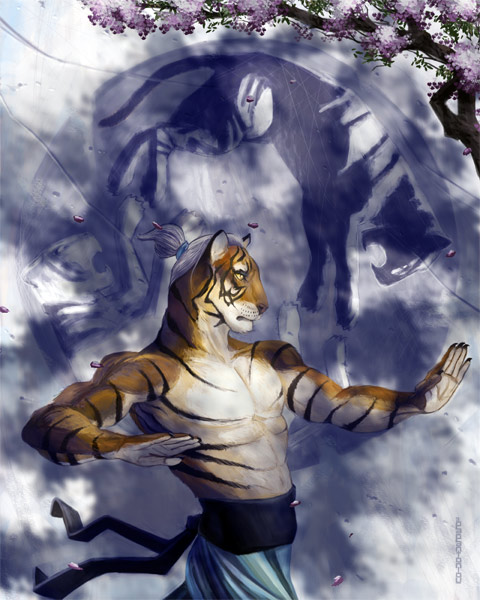
“Tiger Den” by Antonis Papantoniou
Casting Shadows
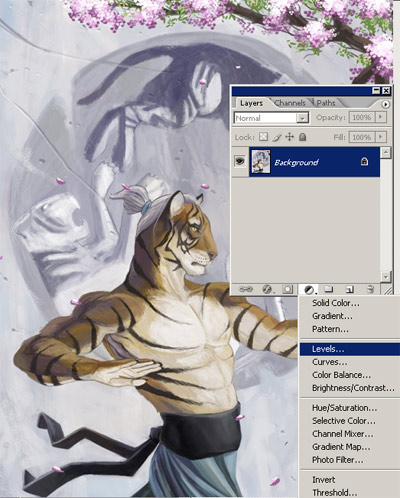
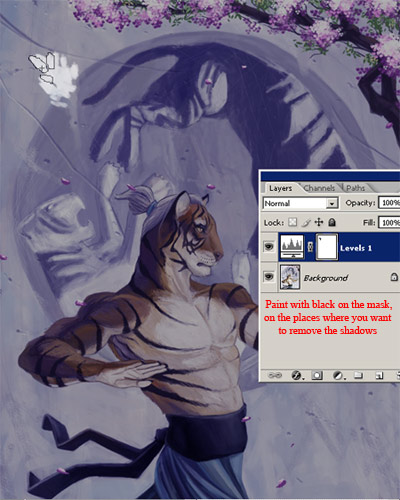
At this point, I decided to create more atmospheres in the image, by introducing cast shadows. To do this, I created an Adjustment Layer: Levels on top of the layer list. I reduced the white output level to about 160, and then I played with the values of each channel to achieve a purple overcast. Adjustment layers have masks automatically attached to them. So I picked my Leafs brush, and painted with black color on the mask, creating light areas. Then I clicked on menu Filters>Blur>Guassian Blur, and I blurred the mask, to simulate cast shadows.


Final Adjustments
In the end I adjusted the curves a little bit to create more contrast, and I saturated the image at about +12 using Hue/Saturation. That’s it!

I hope that this tutorial was helpful to you. Stay tuned for more techniques in the near future.

(c) Antonis Papantoniou, www.a-papantoniou.com


Latest Comments