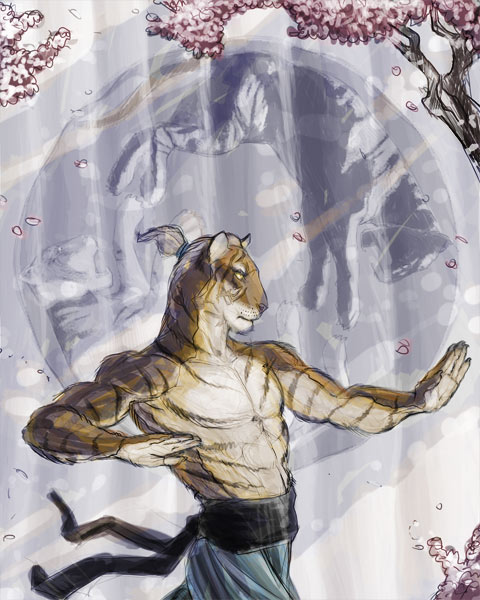
“Tiger Den” by Antonis Papantoniou
Coloring
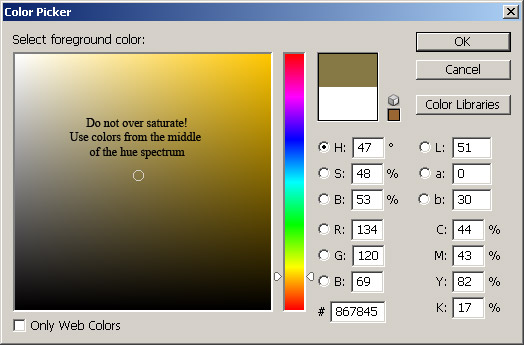
After my sketch was done, I flattened the document to get it ready for color. I double clicked on the flattened background layer to convert it to a regular layer and changed its mode to Hard Light. Then I created a new layer under it and I started slapping colors to that layer. I am usually very messy at this stage when I use my Fast MultiBrush technique. During this stage is important to not over saturate the colors. I use colors in the mid range of the hue spectrum. An other important thing is to build up various hues for each color during this stage. For coloring I used my RoughColor brush. This is a regular brush with the following settings:
Hardness 80%
Scattering 35%
Texture: the third one in the second line
Other Dynamics
It is not necessary to use such a brush, but it creates a nice, watercolor texture.
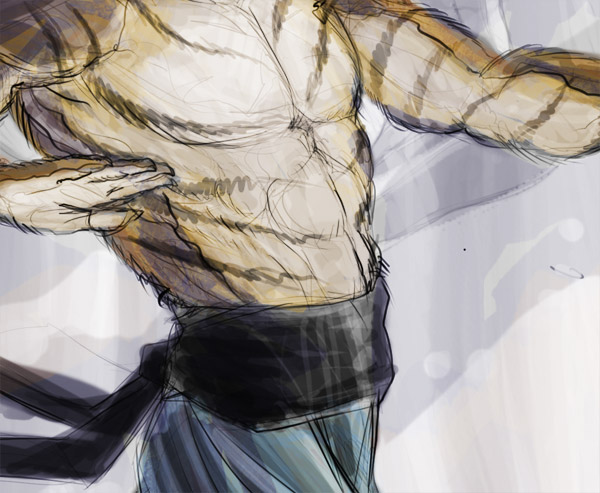
Painting the Back
This step is the most time consuming part of the process (which is a fast process though). During this step, I utilize many custom brushes to significantly speed up the process, and thus the name Fast MultiBrush technique.
I begin from the furthest object in the image, and I work my way to the front.
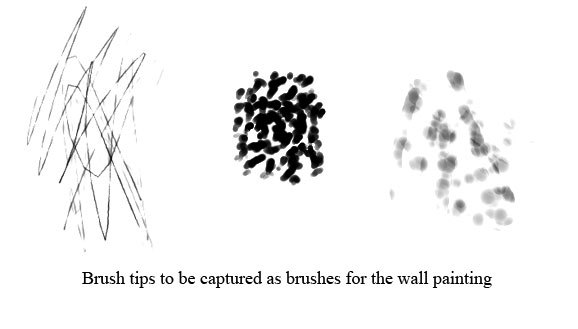
In the case of this image, I started with the cloth. Just as I begun painting it I decided to change it into an old, withered wall. So, the first thing to do was to create three new brushes to emulate the texture of a withered wall. I opened a new 800X600 document, and I used black paint to draw the brush tips of my new brushes. Then I selected the areas of each drawing with the rectangular marquee tool and clicked on menu Edit>Define Brush Preset for each. After I captured my new brushes, I tweaked the settings of each, to get the desired effect. Once my brushes were created I started painting with them using semi-opaque paint.

Tiger Den tutorial
Popular Tutorials
-
 Free set of photo references for our members
Posted on Nov 15, 2010
Free set of photo references for our members
Posted on Nov 15, 2010
-
 Photo References
Posted on Oct 6, 2010
Photo References
Posted on Oct 6, 2010
-
 Modeling Competition
Posted on Dec 10, 2010
Modeling Competition
Posted on Dec 10, 2010
-
 Modeling a High Definition Building – part 1
Posted on Dec 9, 2010
Modeling a High Definition Building – part 1
Posted on Dec 9, 2010
-
 FREE photo reference sets for you – only for registered members
Posted on Oct 2, 2011
FREE photo reference sets for you – only for registered members
Posted on Oct 2, 2011
Try something new

Latest Comments