“Studio lighting in Vray ” by Géza Kadás
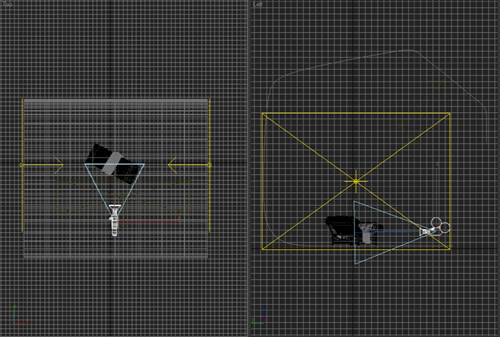
Create a Target Camera from top view with 35mm lens, and set it up as you see.
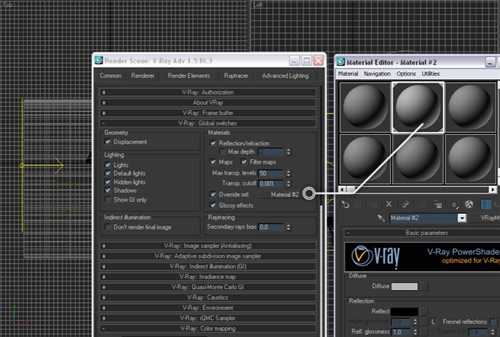
All right,choose vray as youre primary renderer. Make a vray material with a light grey diffuse color, R:170/G:170/B:170. Put this material to the “override mtl” slot in the Global Switches tab.
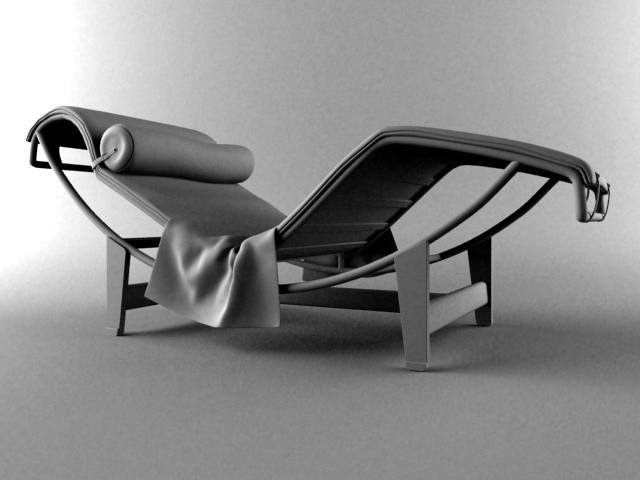
Now all the objects in the scene will have this material, so this function is great to test lighting with a clay render. Later we will turn this function off. Hit F9 and lets see what we got here.
3Dtutorials.sk recommendation:
To maximise the realism of your 3D furniture we recommend to use high quality photo references from the #1 texture website www.environment-textures.com
So this is what we have without any settings. No illumination,or any kind of sampling except the standard one. Now we need to set up vray for test renderings. It is time to move to the next topic.
SETTING UP VRAY FOR TESTS
To test the illumination in the scene we need to set up vray with low values. These are only tests ,so we only want a quick feedback from the lighting. First of all change the image aspect ratio to 1.8 in the Common tab. Go to camera view and turn on the “Safe Frame” option. Safe Frame will help you to place youre camera to the right position and it is also helps to notice unwanted parts in the view.

Now here comes the capital part of the Renderer tab settings.


un gran tutirial, gracias por las molestias.