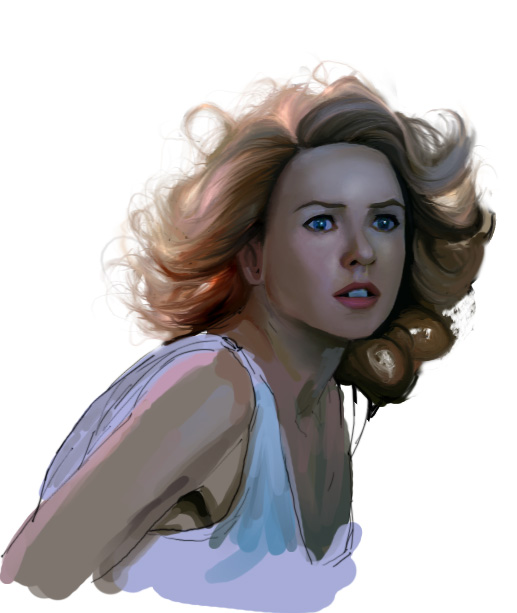
“King Kong – part 3. ” by Dan LuVisi
Coloring, Step 1 of Refining Ann’s face
Lets start with her face first, as you can see her hair is blocked in but don’t worry about that for now as for it will come back later. Her face is important; it’s more of a personal thing, when you have a bunch of random colors on, what would make you feel more inspired when painting, to have a finished face or a random hairline? Face! So here we’ll start to form her bone structure in her face. To do this, we’ll want to darken in her cheek bones, maybe with a soft brown, low opacity on a hard brush. Doing this will give her face more depth. After this, you can start to form some lights and shadows on her nose, mostly lights alongside the brush and the front flat on her nose, and the bubble part. Work tightly with her nose, make sure her nostrils aren’t too flared, or that the softness around the edges isn’t too hard. As for the edges of her nostrils, the brown will be a soft but then will grip hard around the actual circumference of the nostril. On the bubble tip of the nose, you will apply a soft light blue, with the soft brush on a low 10%. The highlight will be made by just a small brush, with the Dodge tool. The strength should be 10% and make it bold, but not too noticeable.
Coloring, Step 2 of Refining (HAIR, EYEBROWS, EYELASHES):
In this next step we’re going to start to block in her hair.
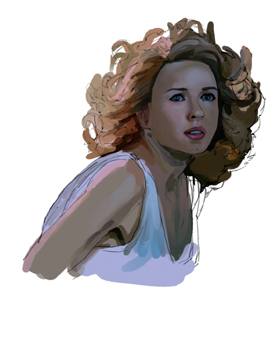
Now you want to reach the same colors as the photo reference, because the hair can easily go from picturesque to platinum blonde highlights. What we don’t want are very vibrant yellows and oranges, we want de-saturated gold’s and browns. For highlights It will be mixes of light pink’s, bold yellows, and a hint of beige. The highlights, or shall I say, bright areas will not come in until way later, with Layer properties, and the Dodge Tool. Since our light source is coming from her right, our left we will apply the lighter of the gold’s on top. Work your way down, going from brightest to darkest. As the hair folds over in the middle, you’ll see a collage of darker blues, browns mix together. This is where the shadows or un-hit of light places will be. Again work your way down, from brightest of the blues to darkest. Don’t worry about the hairlines, etc, just put in your colors here. When the hair is done with the blocking of colors, start to work on her eyebrows.
Ann’s eyebrows:
Her eyebrows are pretty easy to achieve; basically just coloring under the line art with a pretty dark brown. The light is hitting her from behind, so you won’t see them as a colorful yellow. I usually wait to smudge the eyebrows into the face once I have the line art linked into the face. So if you have done so, then you can smudge. Now for the eye lashes this is if you’re a detail freak, like me. You can usually just outline the eyes in a dark, dark blue or you can do that and then draw each lash connecting from the base. Now it’s pretty self explanatory so I don’t think I have to go into detail on this one. I usually paint in the outline of them, smudge it so it blends with the skin, or go over it with a soft brush on low opacity. Either way works, some like to blend, others like to smudge. I prefer both if you ask me, both work fine.
Ann’s hair:
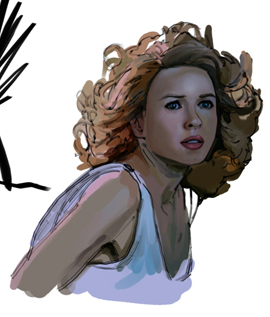
Alright, now this may seem intimidating at first, but it’s pretty easy. To your surprise, it’s pretty fun also. Well, where we last left off on her hair we were laying down the color blobs for it.
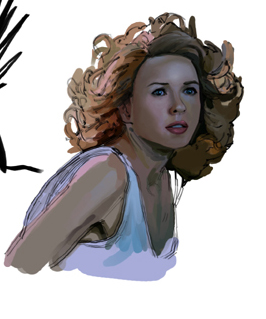
You can see in the image that I shaped it a little more, so it’s just not random strokes. You want to have some what of a discipline here, so you don’t go crazy and give her a fro. As you can see, the top folder of hair, above the center of her forehead has already been smudged / blended together. Now how I do this is by just blended those colors together at first, blending in an up motion. Not to the side, I blend in the way the hair is flowing. After I have my smoothed out lock of hair, ill then go over it in thin lines with a size three brush. I’ll turn on Pen Pressure too, so I can get soft strokes, hair isn’t rock hard: remember this. After I go over with the small brush, I’ll then refine it some more such as lights and dark highlights and putting in random threads of hair to add motion.
Now for the rest of her hair throughout the image, it’s all the same of what I explained before, but highlight advice will come later in the next part.


Great effort within this Jesse. Another thing in relation to Yext that is certainly well worth bringing up: if some of the actual mate internet sites has their own own report which is considered possession involving in that case that data takes priority.
[url=http://runforhumanrights.org/ugg-boots/uggs-moccasins-on-sale.html]uggs moccasins on sale[/url]