“Art Nouveau room – texturing and lighting” by Crtomir Just

Textures and shaders
It is important that you know what you want to achieve, when it comes to textures and materials.
I will start with the wooden floor texture, because I think it’s creation best describes the basic principles I used at creating other textures for this scene as well.
The trick was to get the part of the floor where the plaster is a lot more reflective than the washed out part. To achieve that effect, I used the reflection map and also the reflection glossines map. The reflection or specular map is used to define the area where the material reflects more and where it reflects less or doesn’t reflect at all. The reflection glossines map defines the areas where the reflection is more or less glossy and adds a lot to the realism. Both mentioned maps use the same color range as the bump map, from black to white. By the specular map, white means 100 % reflective and black means no reflection at all. Similar goes for the reflection glossines map, but for the glossiness of the reflection of course. You may notice that at the wooden floor material the specular and reflection map are the same – this is because I wanted the parts that reflect less to also have less glossy reflections.
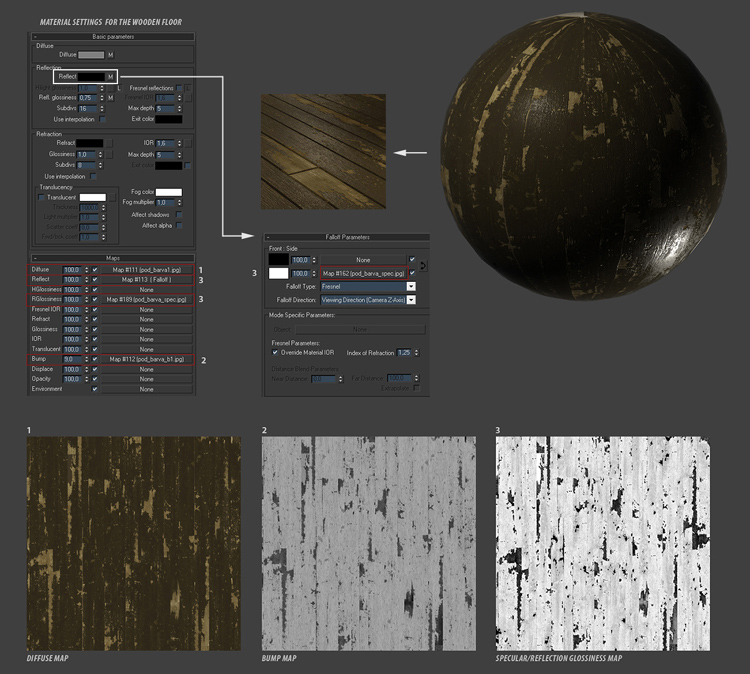
Other wood textures and the ones which contain dirt or scratches that reflect less, were made with similar procedures, where all of them use specular maps, but not the reflection glossines maps, because it didn’t seem necessary to use them in every case.
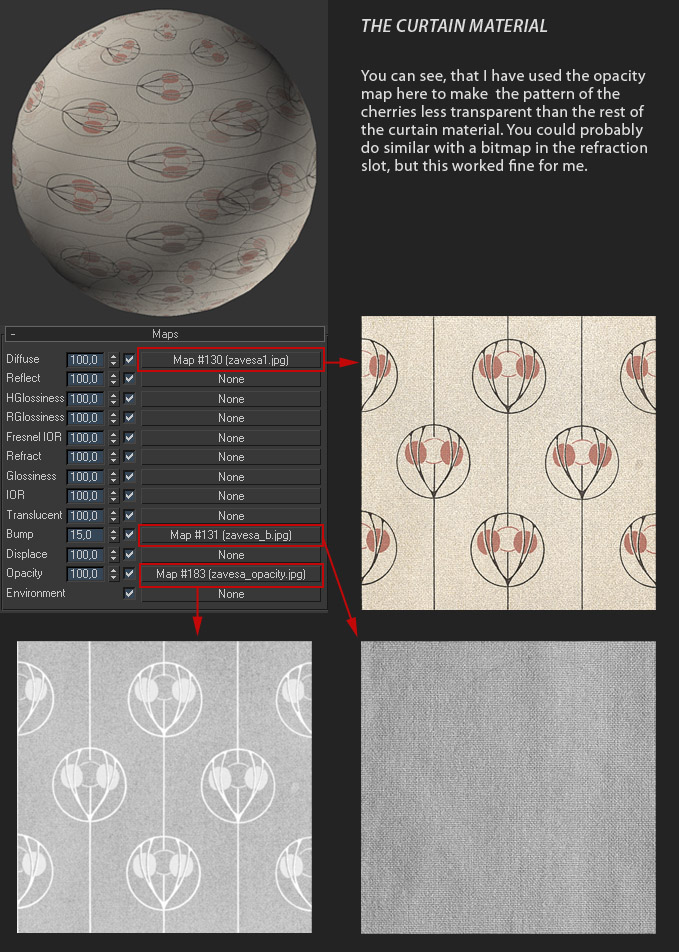
The curtains material was made with the help of the opacity map. I wanted some patterns to be less transparent, so I made a b/w map where the cherries pattern is almost white, which means that it has almost no transparency (black means 100 % transparent), and the other part of the cloth is medium gray.


Latest Comments