“Art Nouveau room – texturing and lighting” by Crtomir Just
Texturing in Photoshop
After unwrapping all the objects, I had to get the UVs into photoshop. Because I was working with 3Dsmax 7 which doesn’t support exporting the UVW template, I had to either use the texporter plugin or just take the screenshot of the Edit UVW dialog with the print screen button. I decided for the less accurate but faster and easier PrtScr button method. So I had to resize the saved screenshot in photoshop to the size of the base texture which usually ment a decrease in quality of the UVW screenshot image. But that didn’t bother me as you can always adjust the UVs later on in max if the finished texture doesn’t match perfectly.
The two most important objects in the scene that required most attention in terms of texturing, were the walls and the floor. These two objects had the most impact on the general feel of the room. I wanted to create a nice and cosy atmosphere, so I chose mostly warm colors, orange for the walls and brown for the floor.
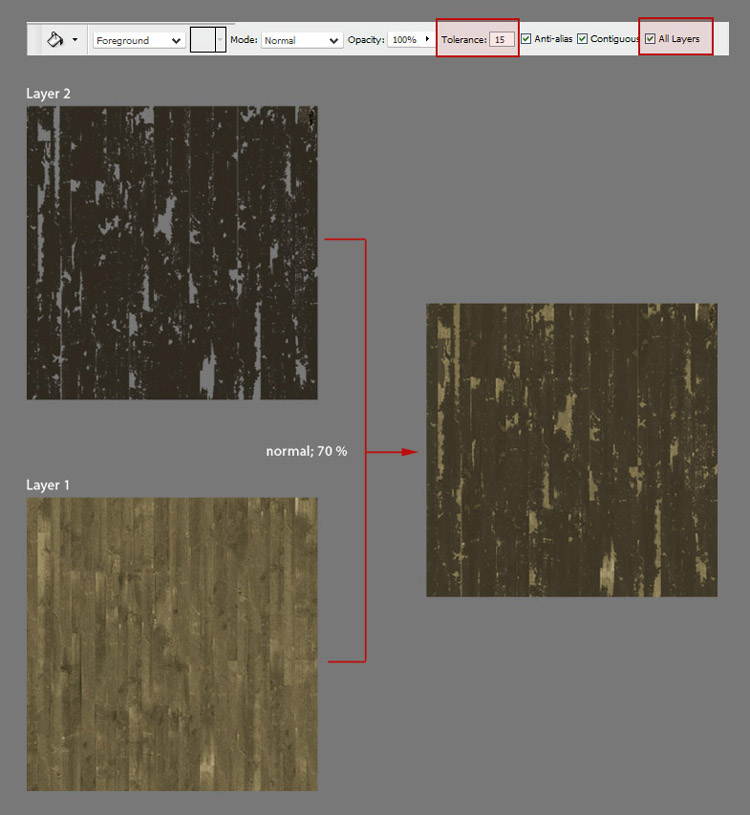
I actually had the most problems with the floor texture and had to change it a couple of times, before I got it right. Eventually I got a fence texture made out of wooden boards and cut out the most straight boards (about 6 or 7 different ones) and multiplied them according to the UVW map, then painted some differences on each of them just to get rid of the repetition. On a new layer I filled some areas brown with the help of the paint bucket tool (playing with the tolerance option) and the option “Fill all layers” turned on (thanks to Jure Zagoriènik for that great tip). That way I got a nice layer of plaster and set it to 70 % opacity.
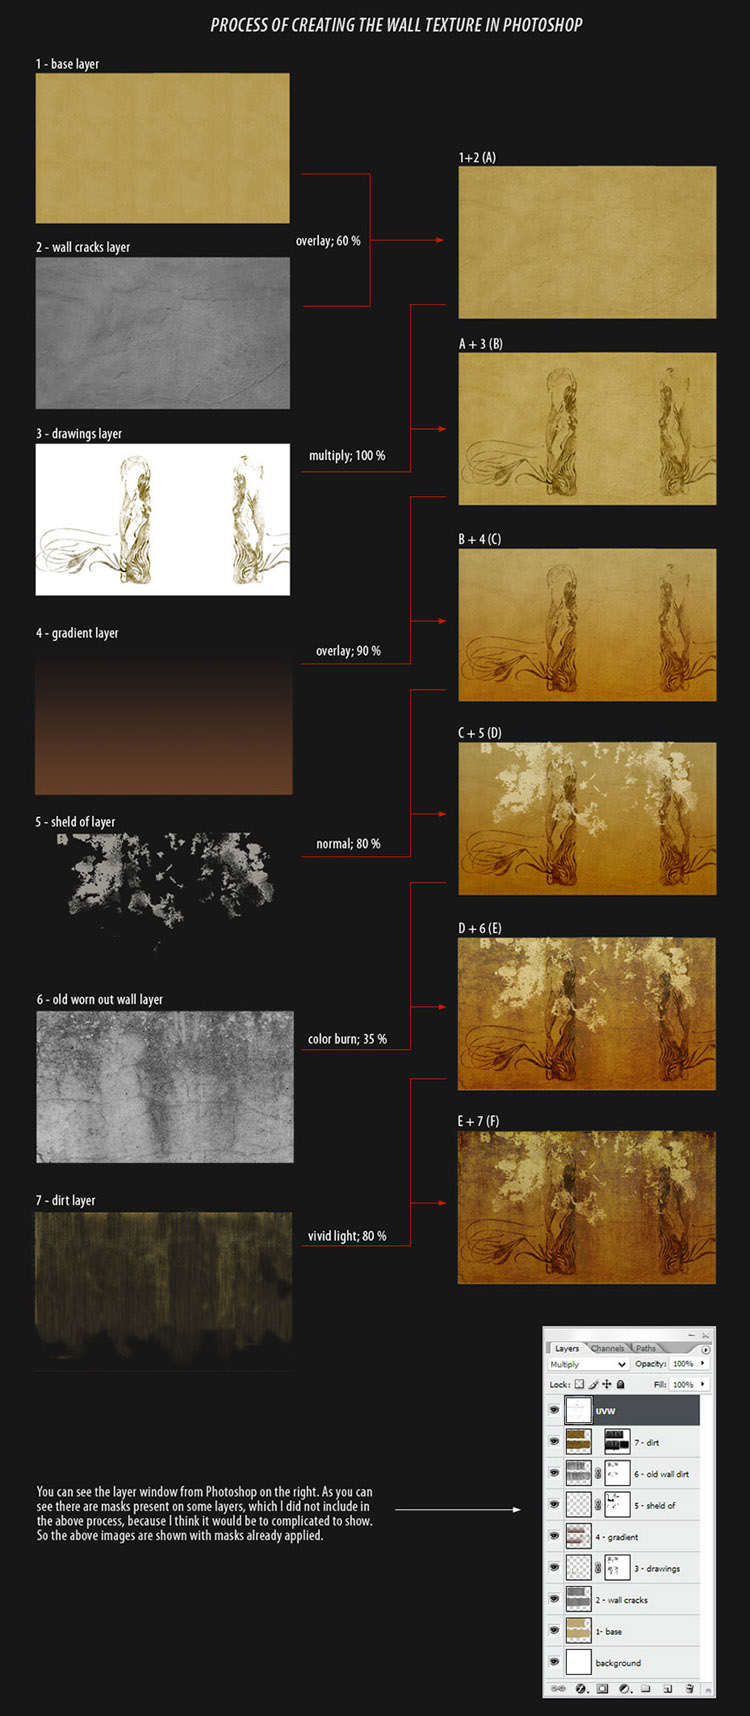
The wall texture was a little easier and I made it a lot faster, although it consists of several layers and masks in PS. The scheme below tries to explain the basic steps of the process of creating it in Photoshop.
Art noveau room – texturing and lighting
Popular Tutorials
-
 Free set of photo references for our members
Posted on Nov 15, 2010
Free set of photo references for our members
Posted on Nov 15, 2010
-
 Photo References
Posted on Oct 6, 2010
Photo References
Posted on Oct 6, 2010
-
 Modeling Competition
Posted on Dec 10, 2010
Modeling Competition
Posted on Dec 10, 2010
-
 Modeling a High Definition Building – part 1
Posted on Dec 9, 2010
Modeling a High Definition Building – part 1
Posted on Dec 9, 2010
-
 FREE photo reference sets for you – only for registered members
Posted on Oct 2, 2011
FREE photo reference sets for you – only for registered members
Posted on Oct 2, 2011
Try something new

Latest Comments