“Tainted” by Shreya Shetty
Ever since I’ve known about the character, I’ve always wanted to paint the Pierrot. There’s something really vulnerable and tragic about him that makes him so endearing – always a good subject for a painting! The original story goes something like this: There is a story about the pierrot, which relates how a small naked boy was found outside the gates of Heaven. It was winter, and as St Peter picked up the child and blessed him, the snow on his body turned into a suit of pure white clothing. St Peter adopted the child and gave him his own name – Little Peter or Pierrot – but there was one condition, Pierrot was not to be allowed to play with any of the human children he might come across as he wandered outside the gates of Paradise. Of course, this was almost impossible for a small boy, and on his return from just such a meeting he realised that his white suit now had black marks on it where the ordinary children had touched him. They proclaimed his guilt, and Pierrot was excluded from Paradise forevermore.
Anyway, I wanted to create a being that was androgynous and seemed really young. I wanted to mix the traditional story, and the pantomime character together. So while it would be a small naked being covered with “dirty” hand prints, I also wanted to show the mouth which was cut to make it look bigger, a messy wig-like hair and the red nose. The hair would be pristine white, the last vestige of innocence left in it, and the red nose could either be like the one on a clown, or red due to crying. The head by itself had to be a little big, all to add to the emotion.
As for the tutorial, I think the pictures will speak more than my commentary itself. The words are just a guide to tell you where to look for changes 🙂
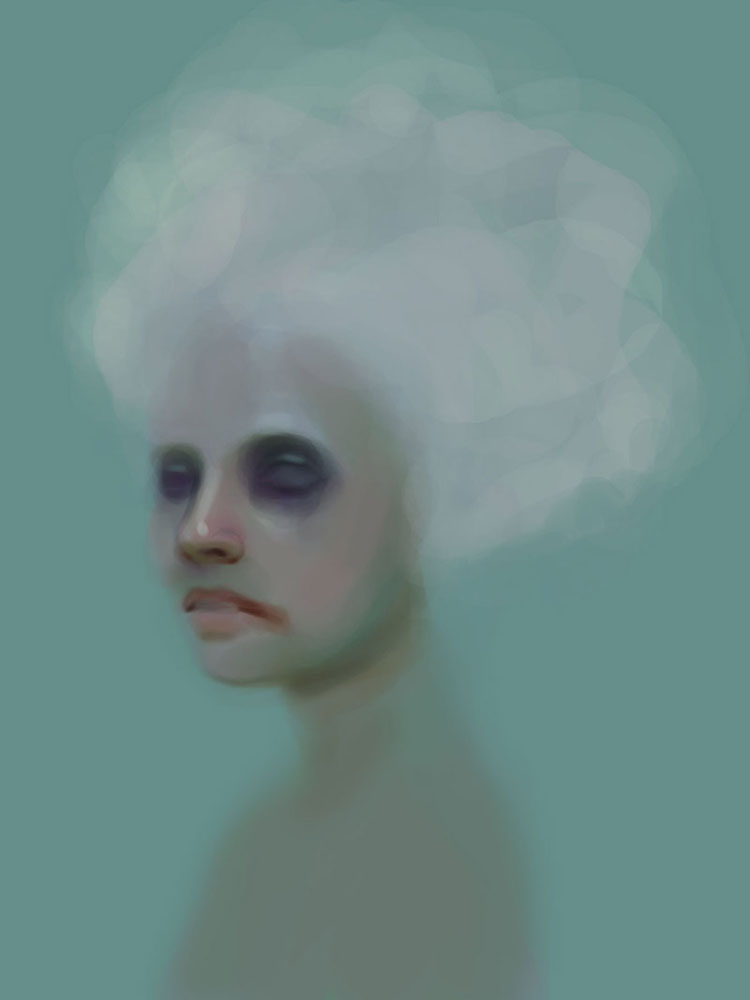
I wanted a cool colour scheme for this painting and for a long time I wavered between having the base as cyan or green. This was important as the background was to be rather plain and so the correct colour had to be chosen to make the skin look “real”. Much of the background will also appear in the shadow areas of the face.
3Dtutorials.sk recommendation:
To maximise the realism of your CG character we recommend to use high quality photo references from the #1 reference website www.female-anatomy-for-artist.com
I used the hard round brush almost exclusively throughout this painting in normal mode and at 100% opacity. I start painting directly- a cylinder for the neck and an oval shape for the eye. After this, I start “modeling” the face, so the areas that recede are darker and the ones that project are lighter. I add darks for the eye-sockets, the shadow area under the nose and on the top lip and below the bottom one. Then I paint the top eyelid and define the nose a little more. I painted the angle of the mouth too, almost an exaggerated frown.
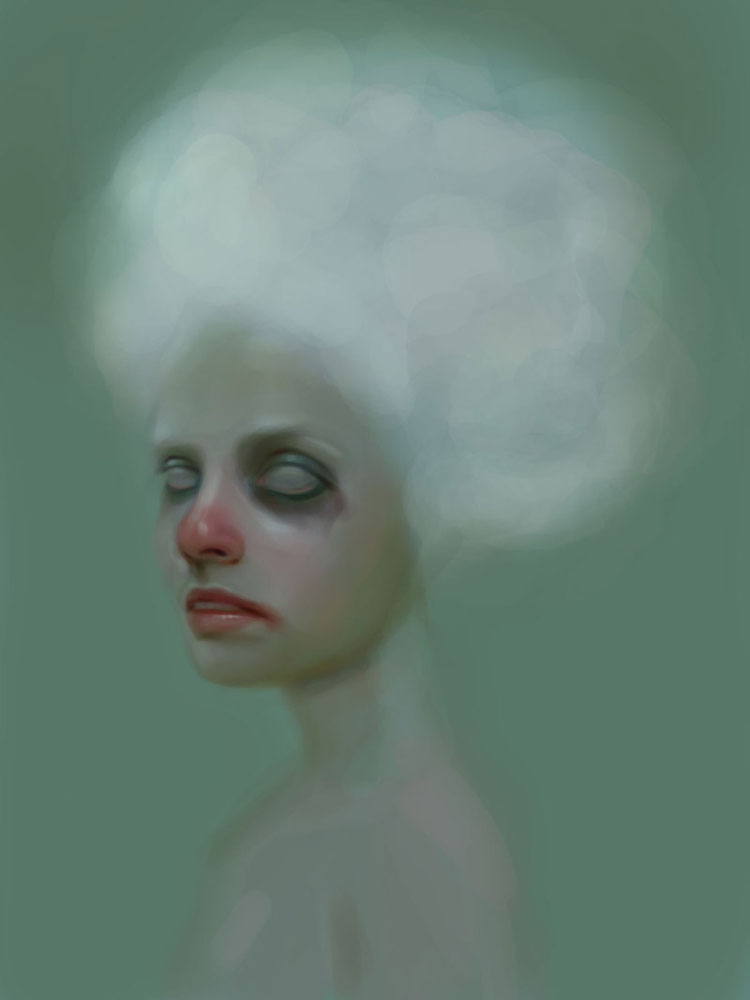
I changed the background to green. It will make the reds in the face pop out very well. I added a bit of that green to the shadow of the face( I usually colourpick the background and move the slider so the result is a little more saturated and use this result with light strokes). I also started refining the nose a bit and added some red to it. I’m going to keep the lower eyelid and the surrounding area dark as it will have the flowing mascara (from the tear) on it. I also painted the eyeballs. I want them to be big, almost exaggerated.


Latest Comments