“Next Gen car – part 5 ” by Valentin Nadolu
The texture is getting better but it is not done yet. Adding further detail can be achieved by using the ambient occlusion map baked earlier. Adding it on top of the color texture with the layer set to Multiply will add a lot of detail to the texture, making it fit for use.This is how the texture looks after adding the AO map.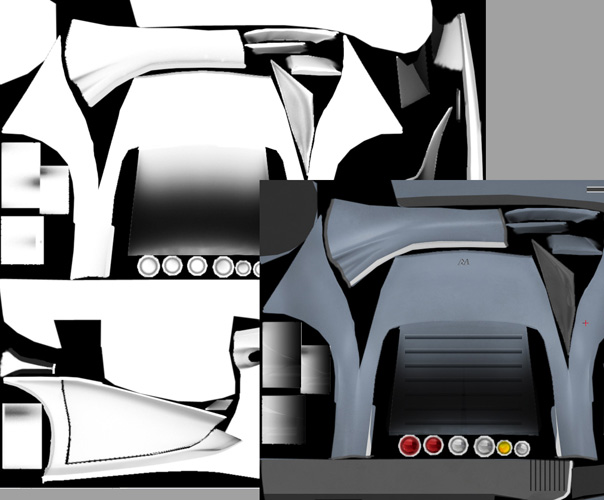 2. The Specular MapA specular map defines the intensity of the specular highlight, effectively describing how reflective a texture is. Creating this texture is fairly simple and involves using the color texture as a base and modifying it. This is yet another reason to keep the color texture in layers. Every type of material reflects light differently, so each area will have to be adjusted to reflect this. Very shiny materials like glass or chrome will have a very light color on the specular texture, usually white. On the other hand, matte materials will be defined by dark colors on the specular map. Pure black is to be avoided as having an area without any specular highlight will make it look very flat in the game’s engine because there will be no highlight to show off the normal map detail. These are the two extremes; the rest of the materials will have their specular color somewhere in between. There are no “standard” values, so the artist has to create this texture by trial and error. Unless specified by design or technical documents, the absolute value of the specular color is not as important as the general contrast of the map. One trick used to enhance the look of metallic textures is to change its specular to a color that complementary to the diffuse map. So here, a reddish specular on a blue color texture will give a nice metallic effect. Another good idea is to enhance the contrast of the small surface details on the specular map to make the specular easier to read. This is the case of the next image, even thought the noise in the texture might not be visible due to the screenshot’s resolution.
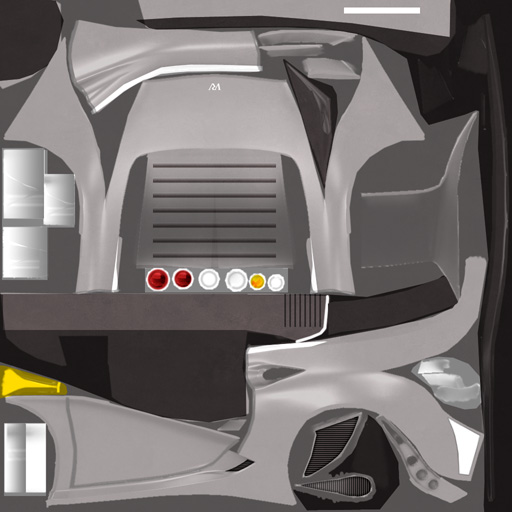 3. The Normal map
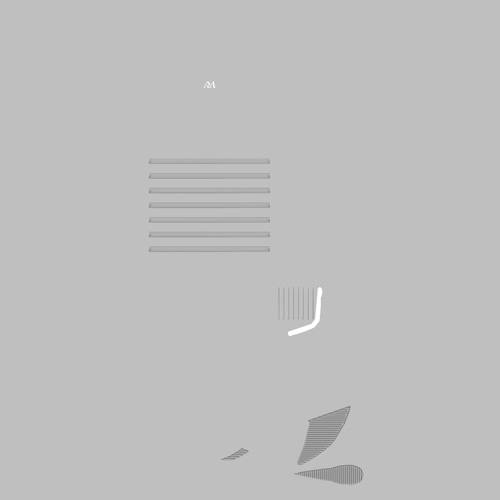
The normal map base is the texture generated in the last chapter. On top of this I will add the details that have been added in the color texture. To extract a normal map from the diffuse texture, there are two free programs that do the job well. The first one is nVidia Normal Map Filter which is part of the nVidia Photoshop Plugins (http://developer.nvidia.com/object/photoshop_dds_plugins.html). This plugin uses a height map to generate the normal map. A height map is easy to create by using the color texture as a base. Each pixel will have a grayscale value that represents its elevation. The lighter it is, the more elevated/extruded it is. This value is a local one in the sense that each pixel has its elevation defined in relation to its neighbors. A flat white height map will result in a flat normal map as there is no variation in elevation. Basically, the process of converting a diffuse texture to height map means desaturating the original layer and modifying it to better reflect the elevation of that area. This is the height map created for the exterior of the car:
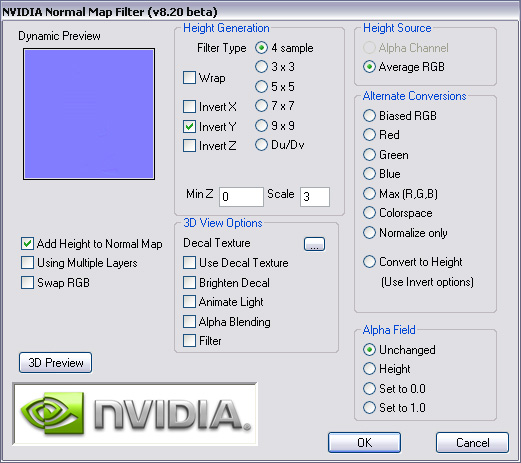
 Next are some hints about how to use the the Normal Map Filter in Photoshop. The settings explained here refer to the next image.1. “Invert Y” is necessary so that the normal map will be correctly displayed in Maya using the default settings.2. The recommended methods of generation are “Average RGB” or “Colorspace”.3. Experiment with the Scale value to obtain the desired depth for the resulting normal map.
Next Gen car – part 5
Popular Tutorials
-
 Free set of photo references for our members
Posted on Nov 15, 2010
Free set of photo references for our members
Posted on Nov 15, 2010
-
 Photo References
Posted on Oct 6, 2010
Photo References
Posted on Oct 6, 2010
-
 Modeling Competition
Posted on Dec 10, 2010
Modeling Competition
Posted on Dec 10, 2010
-
 Modeling a High Definition Building – part 1
Posted on Dec 9, 2010
Modeling a High Definition Building – part 1
Posted on Dec 9, 2010
-
 FREE photo reference sets for you – only for registered members
Posted on Oct 2, 2011
FREE photo reference sets for you – only for registered members
Posted on Oct 2, 2011
Try something new

Latest Comments