“Modeling a Jack Daniels bottle ” by Joshua Murphy
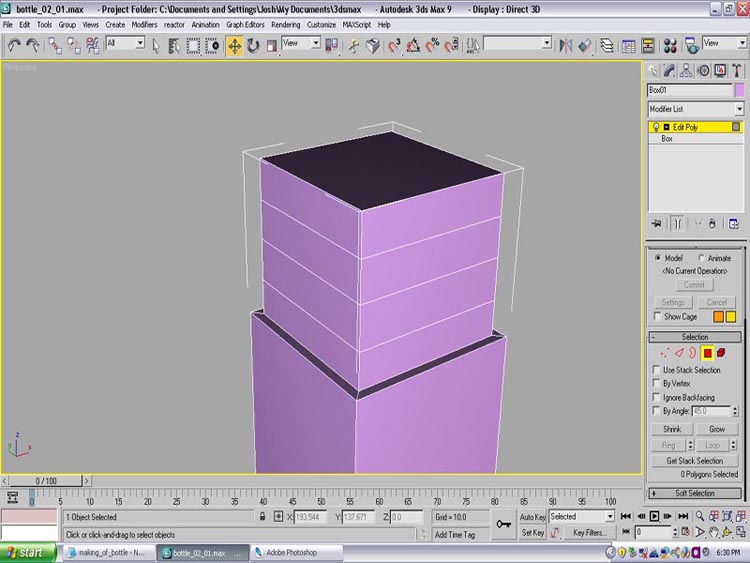
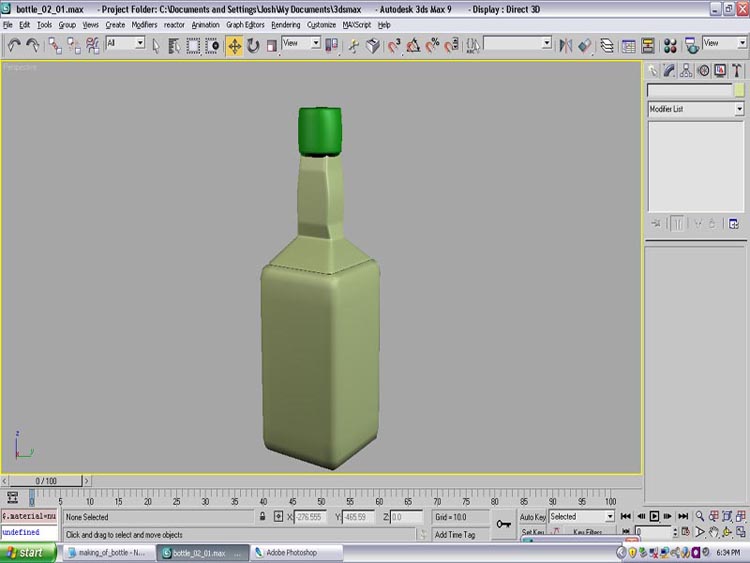
You should have something like the image below now.
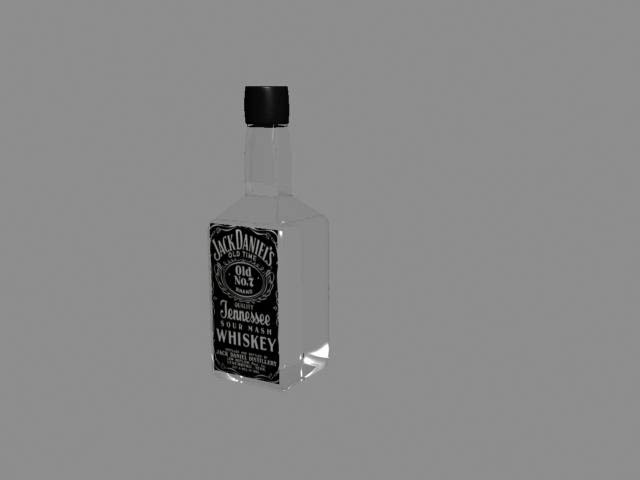
Next, we are going to move onto materials. Find an image of the label and save it to your hard drive.
For the glass material
Select a new Material Slot, make sure that both your Ambient and Diffuse colors are set to black. Set the Specular Level to around 250, and set the Glossiness to 50.
Next click the box beside the Opacity selection and apply a Falloff map from the Material Editor dialog box.
Set the Falloff type to Fresnel and leave everything else set to default.
Next, you want to go to the Refraction map and select the box next to it that says None.
Apply a Raytrace material, and leave everything else default.
Now, if you render you should be getting something close to glass-like. We still have a few more steps to complete to make our material look more realistic.
On your keyboard, hit the number 8. This brings up your Environment and Effects dialog box. In the Environment Map slot, apply a background image so the glass material has something to reflect. The glass material reflects it environment. I chose Mountains.jpg.
Also, another choice you can do is in the Material Editor, check the box to make your material 2-sided.
This helps with the realism.
Now create a rendering environment for the model.
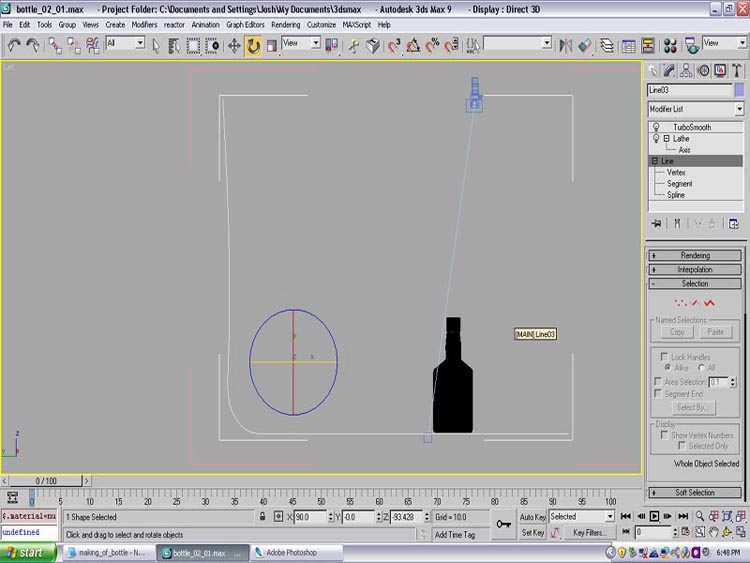
Create a line like I have below. After you create the line, you want to at a Lathe modifier to it, and make sure the it is at 180 degrees, and check the box named Weld Core. After that, apply a Turbosmooth modifier.
Set your “bottle” on the plane as if it were a table, find a nice view and render. Always make sure that when you render, you are in Perspective. If you are in User mode, your render will look weird.
Modeling a Jack Daniels bottle
Popular Tutorials
-
 Free set of photo references for our members
Posted on Nov 15, 2010
Free set of photo references for our members
Posted on Nov 15, 2010
-
 Photo References
Posted on Oct 6, 2010
Photo References
Posted on Oct 6, 2010
-
 Modeling Competition
Posted on Dec 10, 2010
Modeling Competition
Posted on Dec 10, 2010
-
 Modeling a High Definition Building – part 1
Posted on Dec 9, 2010
Modeling a High Definition Building – part 1
Posted on Dec 9, 2010
-
 FREE photo reference sets for you – only for registered members
Posted on Oct 2, 2011
FREE photo reference sets for you – only for registered members
Posted on Oct 2, 2011
Try something new

Latest Comments