“King Kong – part 2. ” by Dan LuVisi
Refining Kong’s Hair, Step 2: Threads
I can already hear the moans of painting hair, it’s a hassle but you cannot deny that it looks really nice once it’s fully fleshed out. It does, it’s what attracts the viewers to your image and this is why you must get it right. When I put this image on my website, everyone always asked “How did you do the hair, did you do it one by one?” Yes and no, and I’ll tell you now how to do it.
Now that you have your blocks patched in, make a new layer and call it Thread1. This is going to be your duplicate layer of hair. Use a size 3 hard brush for thick strands, and a size 1 brush for thin, knotty strands. Make sure you either have a low opacity and low flow or you have Pen Pressure on when painting his hair. I did it both, so I won’t tell you what to choose, this part of the tutorial applies for both differences. Can’t really explain this next step other than make thin strips of hair first, and then go over that patch with a tiny 1 brush as in the picture
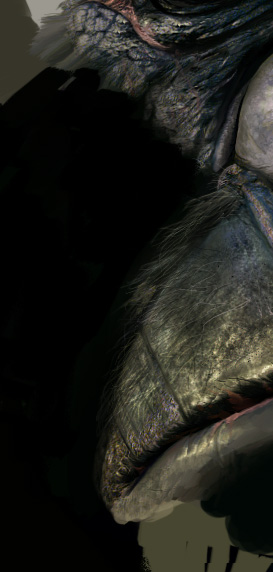
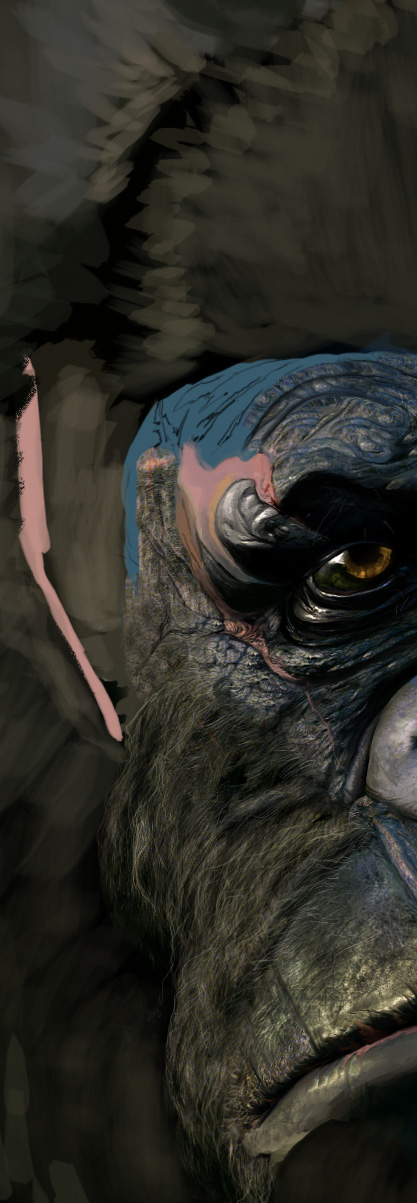
Once you are satisfied with your tiny patch, merge it with the other colors on Kong’s face (the color blocks for hair). After that, use the Magic Lasso tool to circle the hair, and Right Click and hit layer via copy. Make about 4 patches of it, all together, make sure also there’s no gaps in between them, then merge them all back into Kong’s face. This is where I was talking about applying the same topping, you’re going to use the Clone Tool to copy the hair and apply it all over his face. Select the Clone Tool and hold alt and select the hair blob (what you just created) and start to copy it all over Kong’s face. Don’t go crazy at first, just take it easy and go slowly as you can see in the other image,
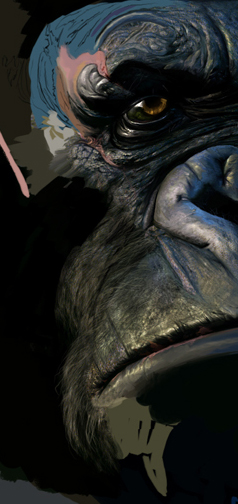
I already have my little patch of hair. Right now it doesn’t look finished at all, but that work comes later during the end. Make sure you get all around his face, and just block in that head with his mounds of hair. The same process will be done on the top, exactly how this one will do. Don’t use the clone tool and clone the patch on the side of his cheek, up on his forehead, it will look weird because of the direction. As I said, the same process can be done on his forehead exactly like the cheek although, just paint on a new layer, merge, cut out, copy, paste, copy, copy, merge, then clone tool it.
King Kong – part 2
Popular Tutorials
-
 Free set of photo references for our members
Posted on Nov 15, 2010
Free set of photo references for our members
Posted on Nov 15, 2010
-
 Photo References
Posted on Oct 6, 2010
Photo References
Posted on Oct 6, 2010
-
 Modeling Competition
Posted on Dec 10, 2010
Modeling Competition
Posted on Dec 10, 2010
-
 Modeling a High Definition Building – part 1
Posted on Dec 9, 2010
Modeling a High Definition Building – part 1
Posted on Dec 9, 2010
-
 FREE photo reference sets for you – only for registered members
Posted on Oct 2, 2011
FREE photo reference sets for you – only for registered members
Posted on Oct 2, 2011
Try something new

Latest Comments