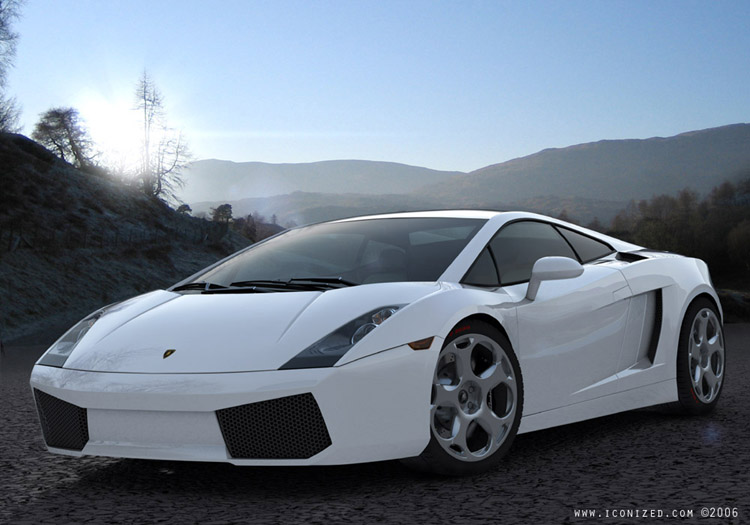
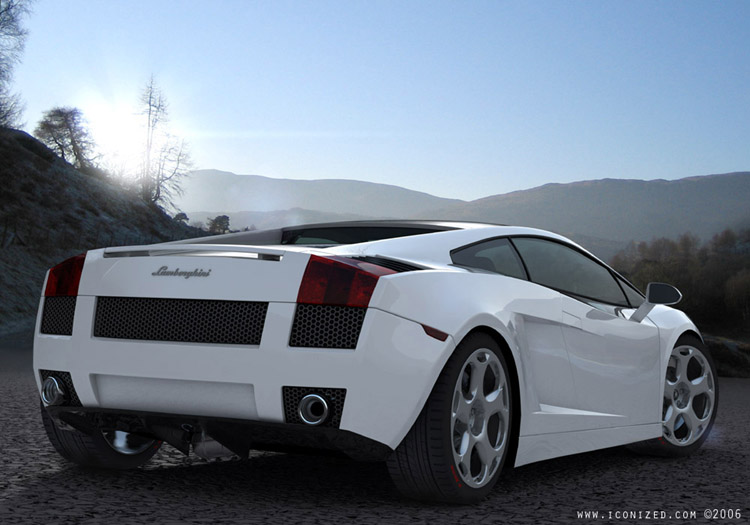
“Lamborghini Gallardo” by Simon Nuttall
Environment settings: firstly the map is assigned to the environment in the environment and effects roll out, but from here we need to specify how we would like the map to behave as an environment.The next step is to drag the map into a free material preview window slot at the top of the material editor (ensure it is placed here as an instance of the original map or it wont update the one in the environment) once this is done more options to control the map become available in the material editor. Our map will be by default set to an environment map but you need to specify the environment type a spherical, as this will then encompass the whole scene.Finally the output of the map is set to 1.5, this as it says increase the output of the map or in more simple terms the contrast where the light areas become lighter and the dark areas become darker. If you have your own image to experiment, with remember that using the u offset has the effect of rotating the image around the vertical Axis so you can control where then envmap is positioned with out having to move the camera or adjust the position of the objects within the scene to get the best look.

The Ground texture¨
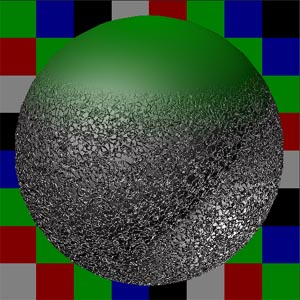
Creating the transparency fadeThe a gradient ramp texture is used to fade the texture out gradually to nothing from solid. Here’s how its done!
In the transparency or opacity slot of the materials editor place a gradient ramp material remembering that black is solid and white is transparent. The gradient ramp is a procedural texture and ideal for controlling where you want to have solid and transparent areas as well as nicely blending between the two states. One thing you also must do is assign a gradient ramp material to the specular slot, this will stop the material from showing any specular highlights where it is supposed to be transparent. Once you have set your transparency, copy the gradient into the specluar slot. I would recommend not using an instance of this as you may find you need to adjust where and how the specular tails on independently of the transparency.
![]()
The ground surfaceThe bumpy ground is a procedural texture made using a cellular bump map, it is possible to use a greyscale bit map to create the bump map but using procedural texture means you don’t have to worry about texture tiling or resolution. Although it can take a bit of time to set up just how you want it gives better results in the end, especially on very large renders. If every thing is working well then the gradient ramps in the specular and the transparency slots material should fade out into the back ground but this didn’t seem to be the case……. I initially though it may have been the IOR being rendered as the material didn’t seem to be working properly, the bumpy surface didn’t fade out:( but on checking this was set to 1 (which means no refraction) so something more was needed!! The bump map was also faded using a mask material which did the trick. The same gradient ramp as used in the specular slot was used in the mask and the material work how I intended it to eventually!!

(c) Simon Nuttall, www.iconized.com
Gallardo
5 comments
Trackbacks/Pingbacks
- 3D Tutorial- Lamboghini Gallardo | 3D Auto - [...] http://www.free3dtutorials.com/gallardo.php [...]
Leave a Reply
You must be logged in to post a comment.
Popular Tutorials
-
 Free set of photo references for our members
Posted on Nov 15, 2010
Free set of photo references for our members
Posted on Nov 15, 2010
-
 Photo References
Posted on Oct 6, 2010
Photo References
Posted on Oct 6, 2010
-
 Modeling Competition
Posted on Dec 10, 2010
Modeling Competition
Posted on Dec 10, 2010
-
 Modeling a High Definition Building – part 1
Posted on Dec 9, 2010
Modeling a High Definition Building – part 1
Posted on Dec 9, 2010
-
 FREE photo reference sets for you – only for registered members
Posted on Oct 2, 2011
FREE photo reference sets for you – only for registered members
Posted on Oct 2, 2011
Try something new

This tutorial is so good so i do not know which is the beginning sory for my bad englis im romanian
I love how realistic your Gallardo looks. I was wondering if you could take a screen shot of your car paint you used to make it so realistic. If you could post it on http://www.facebook.com/pages/Cambrera-Racing/143353462359880 that would be the best!
I want reference images .can you name the site to get to the reference images
Hello Karjun. We are always trying to bring you the best we can. Unfortunatelly, we are currently not able to send you reference images directly.
tutorial is very use full.i want reference images of this tutorial.can you send me images