“Female face ” by Dan LuVisi
Introduction: Welcome back, in this tutorial we’re going to go through the stages of painting a female face. I’ll teach you my method for some quick, but stylish hair strokes, eyes, skin complexion, lips, and a quick outfit to fit the female. For this one, I just used Photoshop CS 2. Alright, lets move on!
3Dtutorials.sk recommendation:
To maximise the realism of your CG character we recommend to use high quality photo references from the #1 reference website www.female-anatomy-for-artist.com
Step 1, Sketching in your character:
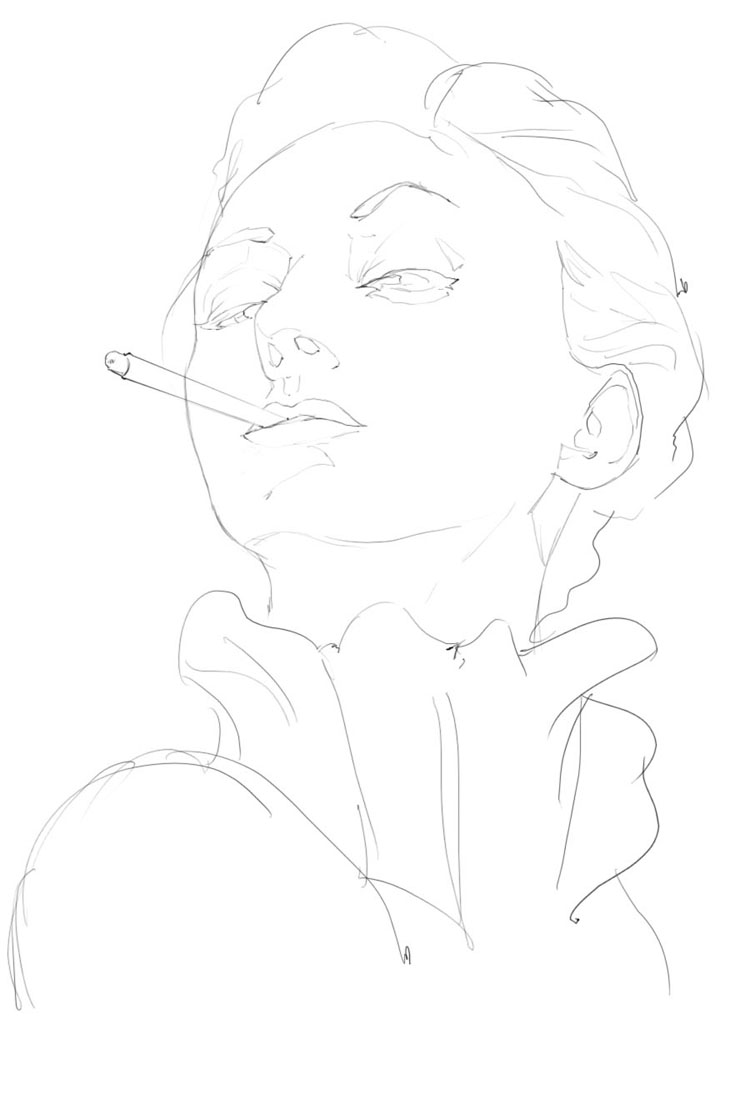
As we all know, this is how I always start and I also think it’s the easiest way to start off. By just laying down a basic sketch, as you can see in, I have my female figure. At first, I thought I’d give her that Cruella Deville from 101 Dalmatians look, but, as I progressed I took out the cigarette and gave her a more smug look. Basically, you can use reference if you want or you can just channel your own female look. I used reference for mine, since I can’t sketch females all so well…yet. Try to keep your lines very clean, almost as if you’re inking in a comic book page. Thin lines, nothing too bold and you can achieve something really easily. Simple is better, don’t make the figure too complex because you have to remember that females are soft, not hard shaped like males. The outfit is completely up to you, if you want something stylish, ugly, futuristic, its all really what’s in your head. For her I wanted to give a stylish 70’s style, European, fringed outfit, simple, but nice. As for her hair, all you have to worry about is just the basic shape of it, don’t go and make a lot of tiny threads and strands of hair, because it will make no difference in the end.
Step 2, Laying down the Background and Basic Colors:
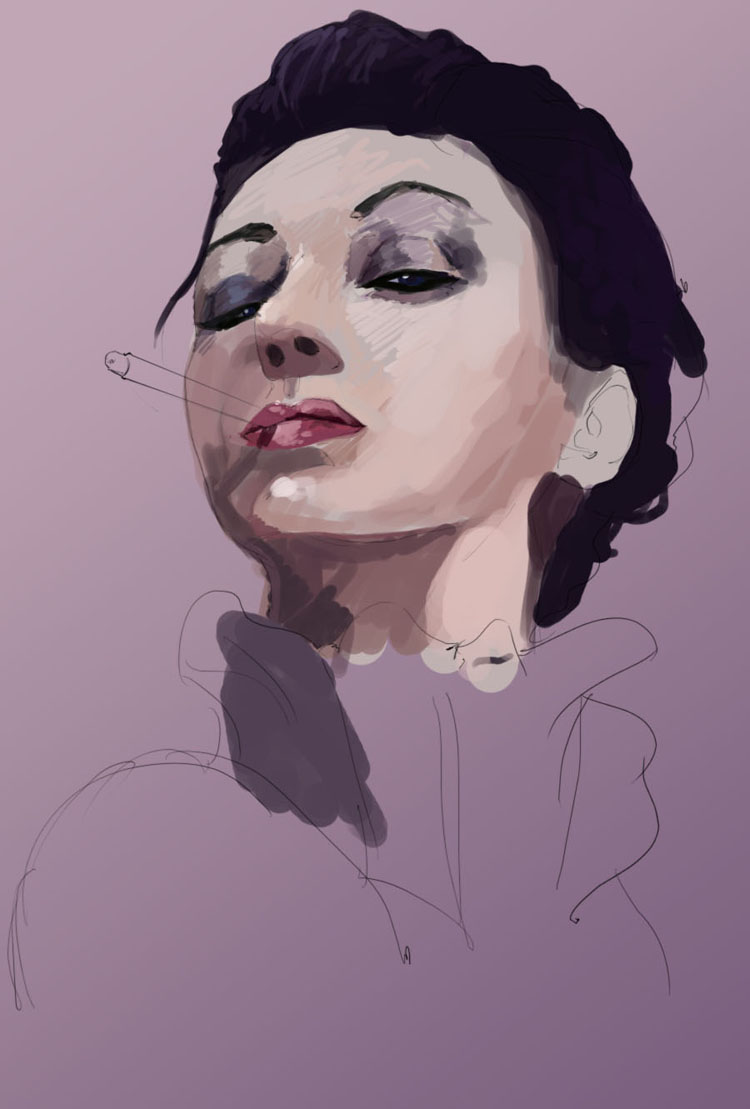
Now for portraits, I always do the same thing for my backgrounds. I use the gradient tool, which can be found in the toolbar and I just pick two colors and lay it flat on the background. For her, again wit the retro style, I just took too chalky pink/purple colors and used that as my background. Very simple. As we move on to the figures colors I always start off with the skin underlay color, which is just the basic flat skin color i’m going to go with. Then I go and paint in her hair, blacks, a few purples and so forth. I’m very OCD about not having something colored in; I kind of cooled down with not starting the shirt in. After I lay my solid colors down (Black for hair, Pearly Pink for skin, and so forth), I then start to paint over that with highlights and shadow differences. Just trying to block in my colors, especially the eyes which I always start on right after. I decided to give her some heavy eyeliner around the eyes so it’ll give her a more mysterious look. I’ve also gone and laid down some brighter colors on her lips, giving what will be my starting point for the highlighting there. Also remember to color the under shadow of her jaw as well.


Latest Comments