“Demon” by Ken Brilliant
This model utilized 3 different programs: Amapi 6, ZBrush1.5 and Lightwave 7.5. This tutorial will focus mainly on the Amapi portion of the creation process. Amapi has an unusual interface and workflow that may be awkward for some to get used to at first. Once you do though, there are some powerful tools and a fast workflow paradigm at your disposal.
This tutorial also illustrates how you can utilize the best features of different programs. There is no need to slavishly stay in one piece of software. For this character, I didn’t have a solid design in mind to start with. This isn’t usually the best way to proceed. A sketch or two can help out before starting.
3Dtutorials.sk recommendation:
To maximise the realism of your 3D creatures we recommend to use high quality animal photo references from the #1 texture website www.3D.sk
IN AMAPI:
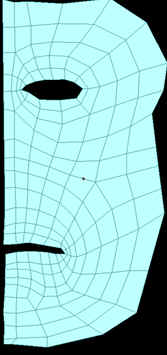
I just dove in. First, I used the polyline tool  to create a layout of the faces for the half the face of the character. I could have also done this with a drawing and imported it as a background image. This was done in the front view and kept 2-dimentional.
 Next, I used this polyline shape as a guide to create faces with the face extraction tool
  The edges of the polygons automatically snap to the points in the polylines. Return is pressed after each face is created, which were kept as quads.
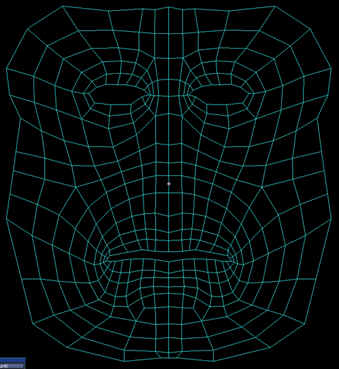
 Add a slice
 ![]() (Under the Tesselate options) is used to add some more geometry and the face are evened out with the Soften
(Under the Tesselate options) is used to add some more geometry and the face are evened out with the Soften  tool.
tool.
The symmetry tool ![]() is used to duplicate the other half of the face, and the weld tool
is used to duplicate the other half of the face, and the weld tool![]() is used to connect vertices in the center line
is used to connect vertices in the center line
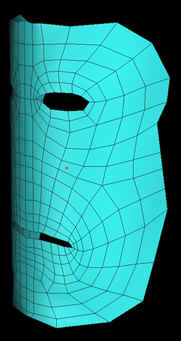
The cylindrical wrap tool ![]() is used to give dimension to the flat face. The +/- keys are used to adjust the percentage of the wrapping.
is used to give dimension to the flat face. The +/- keys are used to adjust the percentage of the wrapping.


Latest Comments