

I created these cubes for my photo manipulation (tutorial will follow in future). This tutorial is targeted for beginners and advanced users. We will begin the creation of cubes from the main object and work with “Cloner” and “Random” effector. Then create materials and a scene (lighting and objects reflection). At the end of the tutorial, I’ll tell you how to set render settings and create final image. Read this tutorial and learn how easy it is!
Short introduction for beginners. If you are already an advanced user then you can skip this.
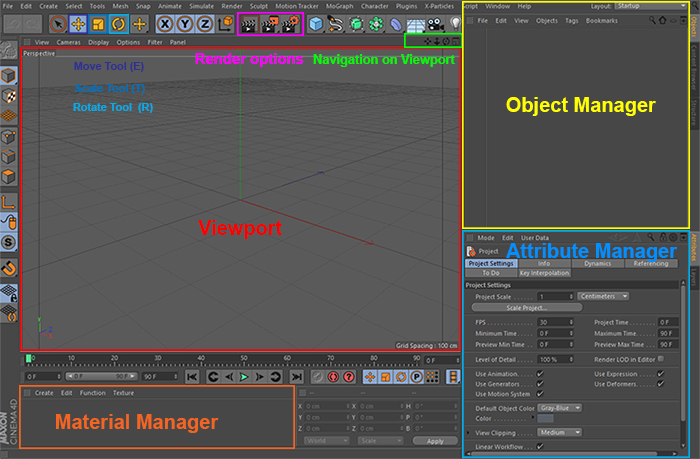
If you are a beginner you should not afraid! Everything is good. For frightening view of the program covered a powerful tool, and one assistant in the implementation of your creative ideas. Also, if you have difficulties, you can always open “Help” (Help > Show Help…) and find answers to your questions. Also, if you run the program for the first time and Viewport window are black, go to Edit > Preferences…. On tab OpenGL uncheck “Use OpenGL” it should help.

Navigation is very simple. At the Viewport’s upper right edge are four icons. If you click and hold on one of the symbols you can move or rotate the camera sideways or in the direction of view – independent of the currently active mode. The symbol farthest to the right is for switching the active view. Also you can use keys “1” to Move, “2” to Zoom and “3” to Rotate camera in Viewport.
Step 1
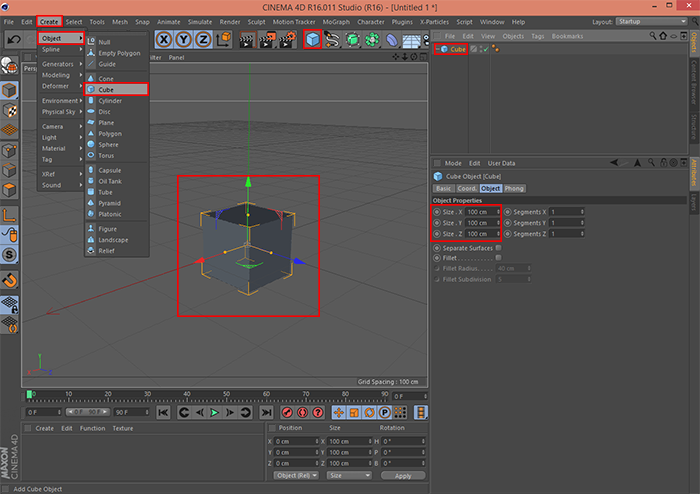
Let’s start with the main object. Add a cube object. Go to Create > Object > Cube or use cube icon on object palette. Cube a little big, so I reduce its size to 100 centimeters. In Attribute Manager (window in lower right corner) go to tab “Object” and change Size of X, Y and Z to 100 centimeters.
Step 2
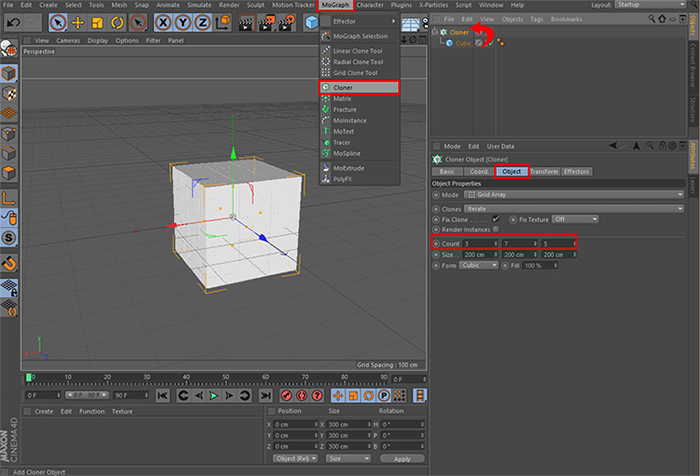
Create a large number of cubes by using a “Cloner”. Go to MoGraph > Cloner and put cube into a Cloner in Object Manager (Cube become a child of a Cloner). In the lower right corner is Attribute Manager. There we can change the properties of a Cloner. Change form a Linear to Grid Array. The value “Count” is the number of objects in each of the axes. It can be changed for each axis to a 3, 7, 5 respectively.
Step 3
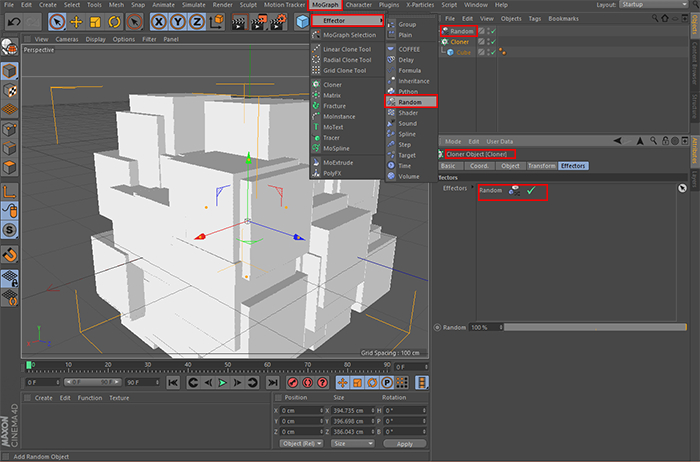
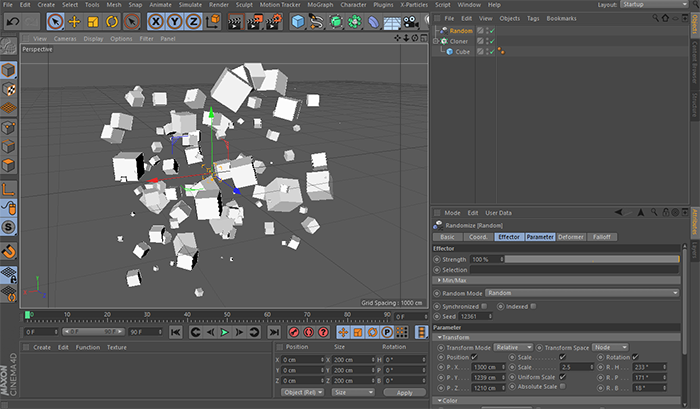
Add an Effector “Random” which makes moving cubes. Go to MoGraph > Effector > Random. By default, “Random” once applied to the effector (Cloner) but if that did not happen select a Cloner, go to tab “Effectors” in “Cloner” Attribute Manager. Grab “Random” effector and drag it to the effectors field. In my photo manipulation I used scattering cubes, but this is also looking very good and you can try to use this kind of cubes.
Step 4
In “Random” effector, in tab “Parameter” I change the “Position” to 1000 along all three axes, checked checkbox “Scale” and set “Uniform Scale” with Scale around 2 – 2.50 (change the value to make the cubes larger or smaller). Now you need to add dynamics. Checked “Rotation” and set 60 degrees to each axis. You can use other values to make the cubes more varied.
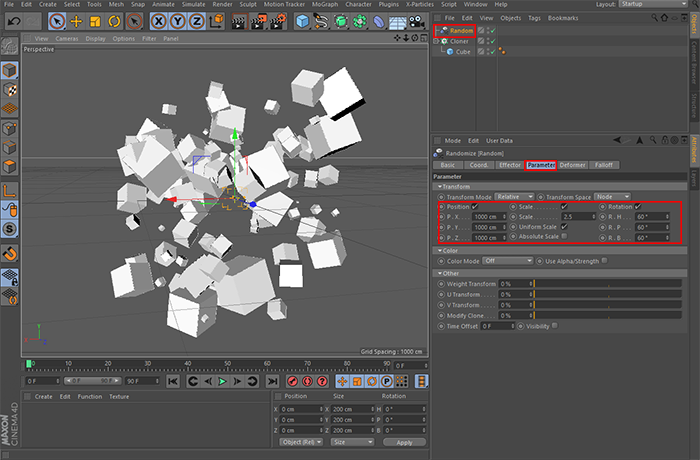
Play around with the settings “Position”, “Scale” and “Rotation” in “Random” and with “Count” in a Cloner to get interesting results. It is a creative process and every new value changes the picture. Also, if you need to change the appearance of “spreading” cubes (in case you need to change the location of a certain number of cubes) use “Speed” parameter on tab “Effector” in Random.
Step 5
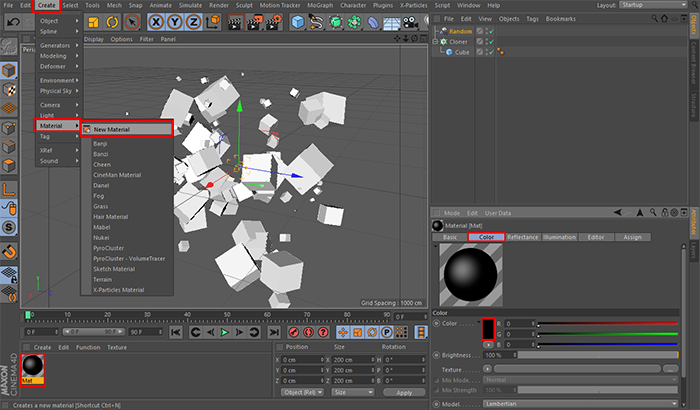
Now the material. Personally, I wanted to create a glossy black cubes for my photo manipulation, because they look stylish and not so difficult to adapt to the atmosphere of the image. Go to Create > Material > New Material. New material is shown in the bottom panel “Material Manager”. Double-click on it to open the properties and edit them. Checked checkbox “Color” and click on it. Set black color.
Step 6
To cubes were not as boring, you can add reflection. Go to tab “Reflectance” (be sure to check it). This part is a little different because I use CINEMA 4D R16 and some of the properties (in particular “Specular” settings) will be in other places in your version of the program. Press “Add” button and from list, select “Reflection (Legacy)”. Under the button will appear new layer “Layer 1” this will be a reflection. Click on it and go to tab “Layer Fresnel”. Set Fresnel: Conductor, IOR: 2.5, Absorption: 1.7. Move “Default Specular” over the Layer 1 and close Material Editor window. Grab the material and drag it to Cloner. Now in Viewport cubes become black.

Pages: 1 2


Latest Comments