"Ashoan" by Alexander Tomchuk
Hi, everybody who where interested in this tutorial, which is my first one and I hope you will like it. Through this tutorial I will try to explain the entire process of creating this particular image, from the first step to the final result.
3Dtutorials.sk recommendation:
To maximise the realism of your 3D creatures we recommend using high quality animal photo references from the #1 texture website www.3D.sk
About the image
First of all, I want to say that from the very beginning I did not thought about any scene, rocks, sunset and so on. Just wanted to experiment in different direction of art, cause I usually creating human characters. So I’ve stopped on the fantasy style and asked my friend Vladimir Kiselyov to draw a very fast sketch, unfortunately drawing of the character was lost and no digital copies where created. Once very rough model been created I was forced to suspend further development. Some time later I found this model in my library and an idea of image came to me.
Modeling
Usually I’m starting all my models from primitives such as box, plane, spline, cylinder etc. It allows me to keep polygon count under control. This is very important, because rendering and overall development time depends on it. So my advice, keep it as low as possible, remove everything you think is unnecessary. Less polygons – more control over the volume! Every time I starting the new model, I just open the sketch and all the helpful references on the secondary monitor and starting to create.

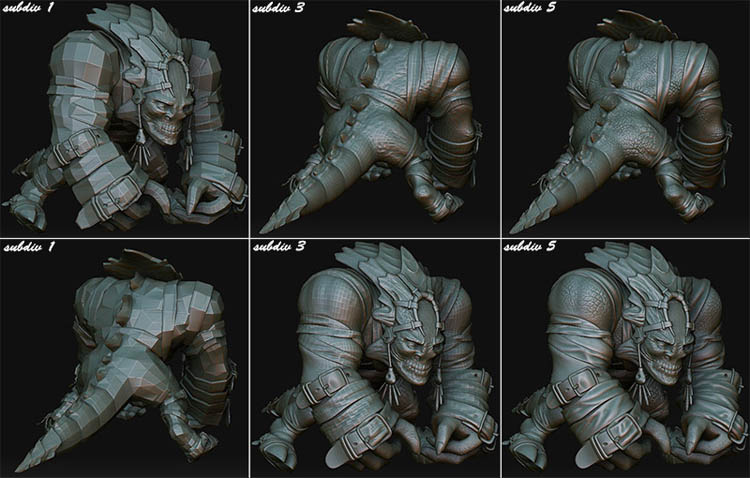
Sculpting
When the base model is done, it is time to add some more details. No need to unwrap model before exporting to z-brush on this stage. You can do it later. What I do, is just exporting the model without Turbo Smooth modifier on it. Then, even if you finished with sculpting, you always can export first Sub divide level to 3dsmax and change what ever you need. Then import it back in Z-brush over the first subdivide level. Just remember, you can not add or remove polygons. I decided to break up the character into manageable pieces (head, body, head belts, body belts). It is reasonable to do, every time you starting new character!
Skinning
After sculpting been done, I’ve exported modified first subdivide level from z-brush and proceed to rigging. I used Biped skeleton.


Latest Comments