“Afro Head Modeling ” by Jiri Adamec
TEXTURING:
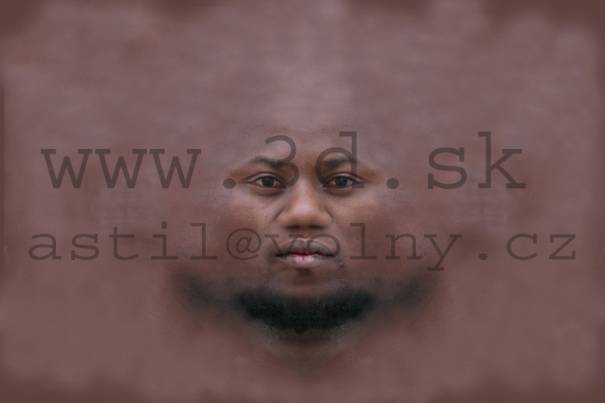
I used high textures from www.3d.sk. In this way I like to thank for this top textures because without them should be my work half.
Final created bitmap had separation 4800×3200. Then I adjusted texture for Bump, Specular, Specular color, Diffusion, Sub surface.
At adjustment of the basic texture (color) I manage with drawing-pen from Wacom and with functions Brush, Clone, Stamp, Patch, Dodge and Burn tool.
Firstly I insert created net and I used upon it Free pluigin Texporter. Secondly I pour out into the new layer basic colour. Thirdly I open front look at the black-man into the next layer and into the latest layer I open left look at the black-man.
I shift front look – it must agree with a reticular mesh. Then I shift left look – it must best agree with the front look. On the left look I erase redundant texture with rubber/eraser. In the place, where is the connecting line between both faces, I use rubber with soft hardness. Step by step I overlay the crossing.
This crossing is between both maps the most important. Therefore I at the left look adjust a colour funds and a lights reflections with the view of the connection without using of the Clone stamp the most real.
Finally I the both layers (with this sights) unite to the one and then I must do petty work with iron out of the connecting line; e. g. when I make a beard or improve the connecting line I use other photos of the black-man from the others angles – I sketch in the texure so that it look more real.
Then I make so called repeating texture. This texture I create with medley of differents parts of the skin from the face and I copy it on the top of the head, ears, scruff of the neck etc.
Step by step I repaint, make lighting or get dark the place where the maps overlay bad together.
If I am satisfied I make the mirror copy. Then I redraw the connecting line in the texture and I make – on this second half – the changes of the skin which I copied here from the other views of the textures.
I put together all to the one final layer and the basic (color)bitmap is finished
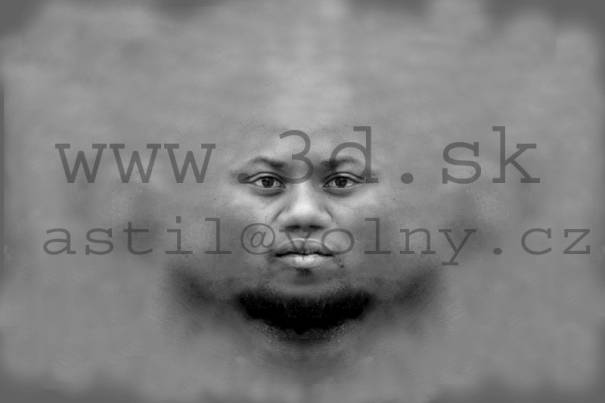
Now we pass to the others maps which I adjusted from the color map.
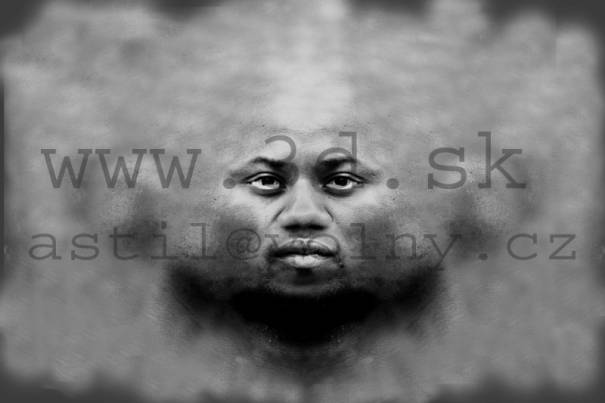
At first you can see the map Color, then Bump and Specular. At the adjustments Bump, Specularmap etc. I used (in the Photoshop 7) Brightness-contrast, Curves, Levels and Color Balance. The adjustment of the bitmap is completed for a several minutes. – Only at the Bumpmap I more contrasted a certain dermatic defects – so that it more excel – and I blur some parts around the eyes which I dont´t need there.
The general adjustment of this map isn´t so much diffucult not even for me – and I´m not so skilled 2d graphic designer.
Beard:
Shag fur: Rust and the next limitations are influenced with the map – I adjusted it from the previous maps. I must adjust it a lot of so that a beard grow punctually how I want.
Firstly I use function Inver and then I paint (colour RGB 0,0,0) those parts where the beard shouldn´t be there. I lighting and get darkness it still and I redraw the parts, where the beard are much regular. I use on it presetting/before regulating/ Wet media brushes – I adapt it a bit.


Latest Comments