“War Troll ” by Glen Southern
Using a heat gun to add detail
1. The theory
Super Sculpey becomes hard when baked. Big news hey! Ok, so what if you want to add a lot of detail to a specific area of your model and as you work you destroy the detail you have created in earlier modeling session?An example might be a head. To create a detailed head I create a couple of eyes and a few teeth then go to my oven and bake them off. 20 minutes later I would take the recently baked pieces and set them aside for cooling and a further 15 minutes later start adding them to the model. I could then use more Super Sculpey to model detail around the hard parts with effecting their shape. Useful in a hundred ways.
But, what happens if you need to do something like layering hair or fur on a figure? The process gets a little more difficult if you need to start putting the whole figure in the oven just to bake off specific parts.Enter the Heat Gun.

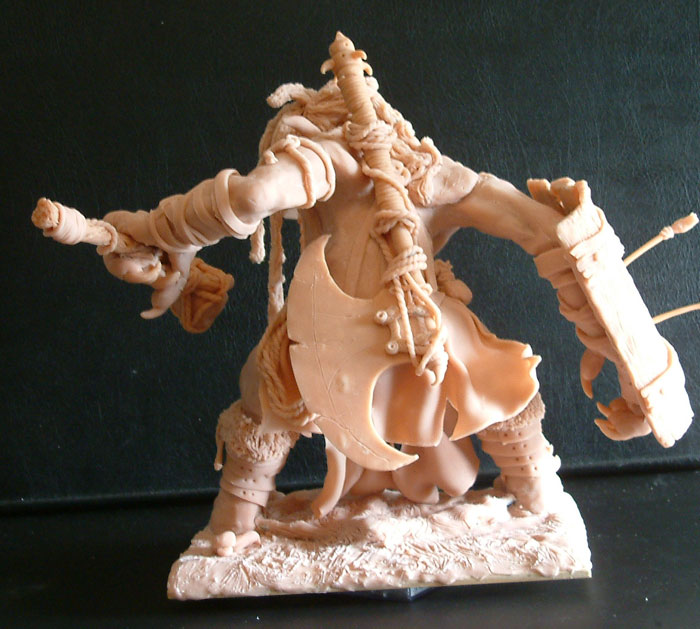
2. The War Troll
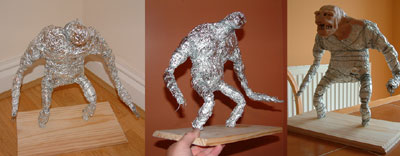
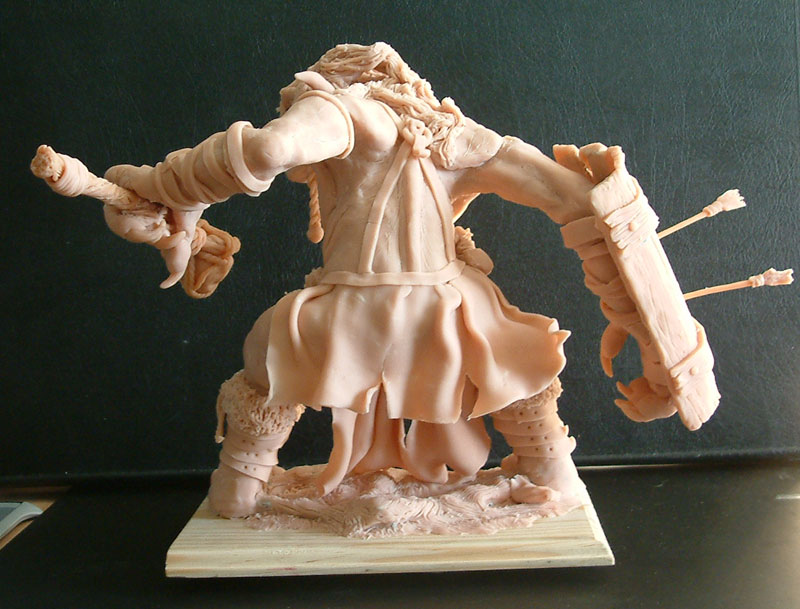
I wanted to model a full figure and decided to create a War Troll with heavy influence from the War Hammer universe. I started with a wooden base and built a wire and tin foil armature very much in the same way as my Minotaur was created.
 Click to go to the Minotaur Tutorial
I started this figure without reference material and just a rough idea of the stance. I wanted him to be a stooped Troll that was preparing to do battle. I decided that he would have Dreadlocks and I knew that this would give me the chance to try out the new Heat Gun that I had purchased for this very project.
3Dtutorials.sk recommendation:
To maximise the realism of your creatures we recommend to use high quality photo references from the #1 reference website www.human-anatomy-for-artist.com
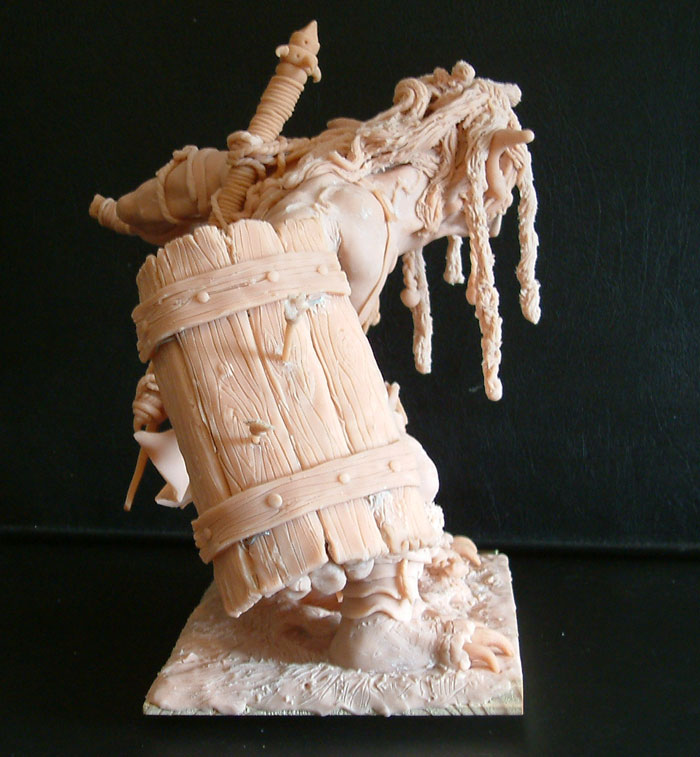
The Armature came together very quickly and it wasn’t log before I was layering on sheets of Super Sculpey to give him a thin skin layer. I modeled a stone headed club, a sheild, some arrows and a thin loin cloth. I put a base layer of hair onto the the head and down his back. I added a head at his waist, some leather belt strips and some shin armour. I pre-baked some eyes, tusks and teeth. claws and finger nail claws
 I did use the Heat Gun on a few of the areas shown above but for the purposes of this tutorial I will take you through the process from this stage. I took the model in its current state (shown above) and baked it in a standard, home oven for 10 minutes at 140 degrees C.
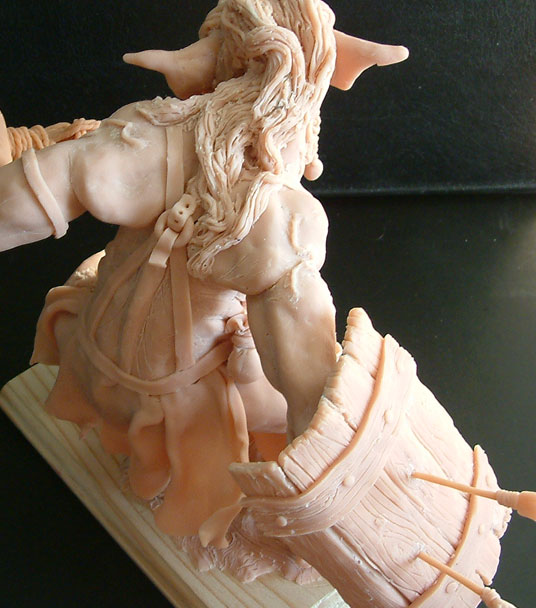
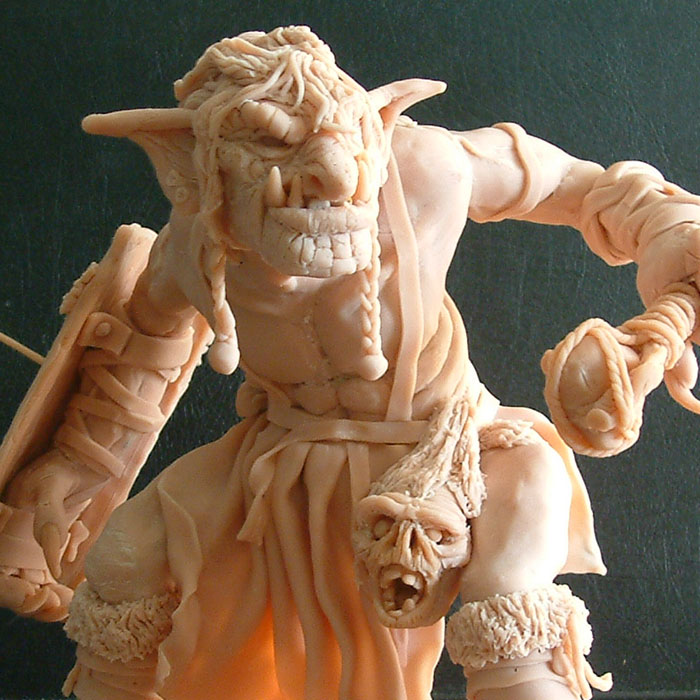
TIP: The book says…Bake Super Sculpey at 275°F (135°C) for 15 minutes per ¼” (6 mm) of thickness. Once the piece is cool, it can be painted with acrylics or glazed with Sculpey Glaze. Store Super Sculpey in a cool, dry place, away from direct sunlight. If stored properly, it will keep almost indefinitely. The images below show the War Troll Model after the first bake off..


3. The Heat Gun for Hair
![]()

1. Using my tiny hand drill (see above) I made a small hole in the top of the head.2. I cut a length of galzanized wire and inserted it into the hole. I then bent the wire to the position that I wanted the first Dread lock to hang.3. Taking a small amount of Super Sculpy I started to add long, thin strips to the wire, winding them around to form a hair like strand.

4. Once the bulk of the Dreadlock was in place I took a small piece of wire and used it to scrape the Sculpey into the tousled look of a Dreadlock. I made sure that the top end of the Dreadlock was smoothed into the already baked hair strands on the top of the head. I find that this helps give stability to add-ons-parts and improves the overall structure of the model once baked.

5. Once happy with the first Dreadlock I took to the Heat Gun. Using the Gun I started to heat up the Sculpey that formed the Dreadlock.TIP: BEWARE! It is every so easy to scorch the model at this stage. Keep the Heat Gun moving all the time. Pass it back and forth along the area without remaining still at any one point. Very quickly you will find that the Sculpey has hardened in the heated areas.
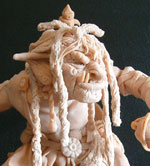
6. I carried on adding Dreadlocks to the model and heating them up to harden them as I went along. The main advantage in using this method is that you won’t mess up areas of sculpey underneath the new area. It makes the process a great deal quicker and really does allow you to add more fine detail to your models.I carried on and added lots more detail in this way including a battle axe, lots of rope, belt buckles etc.
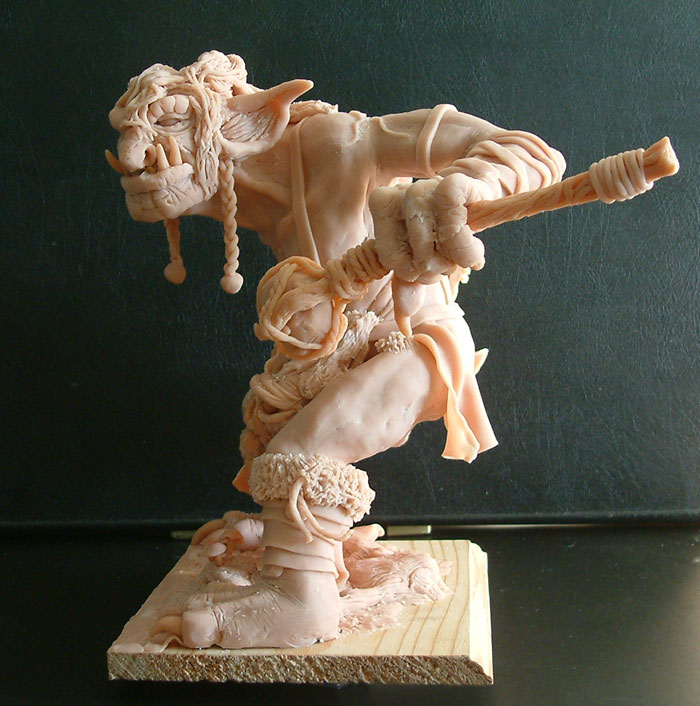
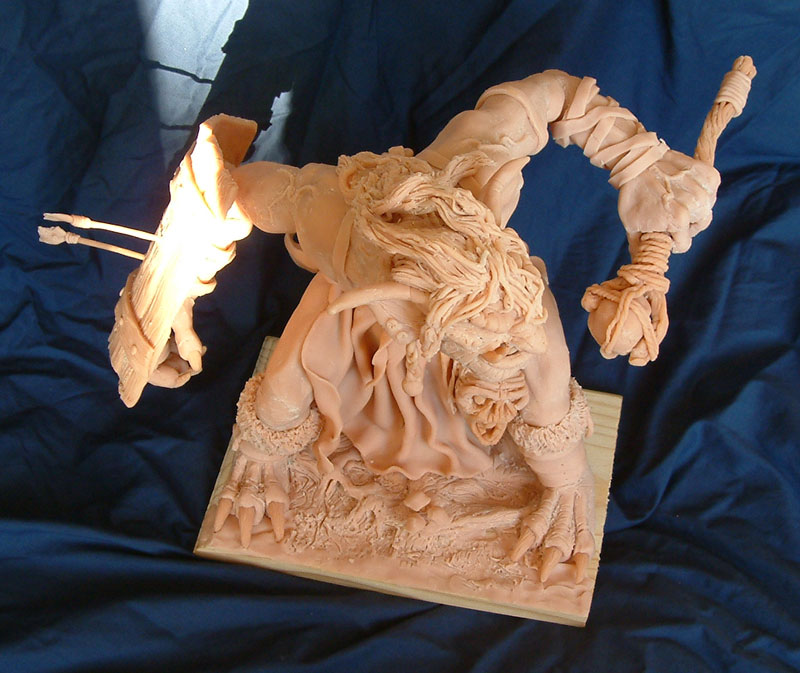
4. The finished Troll


(c) Glen Southern, glen@southerngfx.co.uk


Latest Comments