“V-Rex” by Dan LuVisi
1. Now we start off with an idea. Something simple, don’t work too big of a canvas. Width:500 Height: 900 should suit you well. Now the whole thing is getting that perfect setup for what you want. Don’t ever do a straight on view, do something from the ground up or a birds eye view. You want to be thrown with the two main creatures here, not watching from the ground. You also need to put character into these characters, I didn’t want Kong kicking the V-Rex’s butt, tyet I wanted to show you how he puts his own life before Anne’s.

3Dtutorials.sk recommendation:
To maximise the realism of your CG creatures we recommend to use high quality animal photo references from the #1 reference website www.3D.sk
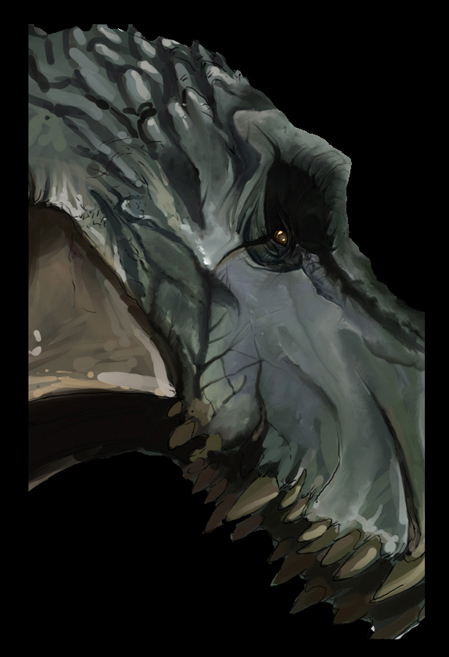
2. The first thing I wanted to start on was the V-Rex. It’s kind of a mix between different crocodiles and a t-rex. So first we start off with just a simple sketch, something to get you used to the character. I usually start one layer of a scrible of it, then put another layer on top, reduce the scribble layer’s opacity then sketch ontop of it. The breakdown would be this:
-Beef up the resolution of the small sketch (usually around the 1000’s)
-Make a new layer over the over-sized sketch
-(Ctrl+ALT) a white color into the whole layer (the new one you created over the scribble
-Over the white layer, make another layer (this will be your detail layer)
-Turn the Opacity down on the white layer to around 60% And start to detail


3.So here we are, laying down the basic colors for this bad boy. This is what I do, I first select my normal colors that I want, something greenish. I do a straight color over, underneath the Sketch layer. Creating a new layer and setting the Sketch layer to multiply. After I set my basic color and color in the trex. I then start with darker color for the shadow, flabs of skin, his eye and highlights. I set the brush sometimes to Flow, this can be done by going to the Windows tool bar, then Brushes, then going to Other Dynamics at the bottom and switching the CONTROL to FLOW. Set it to 35-45, and brush softly to combine the colors. Not much to this step but what I said, so more will be told on Next step.
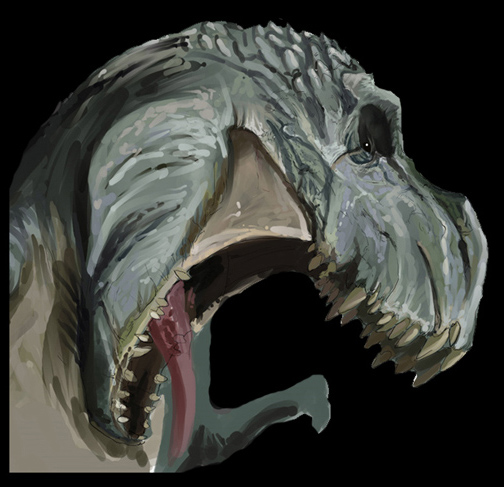
4.This is where the fun begins. It’s all quite simple. Just smudge as if you were mixing real colors with the Smudge tool that is listed above in my Tools selection. The hard part is just making it creative, for the V-Rex I added scars, some old school battle marks, dislocation of bones under the skin, scratches, loss of teeth, etc. Nothing too crazy, but nothing too obvious or out shadowing of the original picture. Now one of the key things you need to do is Connect and Merge the two layers. Which are the Sketch layer and the Original Color layer. After this, is when you can smudge together the two of them, to get what I have.
Pages: 1 2


Latest Comments