
By popular demand a simple carbon-fiber tutorial of my vexel technique. Enjoy.
Step 1
Making the carbon pattern. Save this tutorial image and open it in Photoshop and follow the instructions above. Carefully select this small 8 pixel square (belowú, then got to Edit > Define Patter. A dialog will appear where you can save this as a pattern which you will use later to fill a selection. Save it as Small Carbon or something you’ll remember.

Step 2
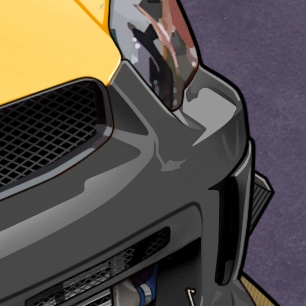
Here I’ve colored the front bumper on a separate layer using standard vexel techniques.

Step 3
Desaturate the layer (ctrl +U) removing all the color. Then create a new layer above this greyed out bumper.
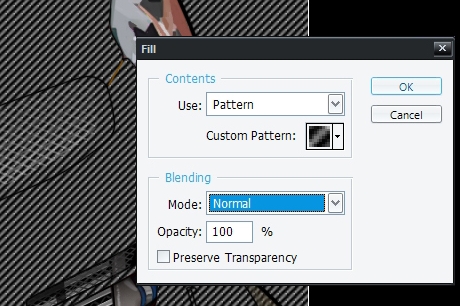
Step 4
Use the marquee selection tool to select an area that surrounds the entire bumper.. Then go to Edit > Fill> Use Pattern as the fill type and select your new Carbon Fiber pattern. Set the mode to Normal and click OK.
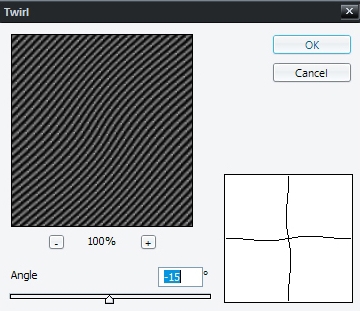
Step 5
Go to Filter > Distort >Twirl and create a slight distortion that works well with contours of your bumper or hood. This is an optional step for no distortion, just skip it.
Step 6
In the Layers Palette, CTRL+Click the grey bumper layer to select its content. Then go to Select > Invert to invert the selection. The use the Delete key to erase the surrounding pattern.
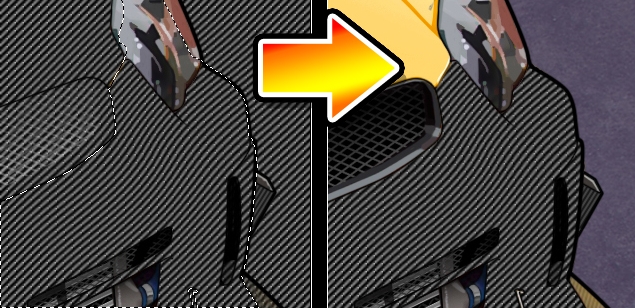
Step 7
In the Layers Palette, Set the Carbon Fiber Layer’s blending Mode to Overlay – looking pretty good – almost there.
Step 8
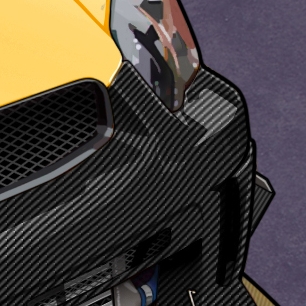
As a final step I duplicate my greyed out bumper layer and place it above my Carbon Fiber layer. Then I adjust the contrast (Image > Adjustments > Brightness Contrast) so that its very close to pure Black & White tones. Then I set this new layer’s blending mode to Screen and adjust its opacity to where I think It looks nice and glossy.

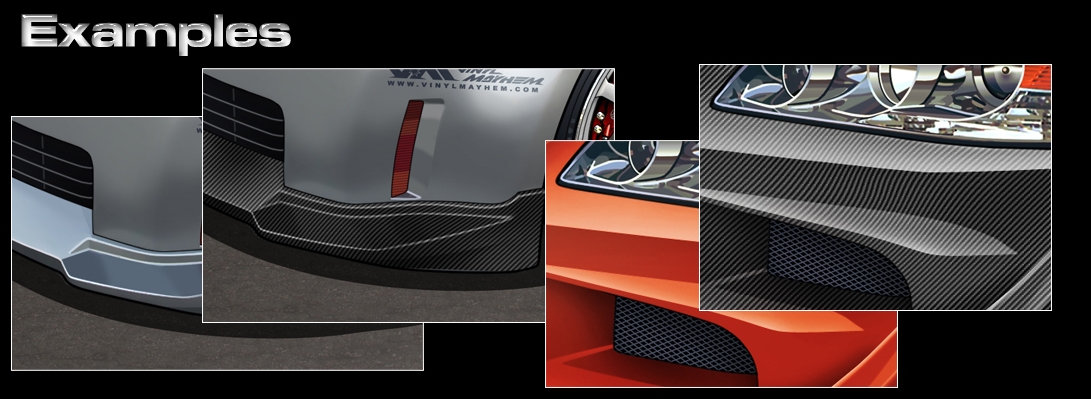
Examples of how it might looks
To get more texture for Vehicles, we recommend visiting www.environment-textures site.


Latest Comments