
 gmail.com
A person who loves drawing (since she was 3 years old). Her unique style of traditional anime drawings have made her artwork instantly recognisable. Favourite tools: Colour and mechanical pencil.
I promised to submit a step by step work with explanation and here it is. It is a tutorial of Ghost Petal work.
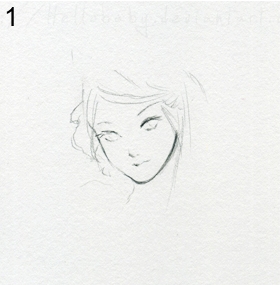
Step 1
I start to sketch the face on the paper. The paper is a bit rough and it’s A4. Tools I use for this work are mechanical pencil 0,5mm, a rubber, ball point pen 0.1mm & skin color pencil of Faber Castel
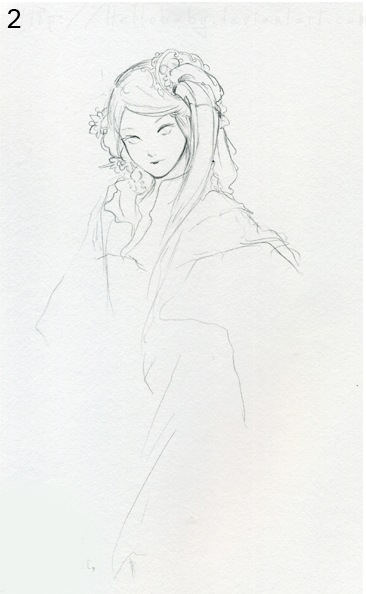
Step 2
I sketch the head & the shoulder. The shoulder may look down atm but I want to make her dress slips down bit , that’s why I draw it this way.
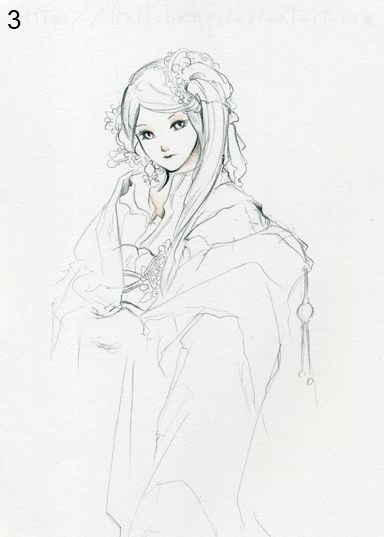
Step 3
I add some more details for the top, also her eyes & some shadow (by press the mechanical pencil a bit harder). I use skin color pencil to give little touch for her face.
Step 4
Her hand was drawn and you can see her shoulder, I add 1 more line to see her arm more clearly now (and give shading for it).

Step 5
I shade her hair/under dress & giving more pattern for it. I use ball point pen for few little lines around her head and little line under the hand.

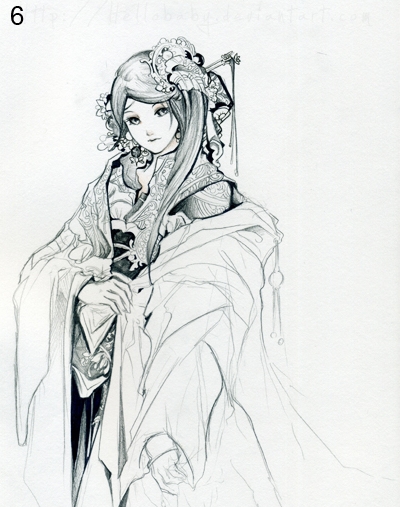
Step 6
I use ball point pen to bring out some needed parts such as you can see the sleeve, ornanments, etc… I sketch the right hand & dress.
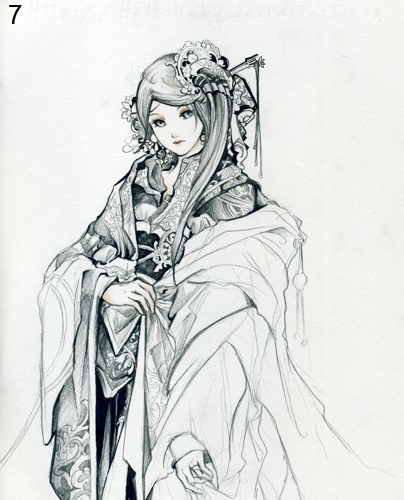
Step 7
I draw more patterns/shading for left sleeve & draw main line of right hand/sleeves. Use the same color pencil just now for her left hand. Give a little more touch for her lips.
Still want more details?
Step 8
Sketch patterns & add color for right hand.

Step 9
Shading & using ball point pen at lower part.
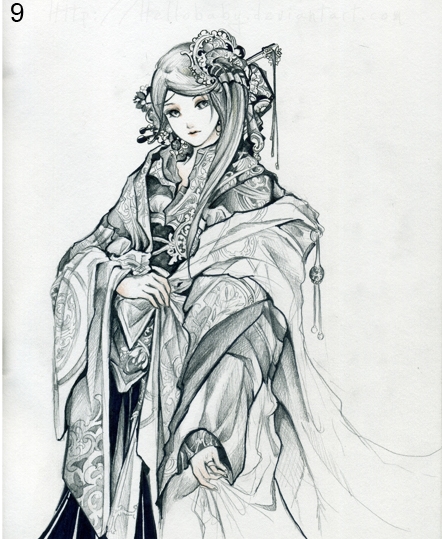
Step 10
Shading & using ball point pen at lower part.

Step 11
Adding the last detail for her coat & start some flower at background.
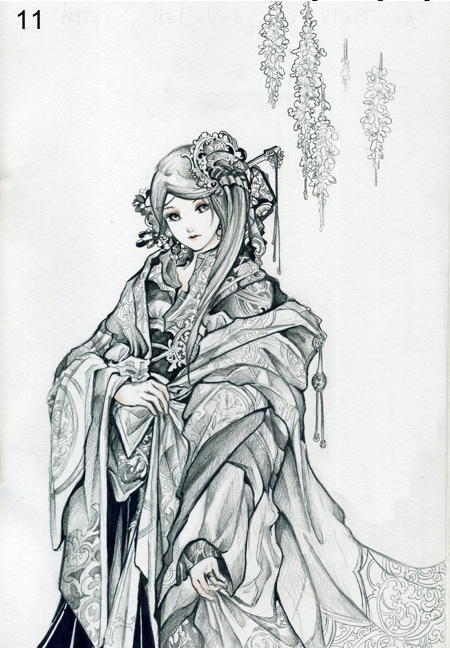
Step 12
Adding the last detail for her coat & start some flower at background.
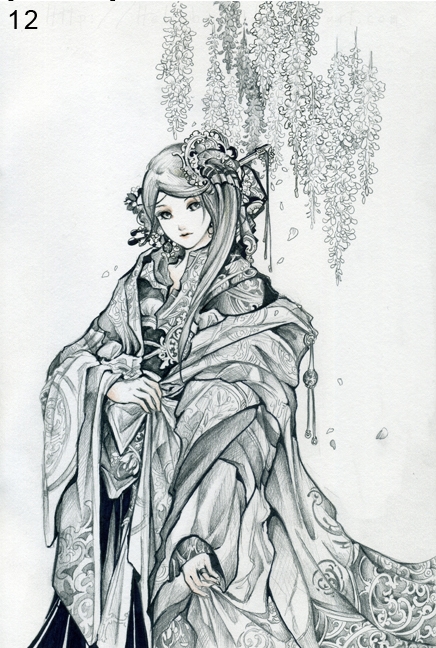
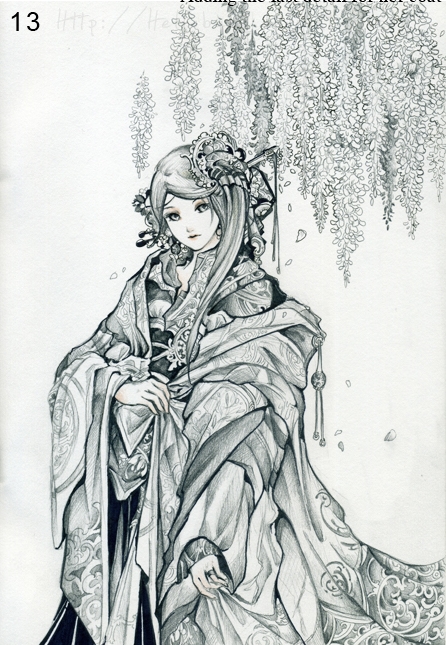
Step 13
I start to give more shading for the flower at bg & add some more falling petals. I recognize her right eye is a bit up.( yeah I usually make mistake on my drawing XD) therefore I edit it ( by using ball point pen to make it a bit bigger, cover old lines.
Step 14
I start to give more shading for the flower at bg & add some more falling petals. I recognize her right eye is a bit up.( yeah I usually make mistake on my drawing XD) therefore I edit it ( by using ball point pen to make it a bit bigger, cover old lines.
Step 15
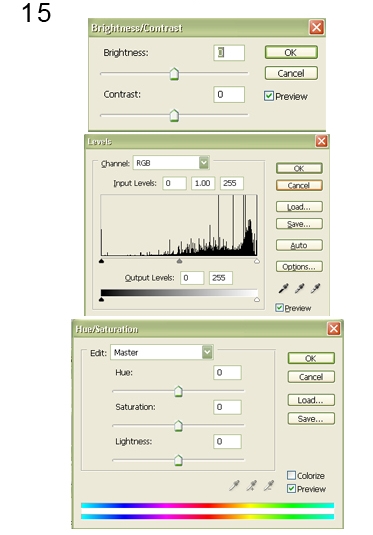
I go to photoshop (I use CS2) & use brightness/contrast & levels (Ctrl+L) to make picture look brighter and darker ( just a bit cause if you use much, it will eat all details). After that I go to Hue/Saturation (Ctrl+U) to change color a bit for fun cause I like it. Also I use PS to add watermark. Beacuase I don’t tear out the paper og my notebook therefore while scanning it may looks rough & dirty sometimes. Sorry.
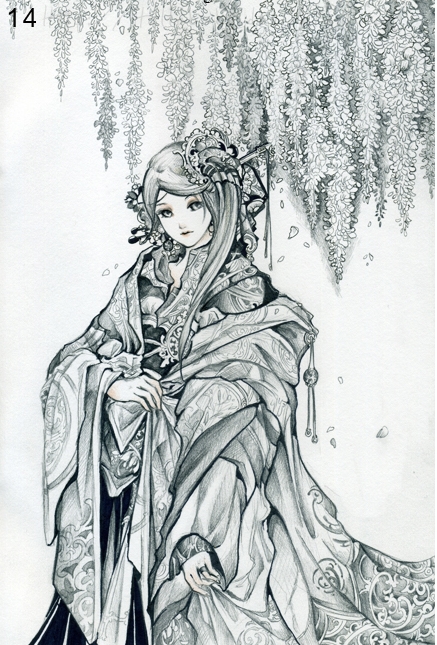
Step 16
And there is the finish version. I hope you can find it help out a little bit dears. Thanks for looking <3

To get more texture for your drawing, we recommend visiting photo-reference-for-comic-artists site.


Latest Comments