“Simple game rigging” by Sean Hewit
This tutorial is for people that already know a little about rigging. I won’t cover everything here.
The goal of this tutorial is to show you how to make the most simple of simple game rigs. This set up is by no means perfect. What it is though is very simple to make, and it will cover the basics for those of you not completely familiar with rigging just yet. In making rigs your goal is rarely ever to make it perfect.
3Dtutorials.sk recommendation:
To maximise the realism of your 3D animation we recommend you to see motion videos from www.3D.sk
Your goal is to get it to do the job needed as quickly as possible. Some times this is per a shot or per an action even. While this rig may not be the easiest to use necessarily, it does the job for animation as well as teaching you in this case.
Remember. I don’t have all the right answers. Often there isn’t just a single right answer. The right answer is what ever works. The best I can offer is suggestions towards solutions.
Skills we will cover in this tutorial:
How to set up your file
Joint Placement Procedure
Orienting the Local Rotation Axis (LRA) of joints.
Positioning and Displaying selection handles.
Skinning procedure
We’ll start off using this model. You can download a copy here if you like to follow along. There is also a finished rigged version you can download at the end of the tutorial to see the results.

I usually start off by making sure my model is set up the way I like. While this isn’t something you don’t have to do to make a rigged character, these are steps I find help. You can see my model in this case is symmetrical. The edges down the center line right up, and I’ve centered the model along the Z axis. I’ve also put the feet to the origin of the Y axis. I’ve scaled the model to the size I want it as well. These few steps can make things easier in the long run.
I’ll start off by making 6 joints up the center of the model in the Front view starting at the hips. I’ll grid snap these in X. As a rule when I place joints I never rotate or scale them into place. I only translate them into place. This ensures I have a clean rotation and scale when I start skinning and can easily reposition everything back to 0 and back into the original bind pose. If you had rotations on the rig when you started skinning, if you ever need to get back to the bind pose for some reason to make adjustments, you would have to know what position those joints were originally in when you first skinned.
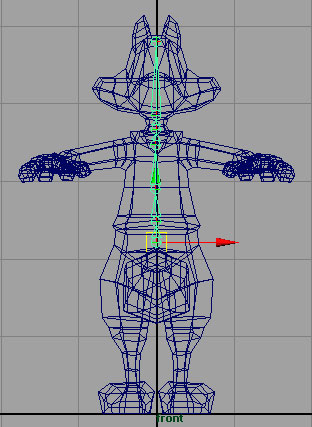
Now don’t think I just randomly decided 6 joints were a good number of joints. These joints were chosen and placed specifically. Starting in the center of the hips I place one joint for the Center of Gravity (COG), then one right above that for the twisting of the hips. The next one up is for the twisting of the torso. The one above that for the base of the neck and shoulders. Then one more joint for the neck, then the base of the head and then we end at the top of the head.

If this was a more complex rig, with a more realistic spine and IK, I would make it sCurve like a real spine would. But since it’s FK I’m going to keep the spine straight from the sides. This will make it easier to twist the body while animating. If we had a sCurve spine, if we twisted the torso in X it’d twist the body at an angle, tilting it back at the same time.


thanks,nice tut.
Is there any other way of fixing LRAs than using script.
Thank you.