“Removing eyebrows from V2” by Glen Southern
WHY DO THIS TUTORIAL
This tutorial uses a Mesh figure called Victoria 2 from DAZ 3D. By the end of this tutorial you will be able to export a Victoria 2 head from Poser that has no eyebrow or eyelash mesh visible.
3Dtutorials.sk recommendation:
To maximise the realism of your 3D rendering we recommend to use high quality human photo textures from the #1 texture website www.3D.sk
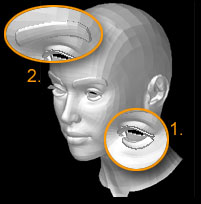
Why would I want to do that?In Poser, eyelashes are created by applying a transparency map to solid geometry(1). The transparency map has white and black areas painted on it, the black areas render transparent and the white areas render with colour.In ZBrush, although it is possible to hide parts of a mesh with an alpha map or even use transparency, it’s just easier to remove the eyelash mesh altogether. The eyebrows on an exported Victoria mesh are not required so we will also remove them (2)
ALTERING THE MORPH DIALS TO REMOVE THE MESH
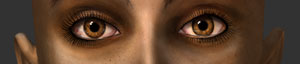
– Open Poser- From the FIGURES menu (Rightside of the interface) load a copy of Victoria 2, usually found in the DAZ People directory if you have installed her as per the DAZ default.- A close up of the face shows us the heavy colored eyebrows and the mesh eyelashes/-Click onto the head to select it.-Morph dials appear for the head to the left of the screen
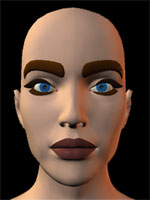
– Scroll down until you find ‘LashLoStraight’- Change the parameters (Using the wheel) to around 0.9You should see one set of lashes recede into the head- Scroll down until you find ‘LashLowFull’- Change the parameters (Using the wheel) to around -10You should see the second set of lashes recede into the head Mesh around with these settings as they may differ on your machine.
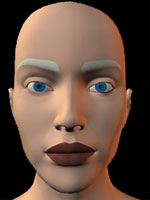
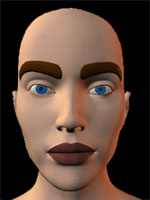
– Locate the dial that says ‘Brows Gone’- Scroll the dial to 0.800![]() You will notice the raised eyebrows recede and vanish into the head leaving the color that is taken from the current texturemap
You will notice the raised eyebrows recede and vanish into the head leaving the color that is taken from the current texturemap
EXPORTING AND IMPORTING (skip this if you are familiar with ZBrush importing features)
As Victoria 2 uses two texture maps (One for his head and the other for the body) you will have to export from poser in two parts. If you try to export the whole body and texture like that ZBrush writes two textures at the same time and we don’t want that.Presuming that you have the Victrio OBJ already loaded in Poser use :FILE>EXPORT>WAVEFRONT OBJ
The next panel is a Hierarchy giving you check boxes with all the body parts.  1. Uncheck all boxes except the HEAD box. Then export the file as V2HEAD.OBJ
IMPORTING INTO ZBRUSH
Importing meshes into ZBrush achieved with the help of a `POLYMESH TOOL`.
-Launch the application and look for the TOOL panel (usually on the right-hand side of the screen). -The `POLYMESH TOOL` is the little star shape shown in the image opposite. If you can`t see it at first `click` into the biggest of the tool windows and a `popup` window with give you a selection of TOOLS to choose from. `Polymesh` will be there.
-Once selected this tool gives you a range of options that the other tools don`t provide.
-Go to `INVENTORY` then `IMPORT`
-Use the import dialog to locate `V2HEAD.obj` and select it.
-The mesh will be imported and you should see a small image in the tool window where the `star` was.
SMOOTH THE MESH

To work on the the Victoria 2 head mesh in ZBrush adjust the SMOOTH slider to give a smooth looking mesh. This is not effecting the actual geometry of the head it is simply using subdivision surfaces to render a smooth image to the screen.If you have the head selected in the tool panel you will find the SMOOTH slider under TOOL>MODIFIERS>SMOOTHYou can also increase the SUBDIVISION SURFACE RESOLUTION (between 1 -30) this controls the number of polygons used to render the image to the screen. Again, the mesh is unaffected.
(c) Glen Southern, www.southerngfx.co.uk


Latest Comments