written by Lee Johnson
I created this tutorial after reading “How do I animate a pin art desk toy” in issue 106 of 3D World. It also reminded me of the really cool video for Nine Inch Nails’ “Only”. However the tutorial was setup in Maya, so I decided to take a crack at it in 3ds Max. This tutorial was the inspiration for the other two Pin Art Tutorials on this site. As I state later in the tutorial, this can be setup with any B/W image or video clip. I am just using a procedural texture to make things easier. I’d also like to give a big thanks to Anton Vasilescu for writing the MaxScript for this tutorial. You can find more of his scripts at
www.75ive.com
DOWNLOAD SCENE FILES
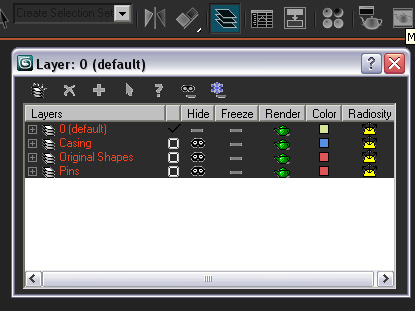
01. Alright, so we are going to start off with the model from Step 42 of the Modeling tutorial, or download the file on this page and open Pinbox.max. First we are going to do a little file cleanup. Goto the Display Panel and hit Unhide All. Now goto your Layer Manager (looks like sheets of paper, just right of the Align Tool). In the dialogue box that opens use the button at the top left to create 3 layers. Name them Casing, Pins, and Original Shapes. By selecting the appropriate object, and highlighting the layer and hitting the Plus button, you can assign objects to each layer. After all geometry has been assigned, you can toggle the Hide icon to turn off whatever you want in the scene. Activate the checkbox next to Layer 0, and Hide all other layers to give you an empty scene to work with.
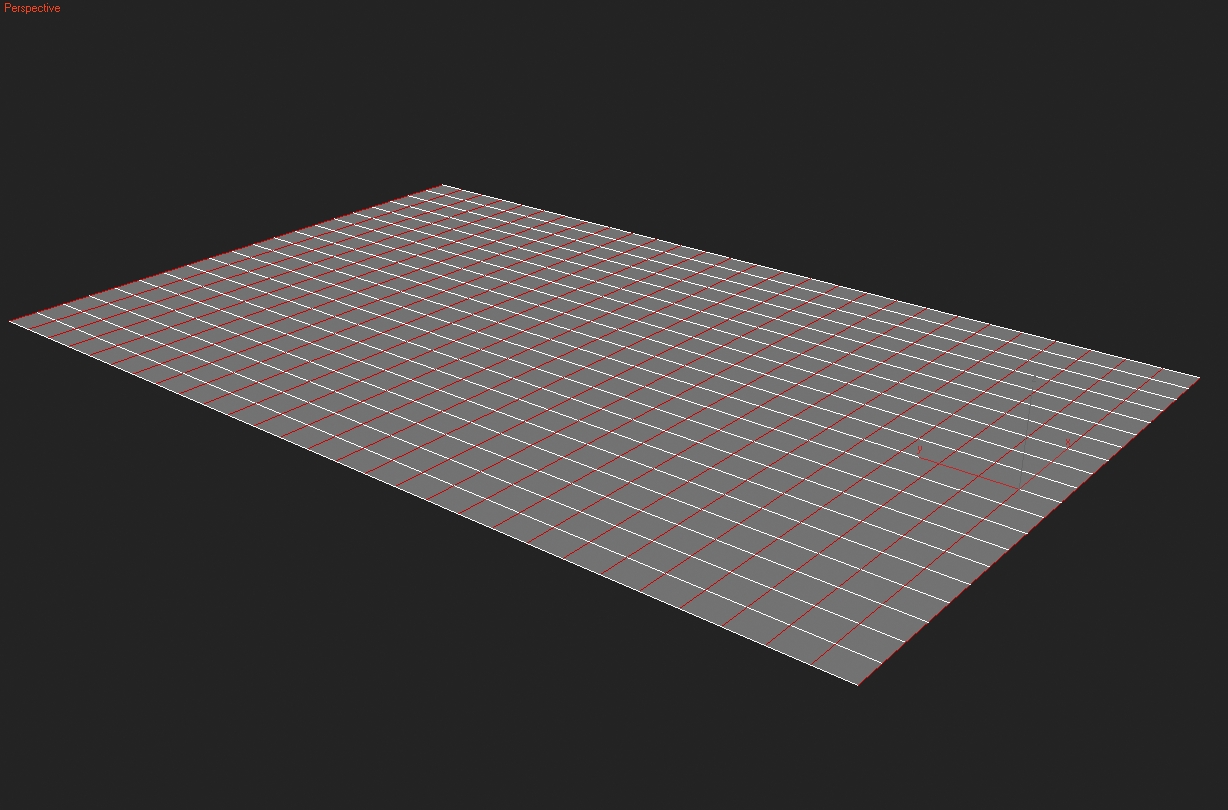
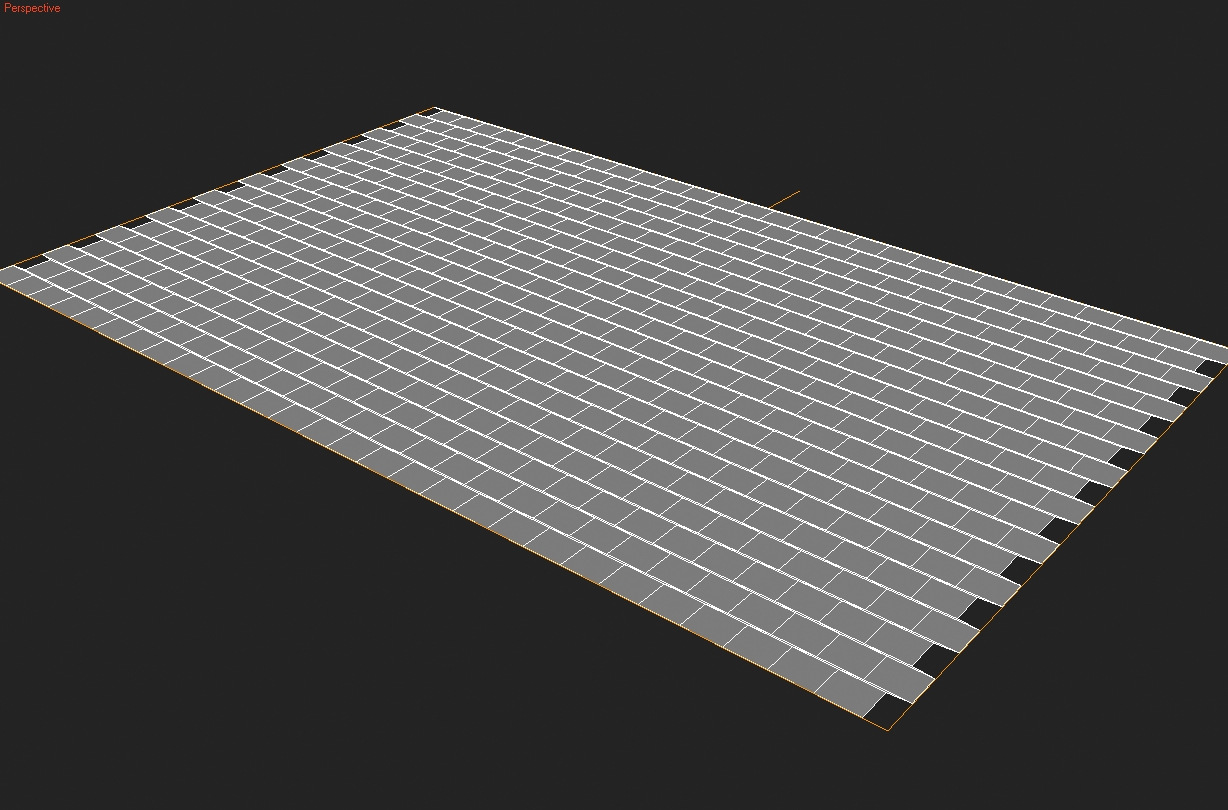
02. Create a plane in the perspective viewport. Set the dimensions to Length : 28 Width : 17.5. Now set the number of segments to Length : 28 Width : 20. Move it to XYZ, 0,0.25,1. Convert the plane to an Editable Poly and go to the Edge Sub object. Select the first edge at the corner on the short side of the plane, and hit Loop and then Ring to get the following selection.
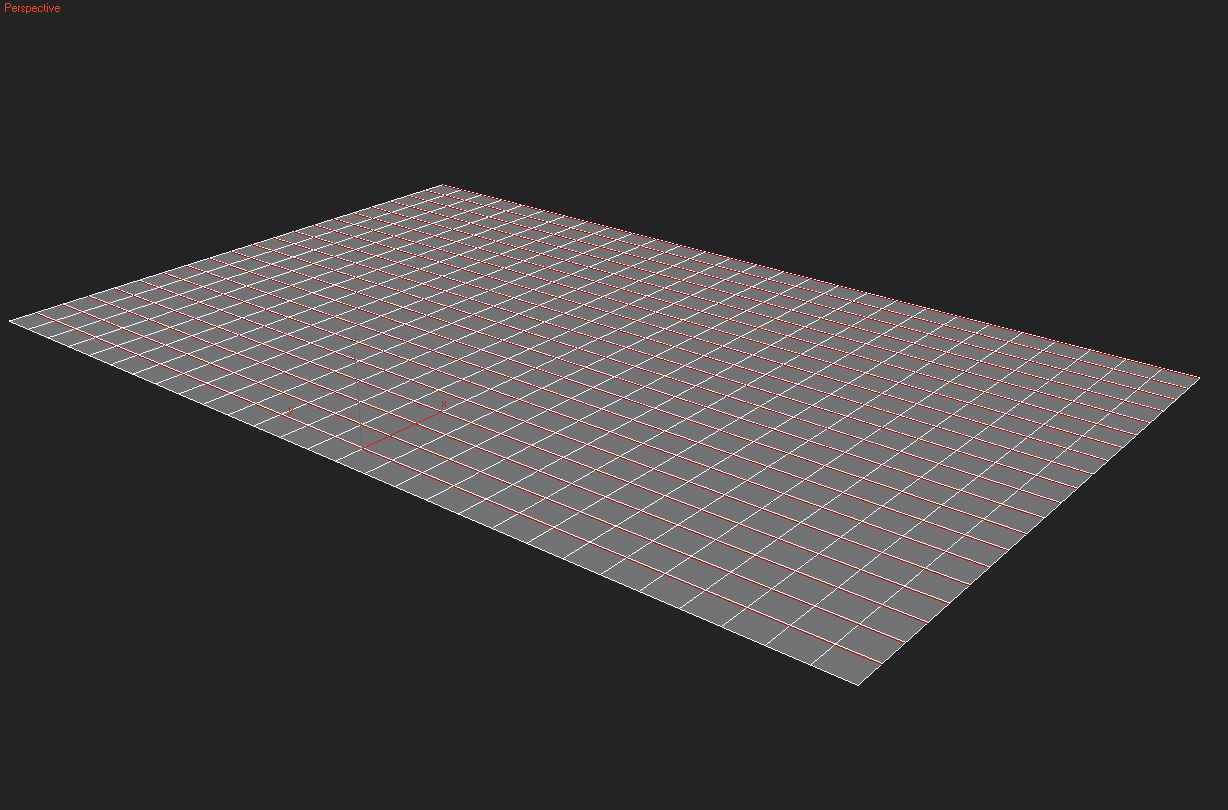
03. Bring up Connect Settings. Leave the number of edges at 1, but adjust the Slide setting to -90
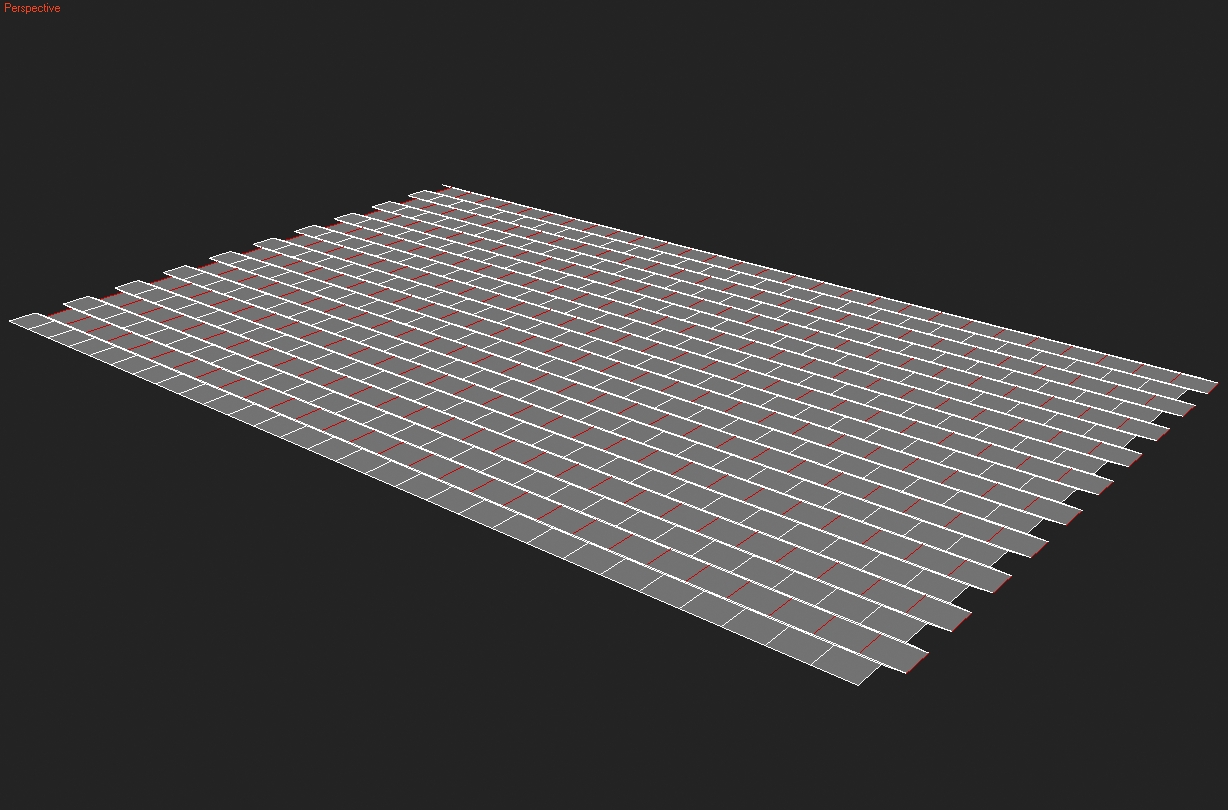
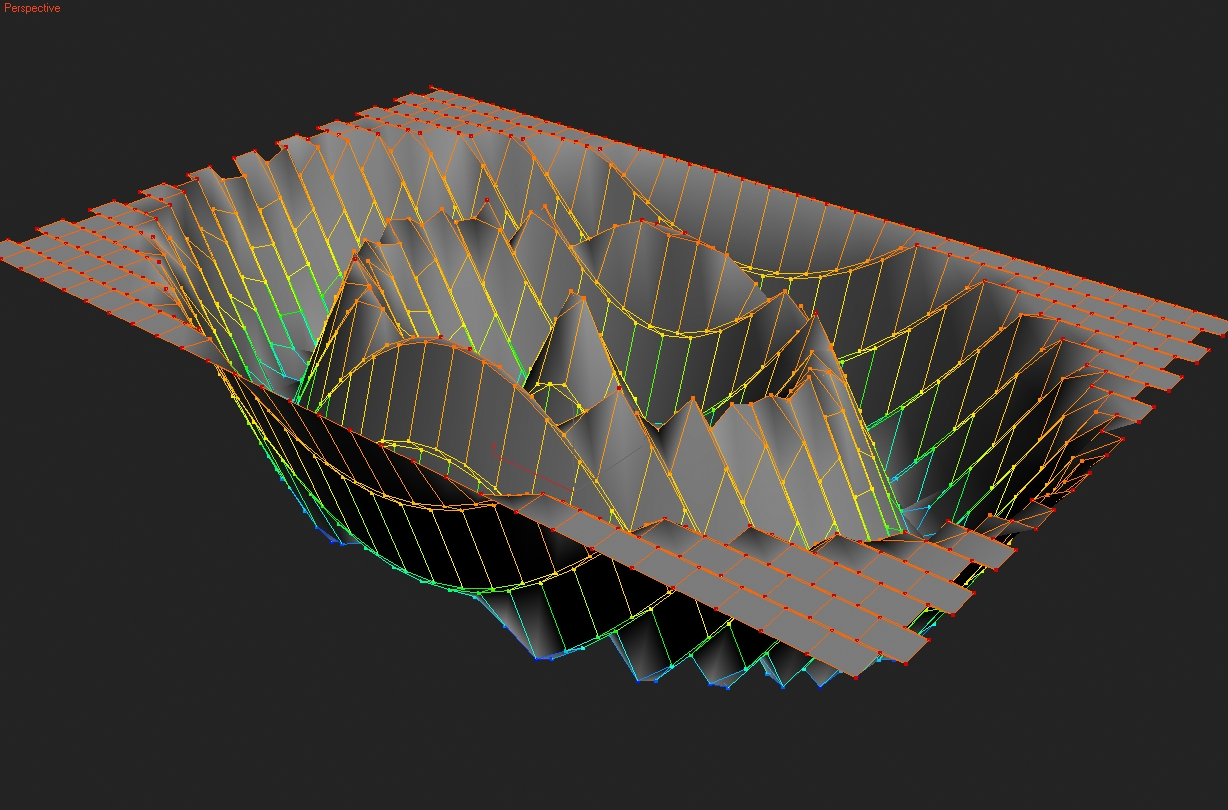
04. Go back to your edge sub object mode and now select every other edge along the short axis. Use the Ring select, and then right click on the move tool icon. In the Offset World Column, enter -.5 in the Y-axis field. Rename this to Animated Surface. Now you should have every other row nicely offset by one half of a grid box.
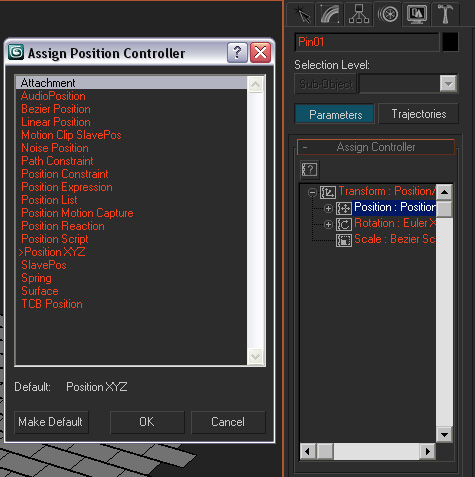
05. Goto the Layer Manager and unhide the Pins layer. Select Pin01, and goto the Motion Panel. Under “Assign Controller” highlight Position, and click on the Assign Controller button (has a question mark on it). Choose Attachment and click OK.
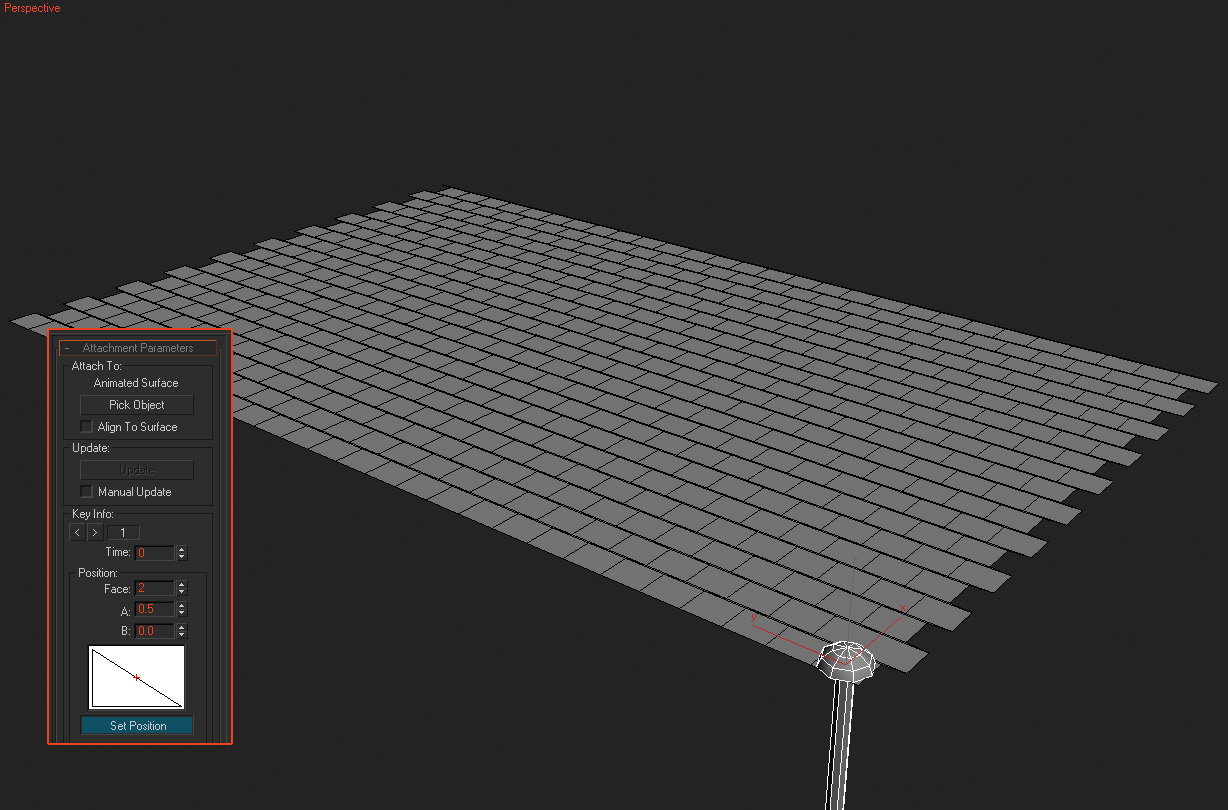
06. Now click on “Pick Object” and click on the “Animated Surface” The pin should jump to the center of the plane. Now click on “Set Position” and set the face number to 2 and the A Coordinate to .5, and B to 0. Make sure that Align to Surface is unchecked. Now goto the Layer Manager and activate the checkbox next to the Pins layer.
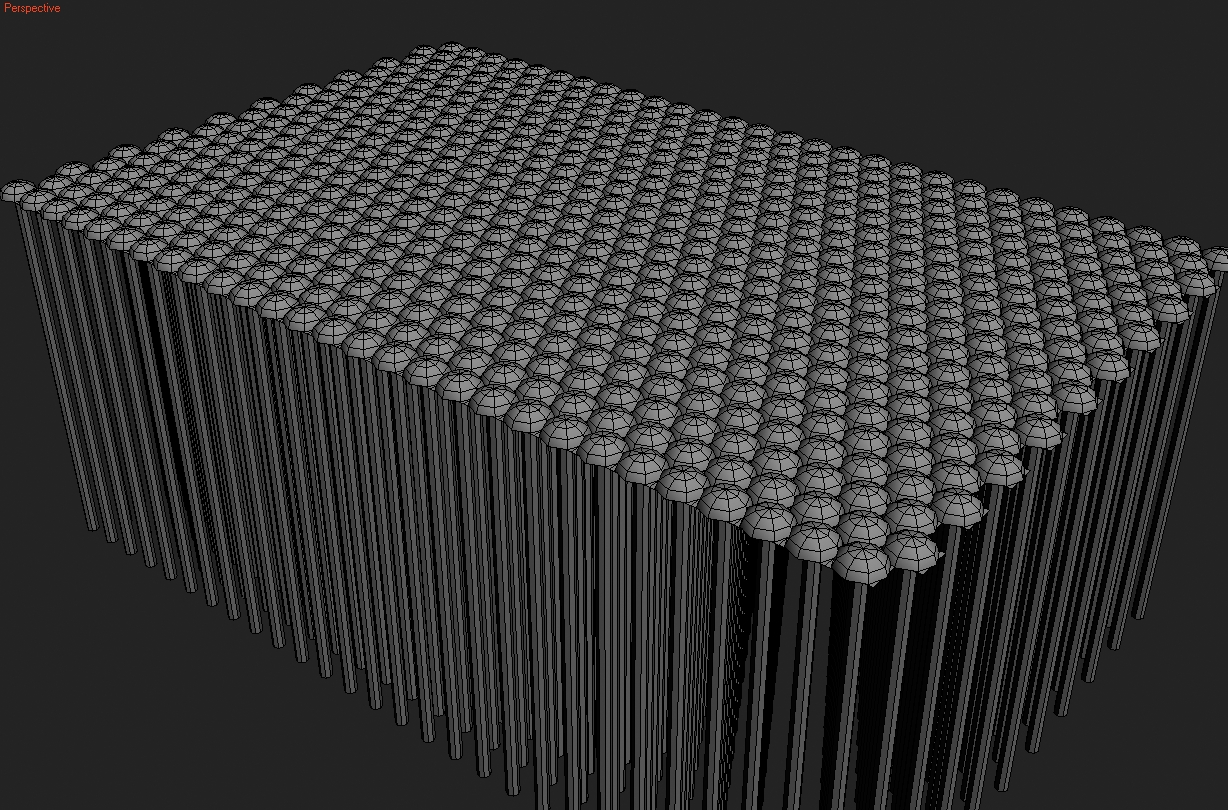
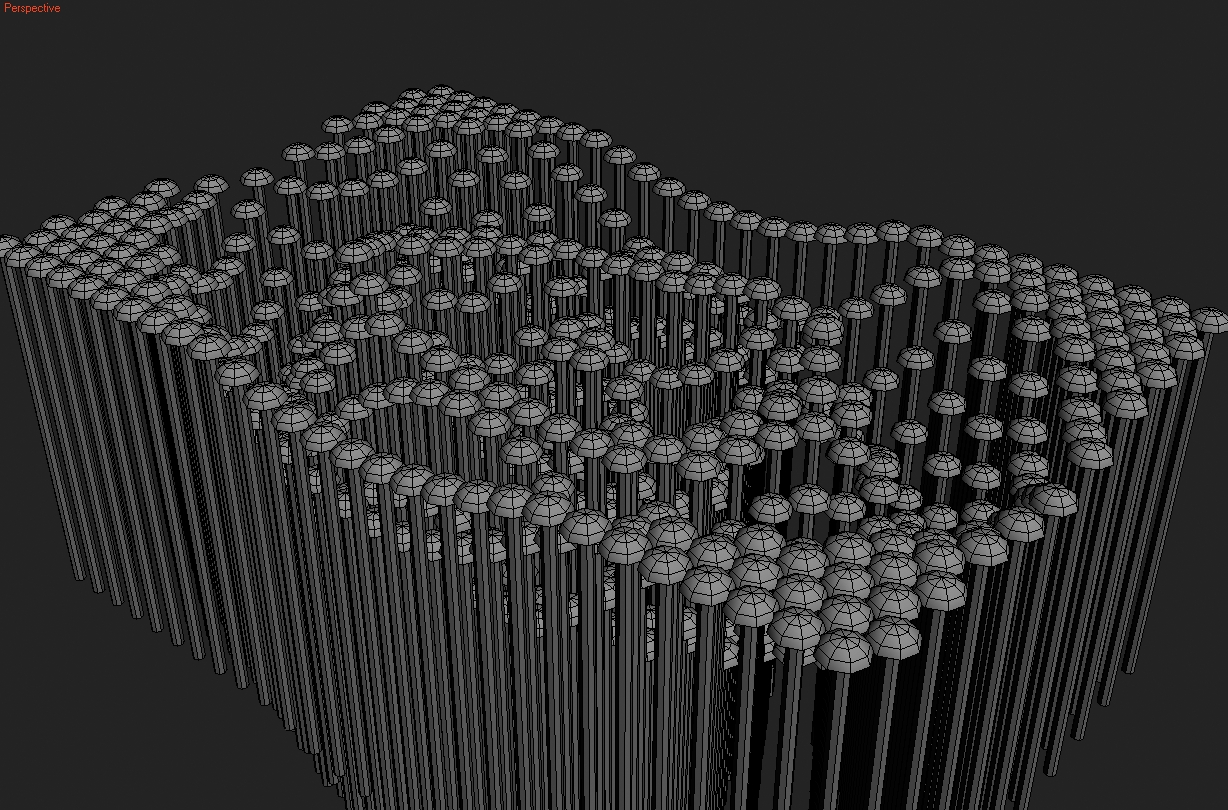
07. In this step we are going to use the script written by Anton Vasilescu. Goto MaxScript –> Run Script, and choose “PinboxCreator11.ms” You will see a small dialogue box pop up. Hit the “Pick Box Object” button, and click on “Animated Surface”. Now hit the “Pick Pin Object” button and choose “Pin01”. Now click on the “Make Pinbox” button. Depending on the speed of your computer you will have to wait just a moment for this script to run. It will be creating 560 pins so give it about 5-10 seconds. Note : This step can be done without doing step 6, the script will actually create the attachment controller, but I wanted to show you how this works rather than just letting the script do ALL the work. In the layer Manager activate the checkbox next to Layer 0 again, and hide the Pins layer.
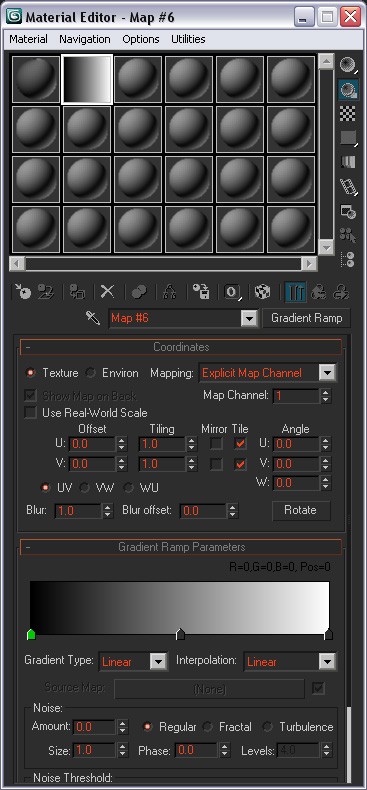
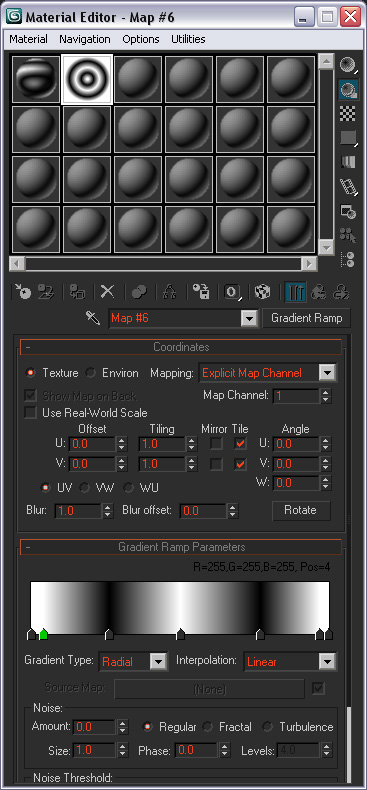
08. Now we are going to create an animated texture to move the pins. You can take any image sequence and convert it to B/W and increase the contrast to use, but for the time being, we’ll just create our own. Bring up the Material Editor and in the first material slot click on the Diffuse Map slot and choose Gradient Ramp. Now Left click on the Gradient Ramp label and drag it into the box for material #2 and choose instance.
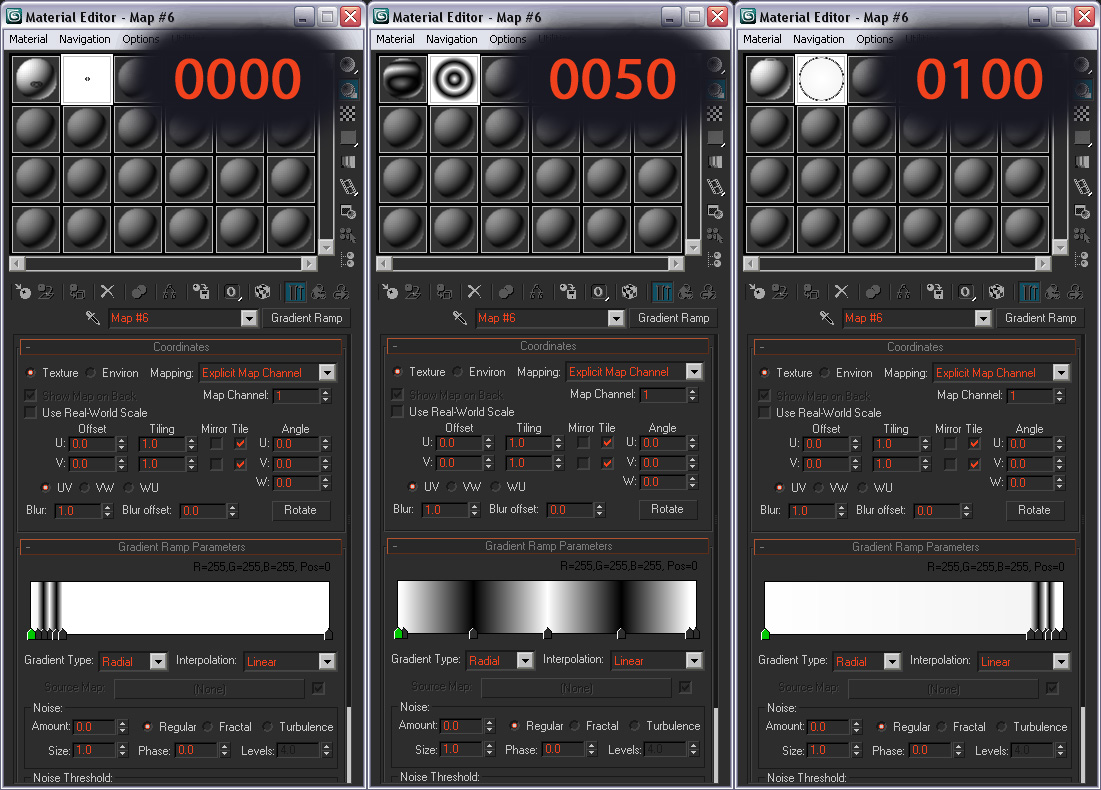
09. Change the gradient type from Linear to Radial. Set the color of all 3 existing flags to white. Create 2 new flags in between the 3 existing flags (at position 25 and 75) and set the color to Black. Now create two more flags just inside the two outer flags (at position 2 and 98) and set their color to white.
10. Set the time slider to 50, and turn on Animate. Slide the time slider to 0, and move the flags to position 2,4,6,8, and 10 respectively. Hit Auto Key. Now move the time slider to 100 and move the flags to 90,92,94,96, and 98. Hit AutoKey. Turn off Animate, and play the time line, The rings should expand outward.
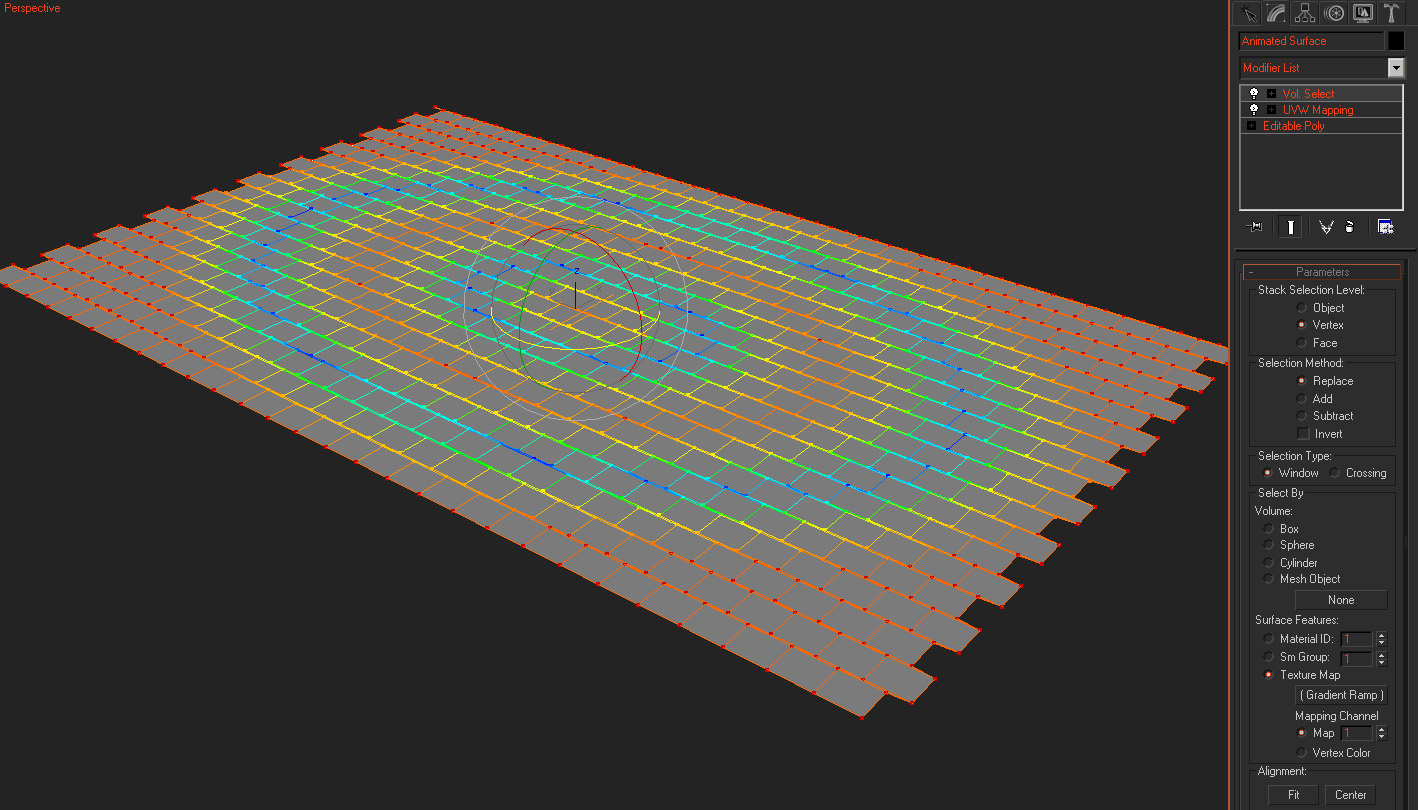
11. Add a UVW map modifier to the Animated Surface and leave it set to Plane. Goto the Gizmo sub object in the modifier stack, and rotate the UVW Gizmo 90 Clockwise and hit Fit, so that the top tag of the UVW map is on the long side of the Animated Surface.
12. Add a Vol. Select Modifier to Animated Surface. Set the Stack Selection Level to Vertex, and under the Select By group, Surface Features, Texture Map, drag the Gradient Ramp map from the Material Editor to the empty slot, and choose Instance.
13. Now Add a Push Modifier to Animated Surface and give it a Push Value of 6.75.
14. In the Layer Manager, hide Layer 0, and unhide Pins. If you scrub the time slider back and forth, you can see how the animated texture will move the pins.
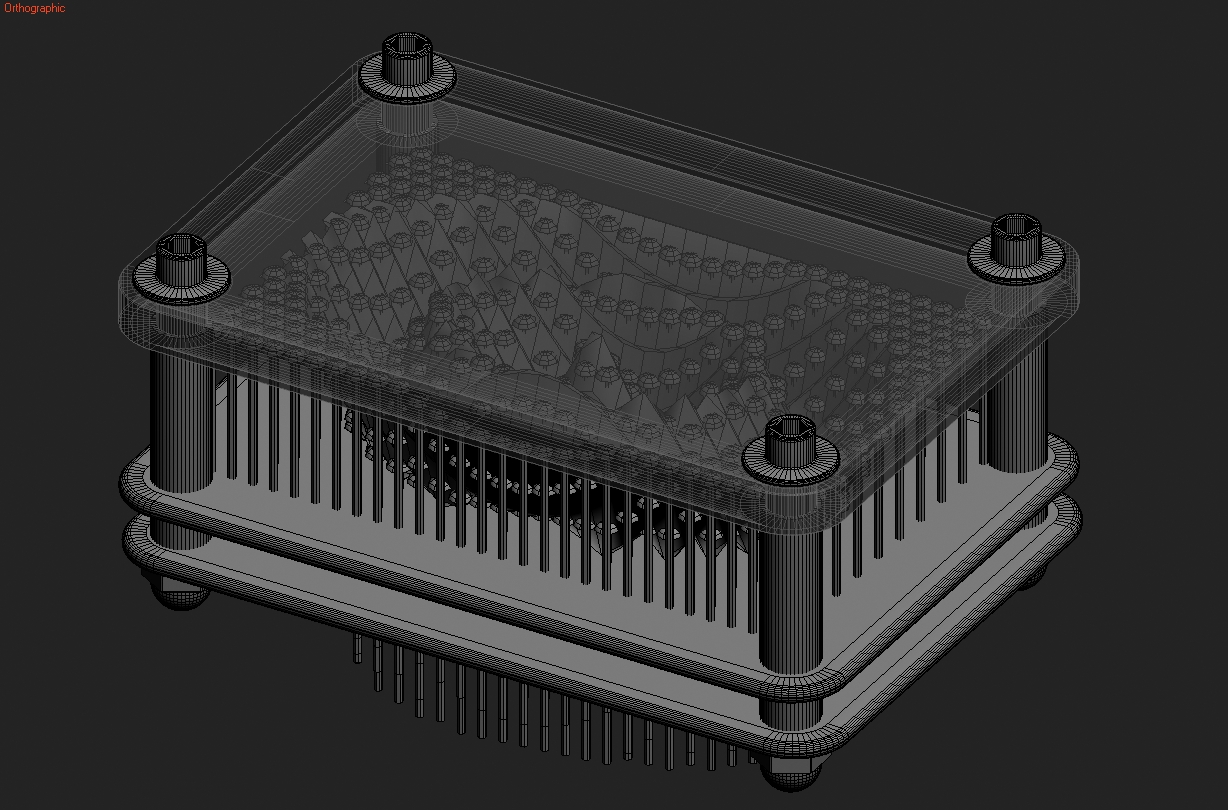
15. In the Layer Manager unhide all the layers except Original Shapes. Select the Animated Surface object, Right Click and choose “Object Properties”. Uncheck “Renderable” and click OK. . Ctrl + A to select all and go to Group –> Group, and name the group PinBox. Save as Pinbox_Animated.



Latest Comments