Hi, In this tutorial. I’ll try to show U some techniques to create one of the most important parts of the landsacape – SKY.
Ok. Let’s det it started 🙂
Sky at Night
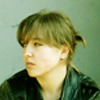
Step 1
Create a new layer and fill it with a dark colour. It does not have to be black or blue: everything depends on what tones do You want to use in Your picture.
Step 2
Take a different tone of colour (when the background is dark – take lighter one, if light – darker colour).
(Lighter bckgrnd) Make many smudges, leave some lighter places.
(Darker bckgrnd) Leave many dark places, draw only few lighter smudges.

Step 3
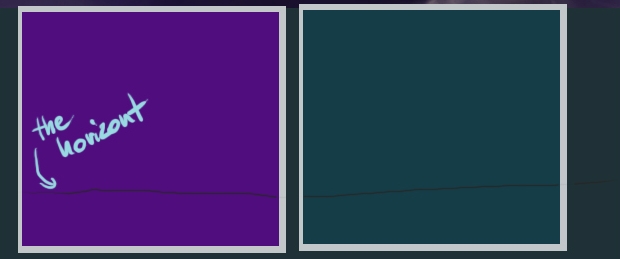
Now, decide if You want to have a planet/moon/this sort of thing in Your picture or not. Planet is easy to draw. Take some pale colour and draw half of a circle (sharp, small brush, op. 30%)…

Step 4
Then take the larger brush (still sharp, op. 15%) and draw some smudges on the one side of the planet as You can see below.
Step 5
Use some dark colour to create the other side of Your planet. This colour should be darker than the background(op.40%, sharp brush).
Put some details to the planet (those which suppose to look like a craters; blurry, small brush, op. 15%).
In the end take some large, blurry brush and match the light. I guess that is all…
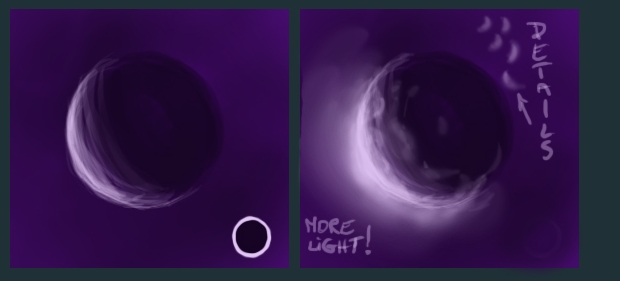
Ok Let’s go back to the sky. On the lighter places put more stars than on the other (small, sharp brush, op. from 10 up to 40%)
Step 6
Step 7
Finally.. Decide if Your pictures presents a landscape on Earth/planet with an atmosphere or not. If Yes, You can draw some clouds. If not, You can draw other parts of your picture…

To get more SKY textures, We recommend visit environment-textures.com site.


Latest Comments