
As far as many people ask me about the clouds, I did this tutorial so they can do them in my style. I just want to add the style is mine, I haven’t taken the methods from any others tutorials.
Step 1-2-3
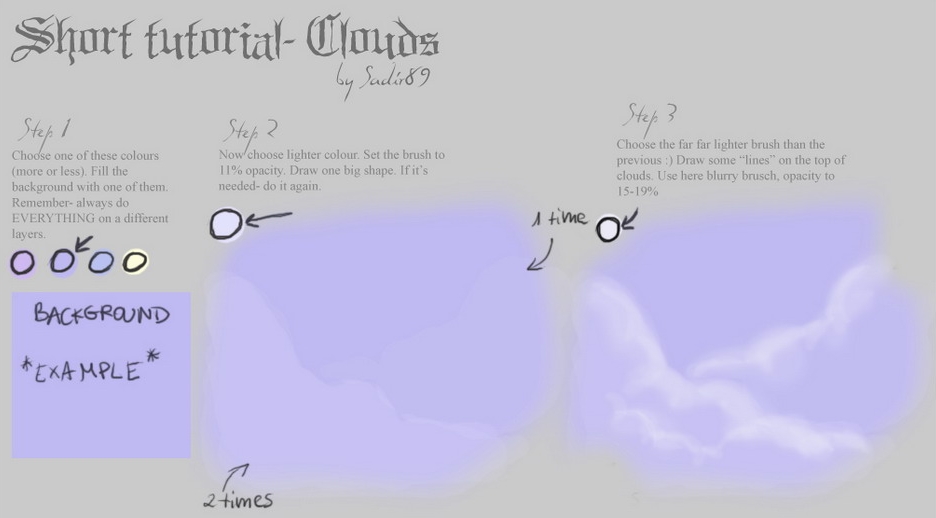
Step 1.
Choose one of these colours (more or less). Fill the background with one of them. Remember- always do EVERYTHING on a different layers.
Step 2.
Now choose lighter colour. Set the brush to 11% opacity. Draw one big shape. If it’s needed- do it again.
Step 3.
Choose the far far lighter brrush than the previous 🙂 Draw some ”lanes” on the top of clouds. Use here blurry brush, opacity to 15-19%
Step 4-5
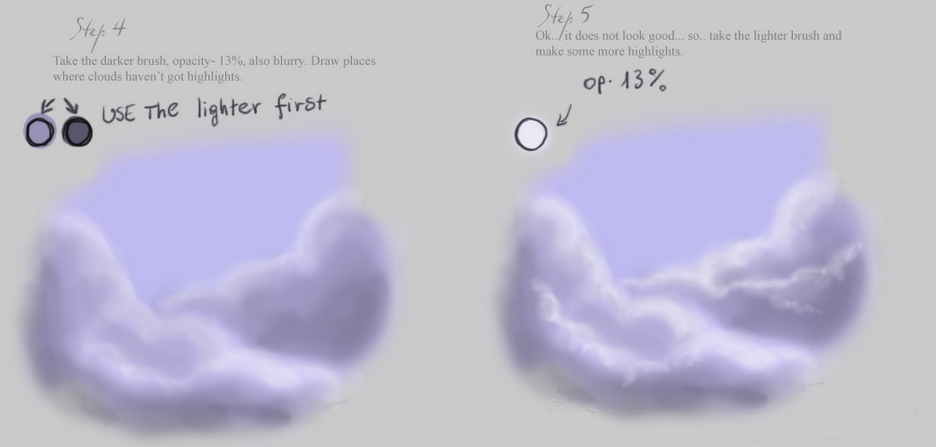
Step 4.
Take the darker brush, opacity- 13% also blurry. Draw places where clouds haven’t got highlights.
Step 5.
Ok… it does not look good… so… take the lighter brush and make some more highlights.
Step 6-7
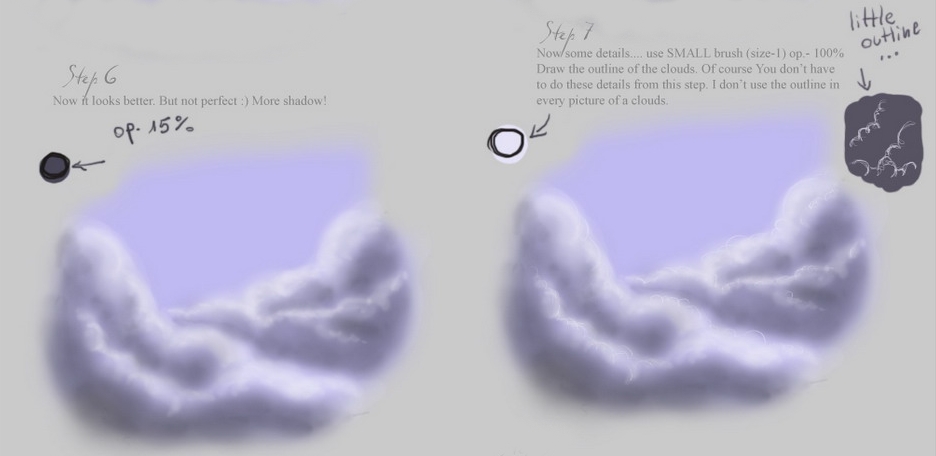
Step 6.
Now it looks better. But not perfect 🙂 More shadows!
Step 7.
Now some details… use SMALL brush (size-1) op – 100%. Draw the outline of the clouds. Of course You don’t have to do these details from this step. I don’t use the outline in everz picture of a clouds. xgeneve
Step 8-9
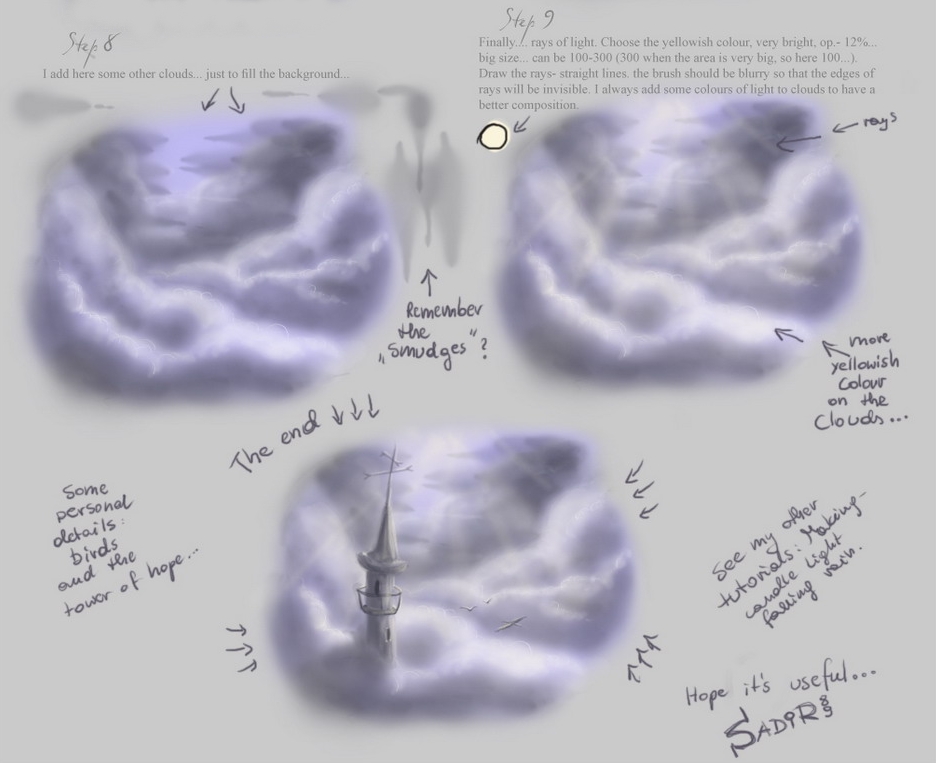
Step 8.
I add here some other clouds… Just to fill the background.
Step 9.
Finallz… rays of light. Choose the yellowish colour, very bright, opacity- 12%, big size… can ben 100-300 (300 when the are is very big, so here 100…) Draw the rays- strraight lines, the brush should be blurry so that the edges of rays will be invisible. I always add some colours of light to clouds to have a better composition.
To get more clouds texture, We recommend visit environment-textures.com site.


Latest Comments