“Phoenix Building ” by Juan Siquier
In this tutorial I will go through my usual workflow with simple steps (trying to make it as simple as posible), to build a scene, from the preparation for the project (Pre-Pro) untill the final render, as always using Discreet 3D Studio Max, for the modelling, mapping and lighting, and Photoshop/Bodypaint for the texturing. A good habit from the beginning is to create a special folder for the project, another subfolder for the textures and another for the references. Another advice (I always do it) is to print one of the references so you can look at it, whenever you go to bed or a bathroom break, in this print I usually write some notes and ideas to help me reach the final image.


I start with the modelling extruding the floor of the building, then I make cuts on the geometry with the “slice plane” tool or also the “cut” tool, and then I extrude the in negative to make the windows, each time I finish the modelling of one of the elements I also finish the UV mapping, I don’t like to accumulate the UV mapping for the end, a couple of parragraphs below I will explain briefly my tecnic with the mapping. In this kind of symetrical buildings is very useful to apply the “symetry” modifier, in this way we can save a lot of time and work also this guarantees the perfect location of the windows in both sides. If the composition of the reference picture satisfyes me, i usually lay the 3D model over the picture as perfectly as possible, in this way I can fix proporion issues, with the hotkey “Alt X” I make the object transparent to make the overlaying easier.
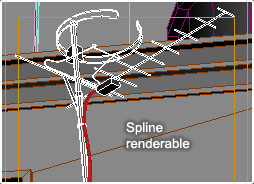
For the antennas and cables I usually model it with renderable splines, making sure that I activated the automatic mapping, I also watch my the poly count, I know for experience that a cable of 4 spans is enough if its going to be from a medium/far distance of the camera. The trees of the bottom of the picture were made using Onix Tree Pro, Only the visible parts are modelled, in other words they are incomplete trees.
For some reason I found more simple to deform the bird neck with some bones, and a skin modifier, in this way I could move the bones in a interactive way to decide the final pose of the animal, (always using the rendering camera, so it has more strenght in the composition.


The mapping is without a doubt the heaviest and most boring process when it comes to creating the scene. It is a necessary but not too creative step, also the UV maps are not something spectacular to show around saying “Hey check out my cool UV map”. But in the long run, uvmapping it’s more like a puzzle game. (it has its charm). To describe briefly my mapping process, you just have a few simple rules: 1 – You should not have overaying UVS EVER. 2 – The checker map we put on the object has to represent perfect even squares. 3 – The objects in the UVeditor should have the same proportion as the ones in the scene. 4 – Make sure the orientation of the object is correct in the UVmap editor. 5 – It is convenient to optimize the space inside the map. A good way to begin the mapping, is using planar maps to unfold the object and then stitch the individual pieces together, also you could equally stitch the pieces from an automatic mapping, I assigned the hotkey”S” for “stitch” in that way I can select an edge, and hit “S” and I can stitch pieces really fast. Always remember that if you put a lot of efford into the Uvmapping it will be less likely to have problems ahead once we painted the textures in Photoshop.
Pages: 1 2


Latest Comments