“Next Gen car – part 3 ” by Valentin Nadolu
The wheel UV:The easiest and most logical way to do the UVs for the tire thread is to use Cylindrical Mapping. To save texture space, the thread UV was cut in half and overlapped. I could have used the entire width of the 0-1 space to make the tire texture tileable, but in this case it is more important to keep the sides of the tire and the thread at the same resolution so I overlapped them instead. I did the same for the interior of the rim; only the UV is cut in four pieces and overlapped as that area is not visible too much in the scene. Same goes for the inner part of the brake disc which was overlapped with the exterior to save texture space. 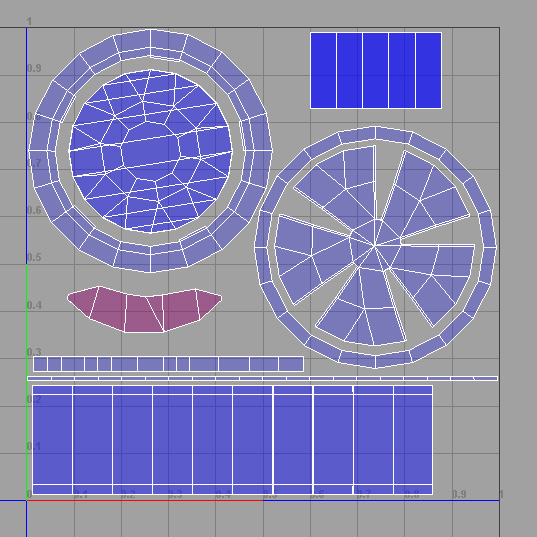
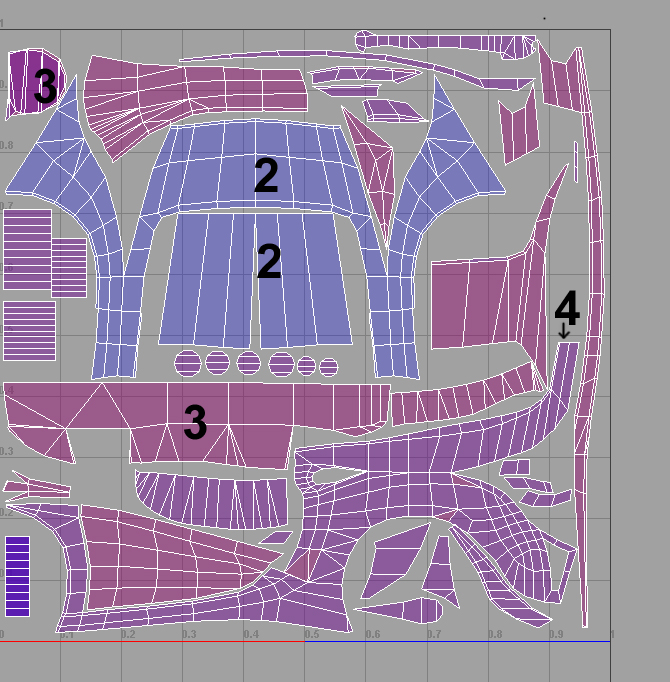
Interior and exterior UVs
The next images show the way the interior (1st image) and exterior (2nd image) UVs are laid. Some things are worth mentioning:1. Most of the shells are overlapped to save texture space. Do this as often as possible, especially for areas that do not contain asymmetrical details, such as text decals.2. Some of the shells are not overlapped as they will require unique detail on the texture. For example, the front of the vehicle is not mirrored to allow the addition of a logo in the texture.3. Parts that are less visible on the car, like the underside, use less space on the UV, as they do not require too much detail on the texture.4. Even thought the rear of the car will be the one most visible while playing the game, the seam resulted from the mirroring of UVs is small.5. I recommend that the UVs to be cut on hard edges, because any seams that will appear there in the texture will be easier to hide because of the sharp transition in lightning between the faces.

The next chapter deals with generating normal maps and ambient occlusion maps.
(c) Valentin Nadolu , www.amc.ro
Pages: 1 2


Latest Comments