by Jahan Zaib
Intro: in this tutorial i am going to teach you how to model and texture a building in 3dsmax. that can be used in games -mods and web images.. so for this tutorial you need to have a 3dsmax 2009 or later .and building textures from www.environment-textures.com – for any 3d model you need to have perfect reference images and textures .. that you can just get from www.environment-textures.com .. they provide just amazing textures.. high resolution and perfect.
Here is that texture…
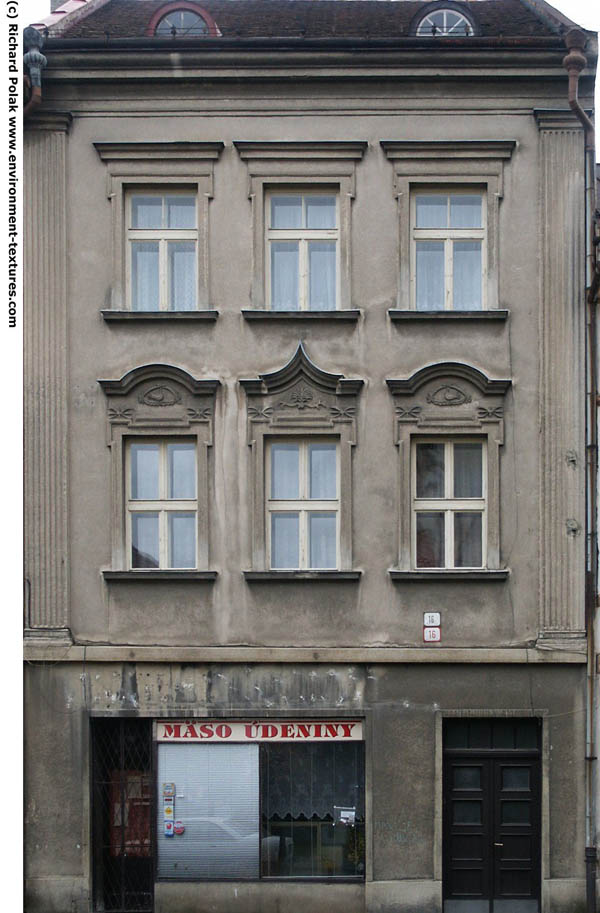
So we have texture.. and 3dsmax.. so lets get started..
Modeling – Part 01
ok in this part we are going to model the basic building..shape.. using the texture.
OK.. open the 3dsmax … then Go To Material Editor > Select any Material Slot. and click on Diffuse Side Box > Double click on Bitmap then select the building texture.
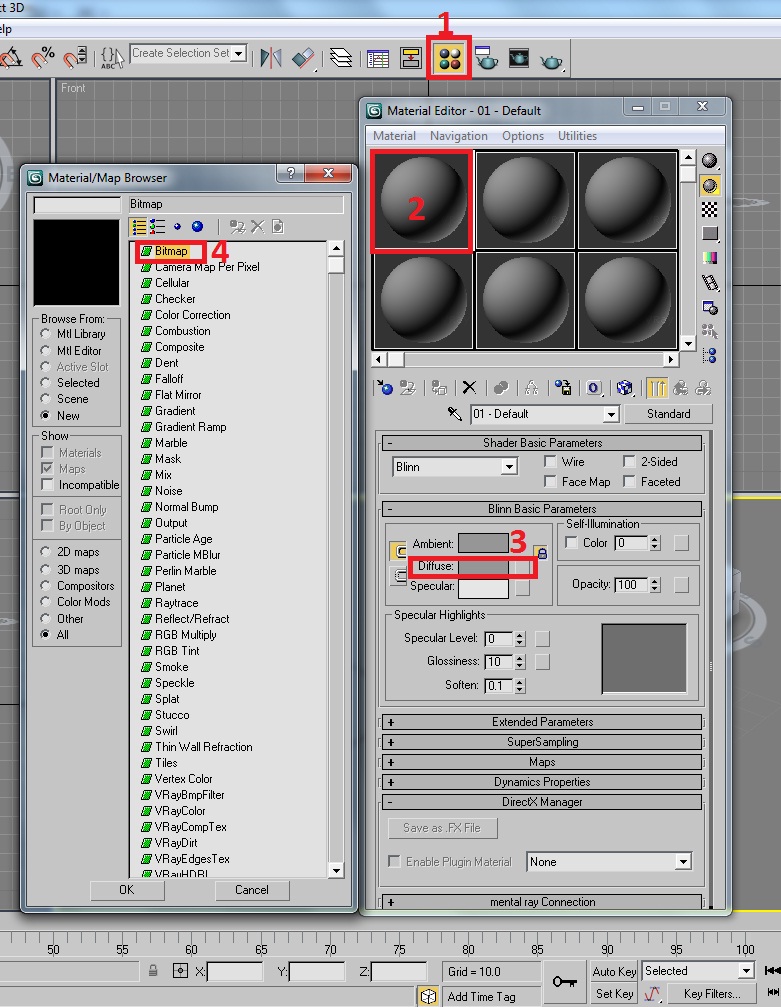
Now you have loaded the texture in your material slot ..
Now create a plane in front view.. and set the plane settings.. as shown in this image. then apply that texture on it.

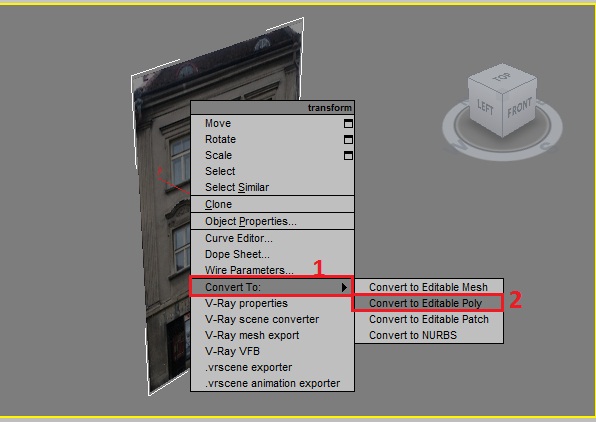
Now select that plane right click on it and and Go To : Convert To> Editable Poly
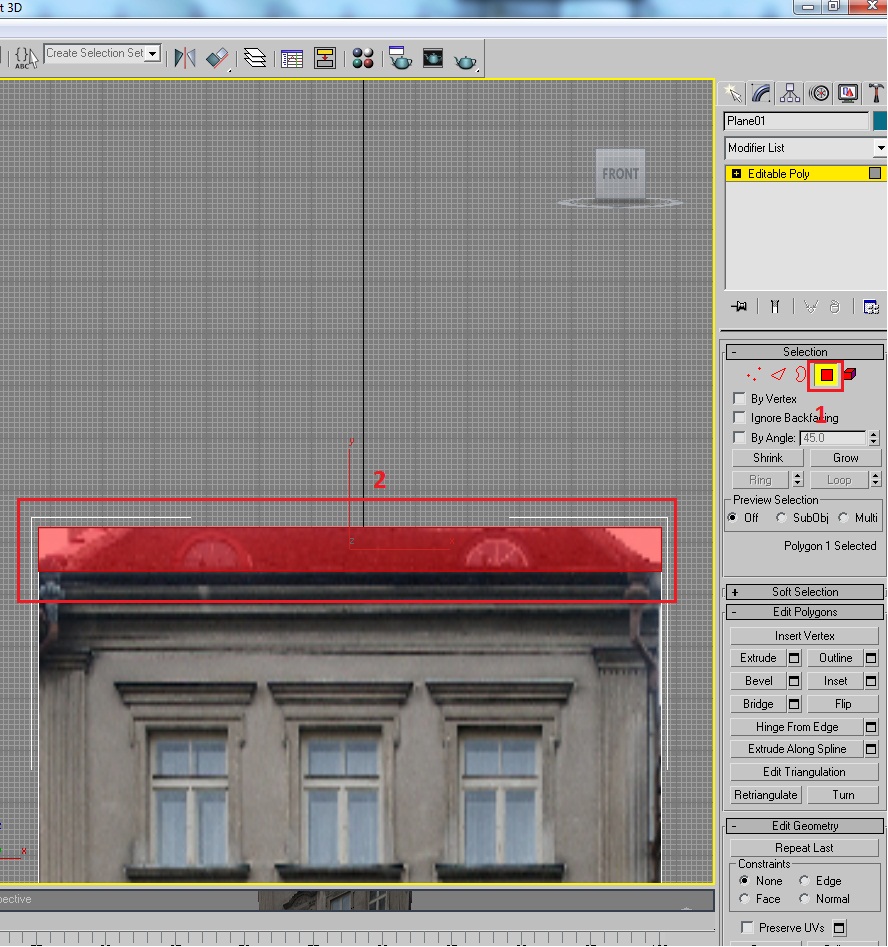
After this.. Select the Cut tool.. and then press F4 button (on your keyboard) that you can see the edges and create a line on its top roof.

Now Go to Polygon mode.. and select that roof polygon and press delete button to remove it..
Now we have the Basic shape of Building.. Now we will use Cut tool. to add realty in building.. and Extrude the Doors and Windows.
Go in Vortex mode >Select the Cut Tool > and create a cut around the window like this image.

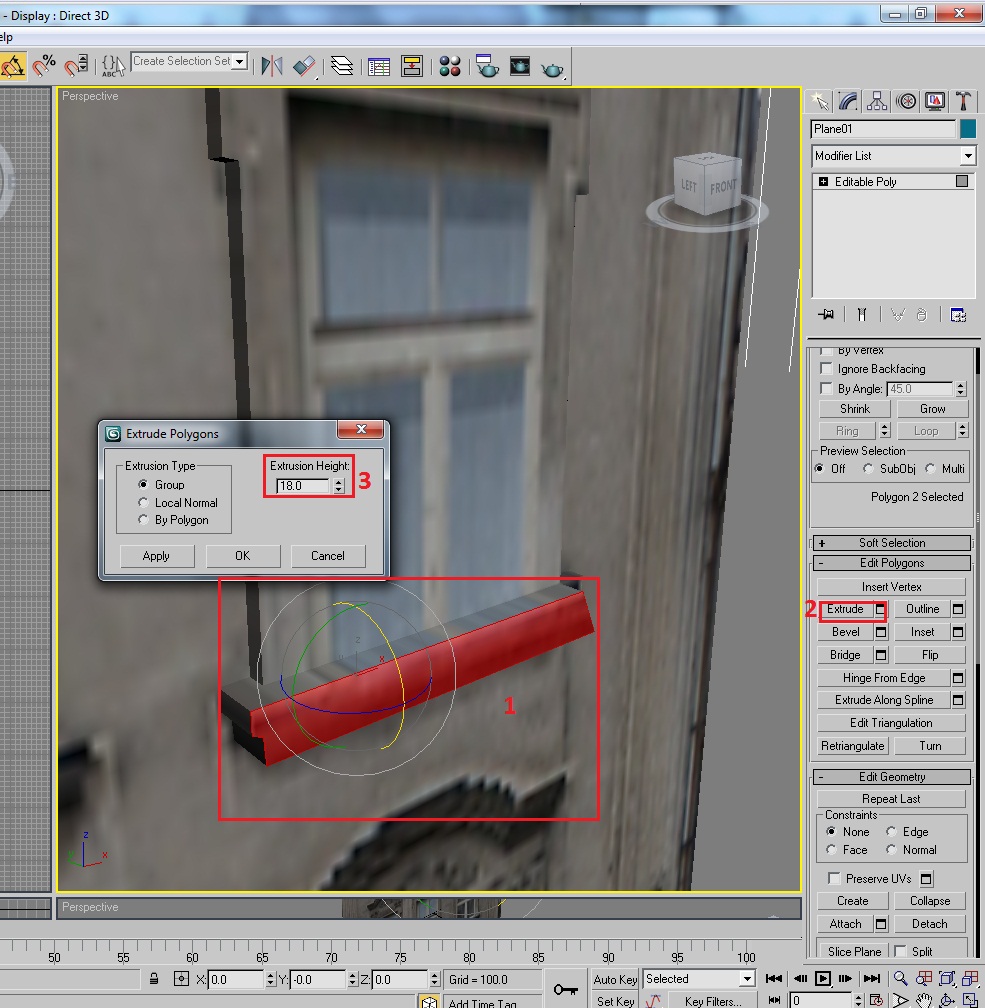
Now go to in Polygon mode > Select the Whole.. window and Extrude it to : 11.88

Select the Upper polygon of the window.. use the: Extrusion Height: 11.88 … > Select the Rotate tool.. and Rotate that polygon to X direction and Parameters : 20

Now select the bottom part of the window . and Extrude it Extrusion Height :18
Now you just have completed that window.. Now. do the same thing with other windows and door..
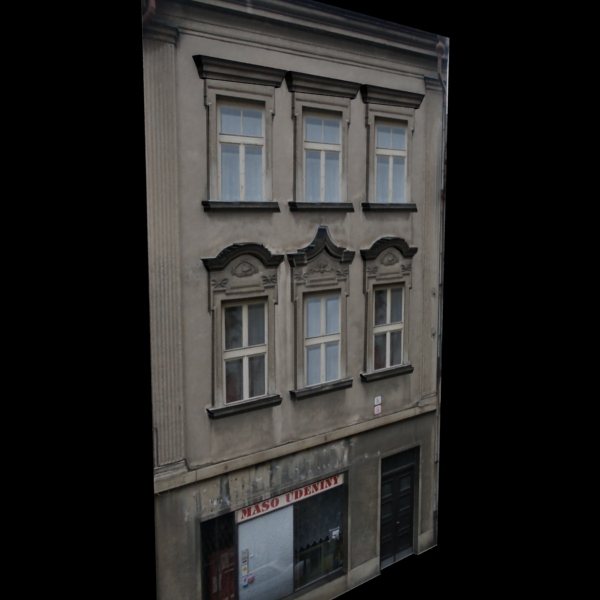
When you do this you have final render look like this.
Now we will extrude the Building.. Side walls. and roof.. then we will do a symmetry ..
go in Border Mode.. and select the outside Edge of the Building.. Then Select the Move tool and Press and Hold Left Shift Button then Drag it in Y Direction .. like this image..

Go to Modify Panel.. > Select the Symmetry > in Parameters Select the Z and un check the Flip . then drag it in Y direction .. like this
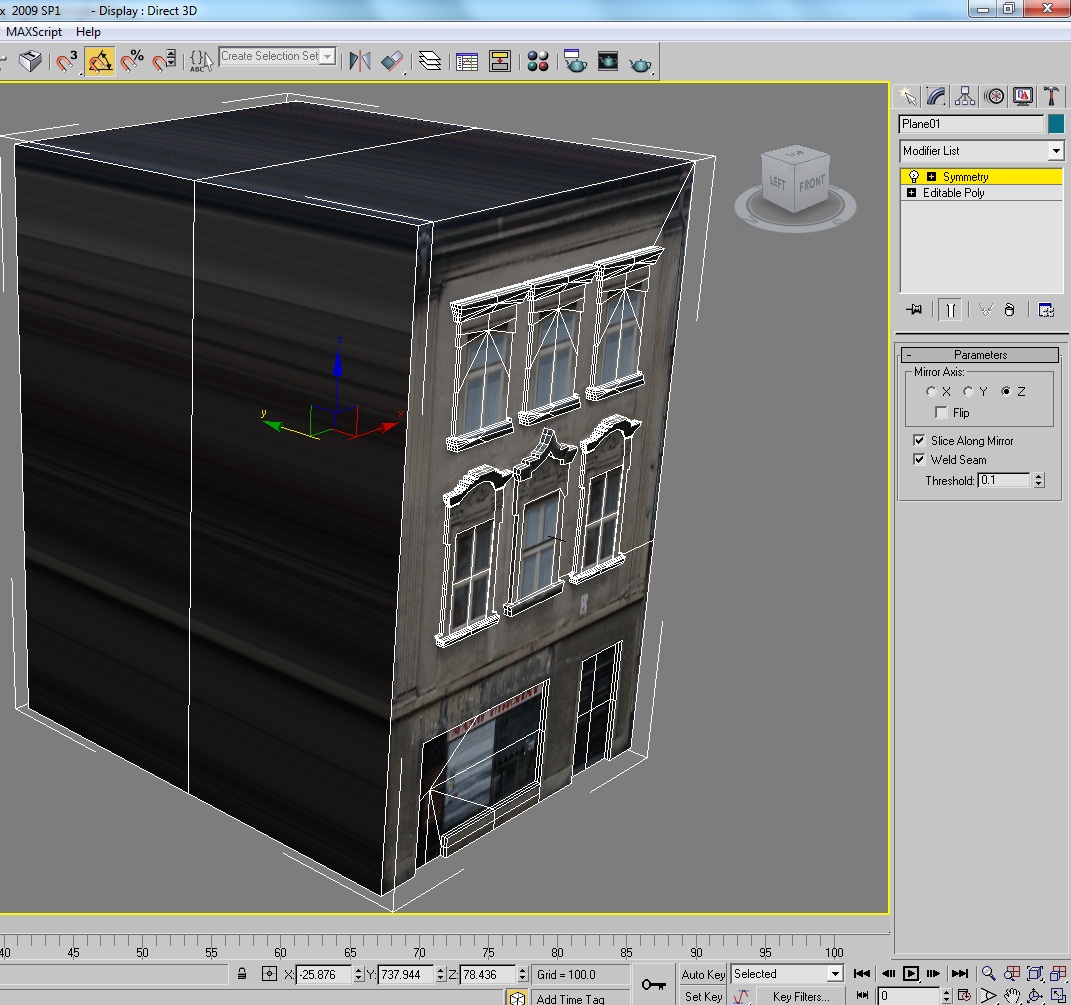
Here is the Final Result…

Final Thoughts : You just made the low poly.. real looking building 3d model.. and thanks for the reading..
and The building side is looking.. not good.. you can add here another simple texture.. or add more windows to make it more real..


awesome Technic….i love this
wow it is helps for student.thanks
hooo! This is a smart Technic.Thank u Bro!
Thanks for cut tool 😀
But when use tihis tool, a few useless edge happen there, and they make the “selection of poligons” not perfect. I prefer to see a video about this.
Thanks a lot.
Thanks my friend, its a nice piece very good for beginners. Try out this tut and then move to learning unwrap uvw.
I do agree with all the ideas you have presented on your post. They are really convincing and can certainly work. Still, the posts are very short for beginners. Could you please lengthen them a bit from subsequent time? Thank you for the post.
thank u so much…very help ful toturial…
Awesome!!!!!! tnx dude
you should really show people how to do a uv for the other side! for those who don’t know theres a unwrap uv modifier with a suit of tools for unwrapping 3d objects, if you want to do the other side too you can just go into the face selection mode then use the quick planar tool to quickly map the other side maybe using the move and scale tools to place it (those who dont know how you can hold down control while scaling in non uniform mode in the uv editor to uniform scale uv cluster objects!).
I like to know if the side resulted surface can be converted to editable mesh and then get texture as well?
thanks !
Thanks so much for sharing, really helpful.
awesome.truly helpful
Actually any chance of providing a video tutorial? I’m a beginner and I am struggling with a few the steps.
This is an awesome technique. I’ve actually been looking for an easy approach to achieve this type modelling. Thanks for posting.