by Jahan Zaib
Hello everyone!
In this tutorial i will teach you how to model a Street Scene in 3ds Max 9 .
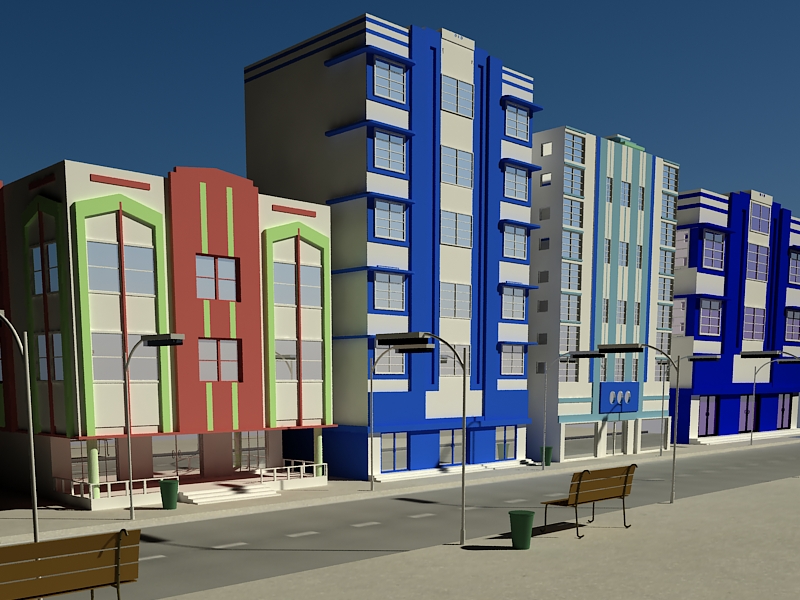
Final preview
So for this tutorial you need to have a 3dsmax 9 and some nice streets reference images..
You can get good and higher resolution images from www.environment-textures.com
ok lets get started
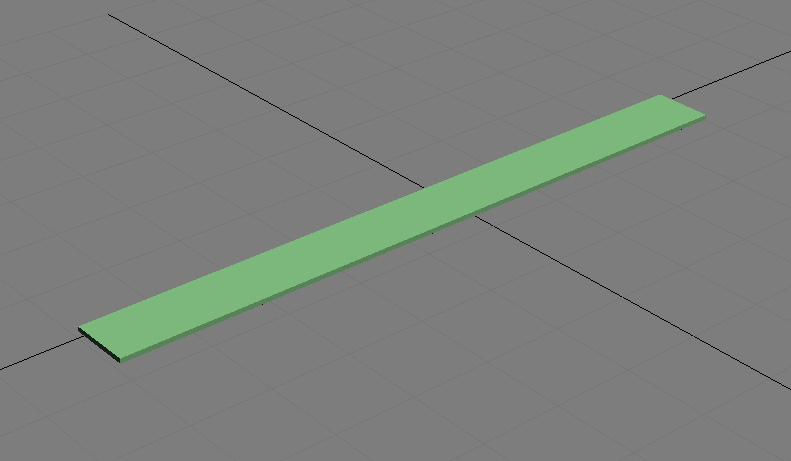
Step 1:open 3ds max 9 or any later version. first i am going to make the road for Street Scene .
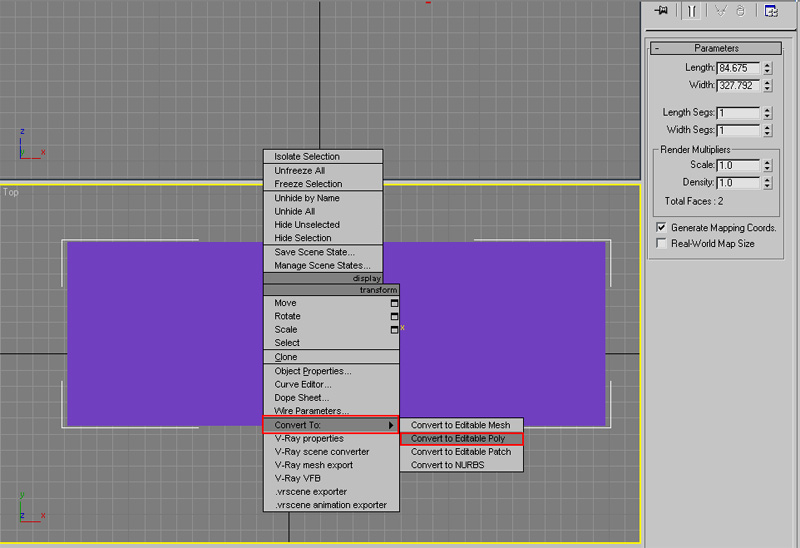
now make a plane in top view with these dimensions : Length: 84.675 and Width: 327.792.

Step 2:right click on the line and then convert it to Editable Poly.
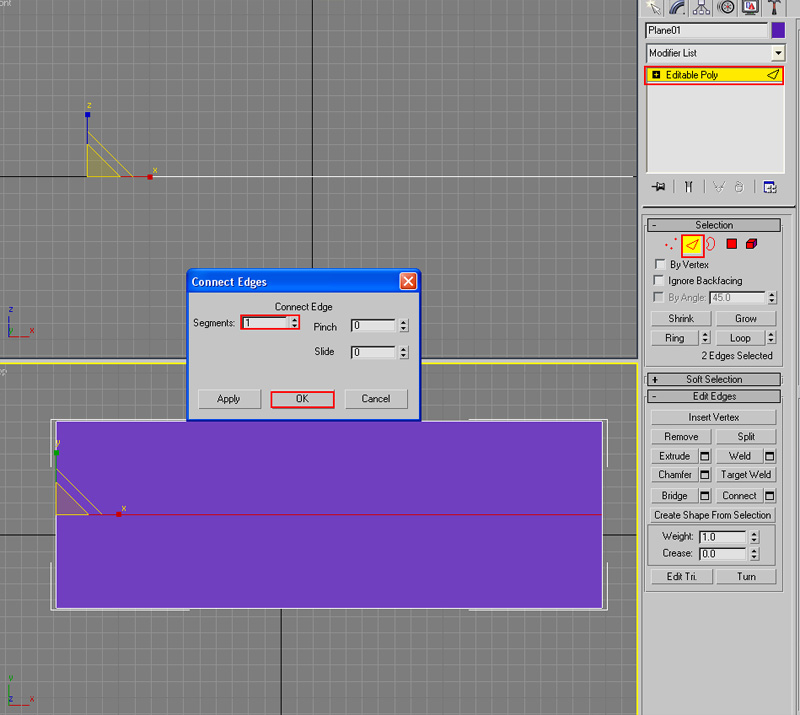
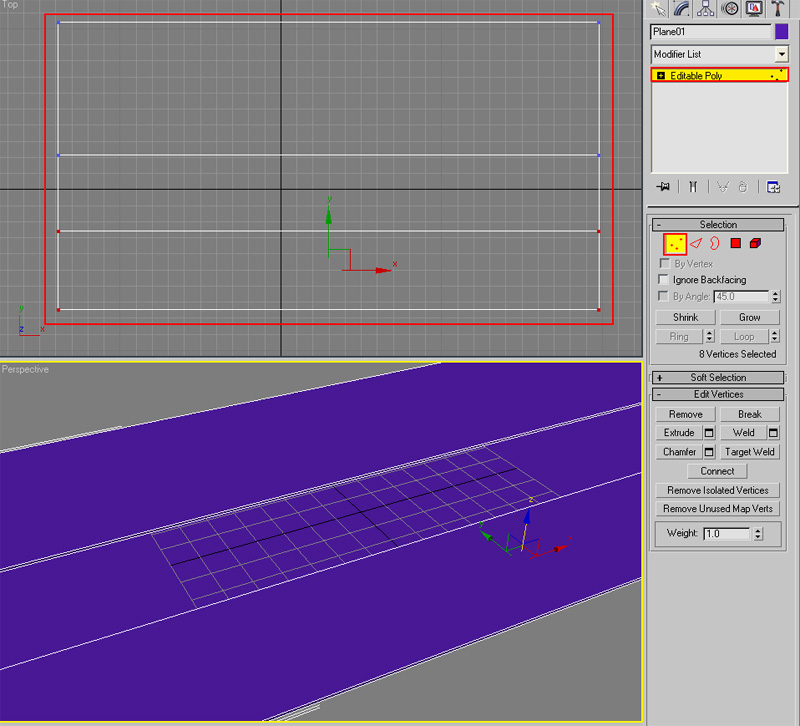
Step 3:select the both Edges and Connect. now click on Chamfer (6.38)

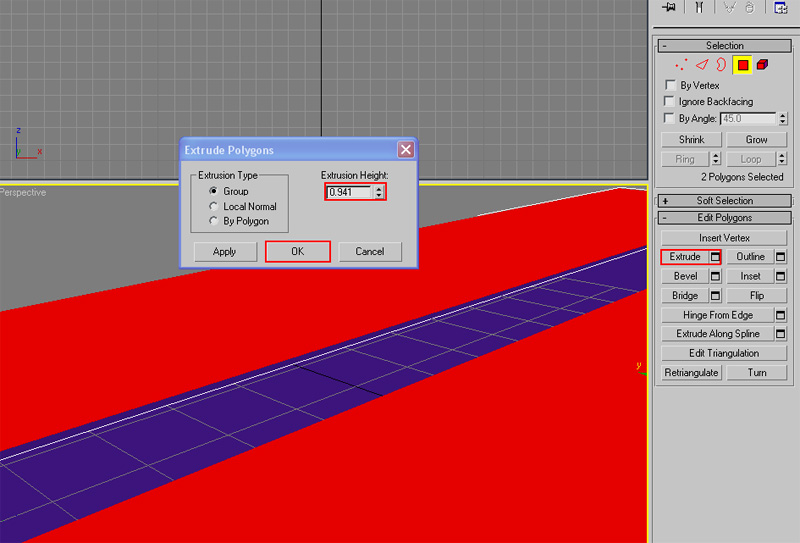
Step 4:select the both part of the plane and Extrude (0.941)
Step 5:now setting up the vertexes position as like image.
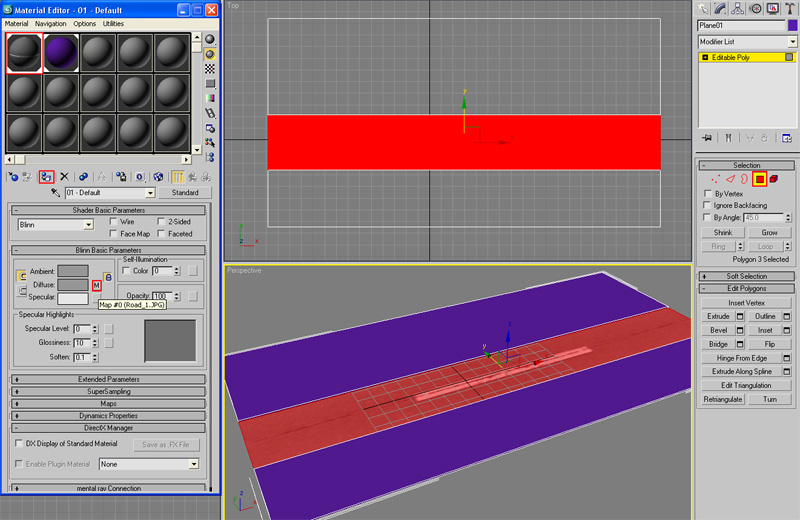
Step 6:apply the texture on the road and footpath. now select the road area and go to material editor >open the texture and apply.
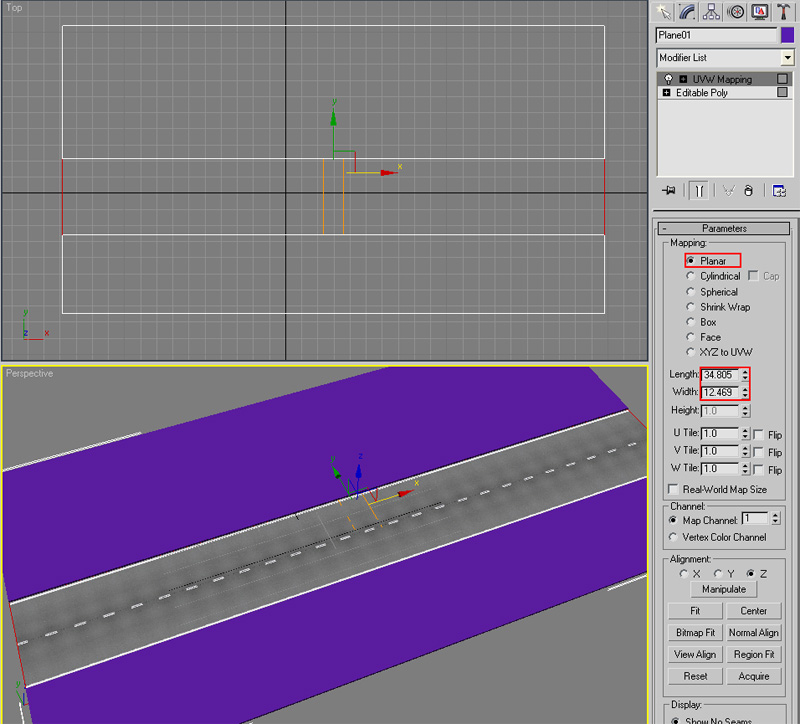
Step 7:go to Modify>open Modifier List>choose UVW Mapping and change the setting as like Image.

Step 8:now its time to apply the texture on footpath. select the footpath area and go to material editor >open the texture and apply.

Step 9:go to Modify>open Modifier List>choose UVW Mapping and change the setting as like Image.

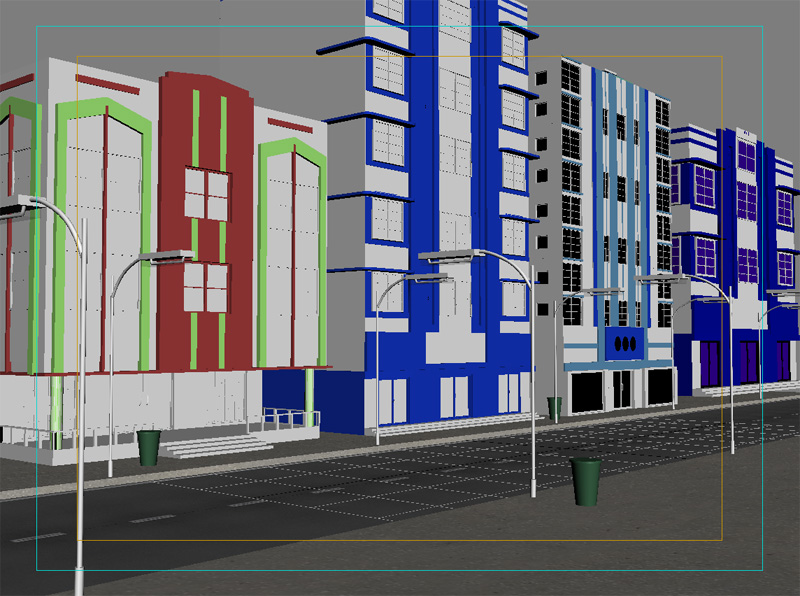
Step 10: Now you need some buildings here is a tutorial that will teach you how to Model a High Definition Building in 3DSMAX 9 . when you done making some
Buildings.. then Merge the buildings and setup them as like these pictures.


Step 11:now i am going to make some things for street for example street light, trashcan, street bench.
lets start first with the street light.
go to Shapes>Line> make the line and change the setting as like image.


Step 12:now make the new line for the street light design .

Step 13:now go to the Geometry>Box>and draw with the image setting and fit it here.

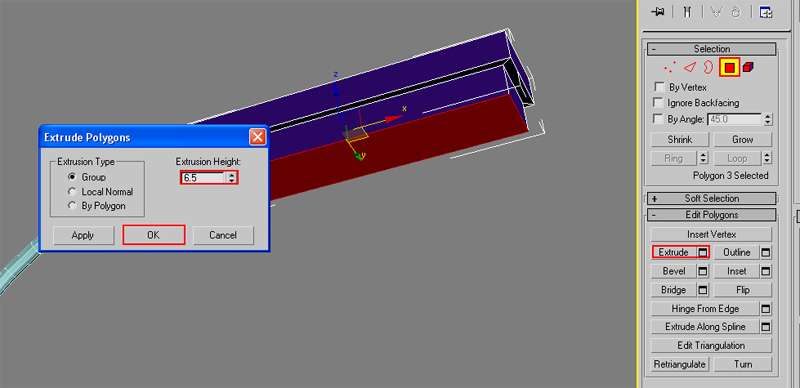
Step 14:right click on the object go to Editable Poly>Polygon>select the front face and Inset (1.249)


now Extrude it (6.5)
Step 15:go to the Shapes>Line>draw as like the tube shape and change the setting as like picture.
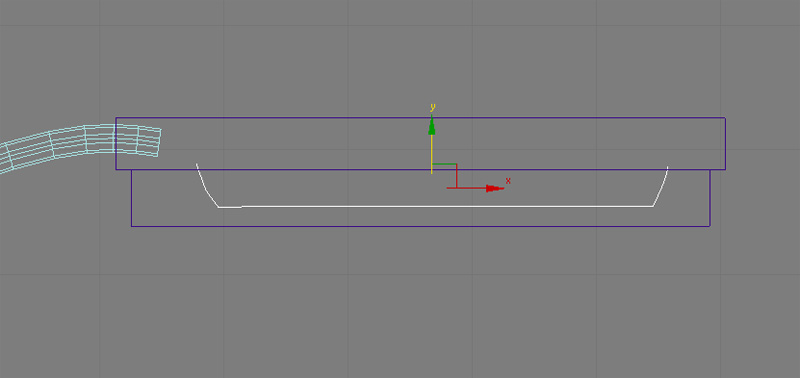

Step 16:now need to make the bottom of street light. right click on the object go to the Editable Poly>Edge>and connect.

move down the edge , select the all bottom faces and click on the Extrude (0.7)

attach the all parts of street light.

Step 17:just apply the material on the street light .go to Material Editor>Standard>Architecture>and open.

Step 18:change the gray color in to white. Assign Material to Selection.

Step 19:use the same method i did in Step 17 , go to Editable Poly>polygon>select the glass faces and apply glass material on street light glass.


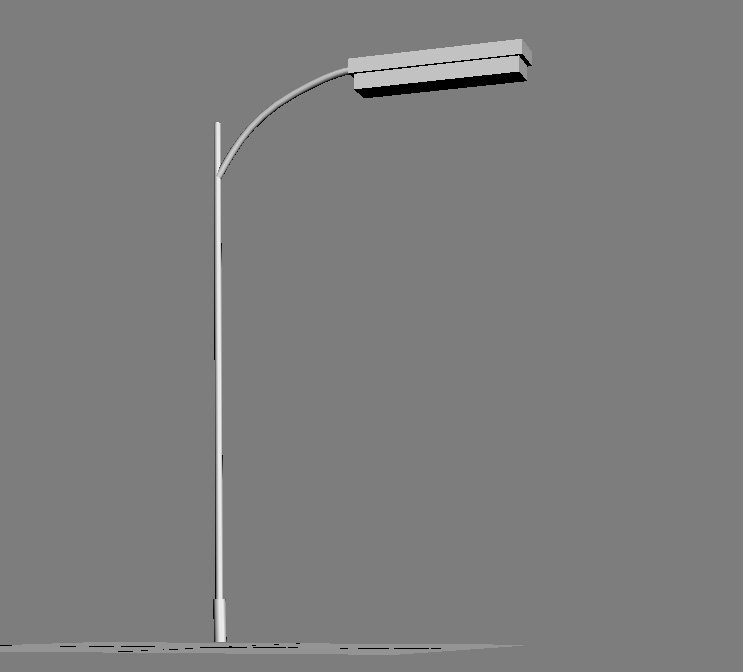
Step 20:now just apply the material on tube and street light is complete.

Step 21:Merge the street light and setup in street as like picture.

Step 22:now lets start the making of trashcan. go to Geometry>Cylinder>and draw.

Step 23:right click on the object go to Editable Poly>Vertex>and set the vertexes position as like picture by the Uniform Scale.


Step 24: go to the Polygon select the top face of trashcan and Inset (0.23)

Step 25:now Extrude(-20.52) it down and scale down the face as like picture.


Step 26:the bottom of trashcan is finished now lets make the trashcan cap.
go to Geometry>Cylinder>draw and follow the picture.

Step 27:right click on the object go to the Editable Poly>Polygon>select the bottom face and Inset (0.23)

Step 28:now Extrude (-0.27)

just fit the cap on trashcan and apply the material on trashcan with same method . I did in Step 17


Step 29:now just Merge the trashcan and setup in the street as like picture.
Step 30:i am going to make the last thing of my Street Scene. lets start the work on the street bench. I use the same method for bench i did for street light.
go to Shapes>Line> make the line shape as like picture and change the setting .


Step 31:now make the back leg with the same method.

Step 32:clone the both lines and setup as like picture.

Step 33:now go to the Geometry and make a box and fit it on the bench structure as like picture.

Step 34:now make the Bolts for bench .go to Geometry>Cylinder>draw as like picture.

Step 35:right click on the object go to the Editable Poly>select the all Edges and Connect one segment now move it up.

Step 36:select the top of faces and Extrude (0.2).now fit the Bolts in the bench and apply the color on bench.


Step 37:just merge the bench in the street scene.

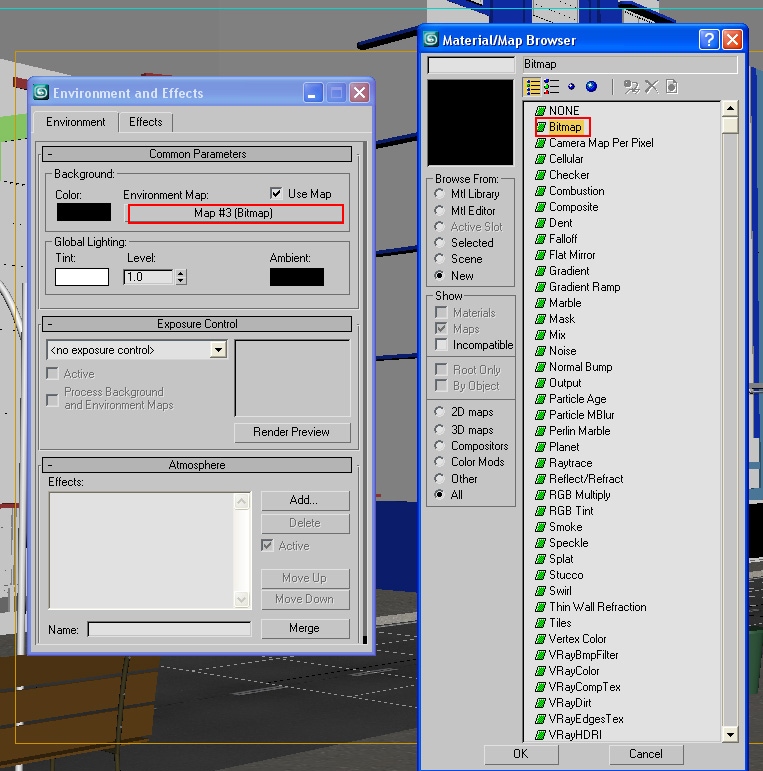
Step 38: Go to Rendering>Environment>click on Environment Map>Bitmap>choose any sky map from your library. You can visit www.hdrskydome.com to get few free samples of great HDR skies for better rendering purposes.


very good
nice idea
Thank you sir!
great dears i learn new things from this site thanks a lot to share
its so good making a street scene and so very good images..
thankssssssssssssssssssss my dear ???????????????????????????
Never mind, I can see it now, just needed to refresh my browser.
Umm…….for steps 29 through 36, I don’t see the photos of the street bench
ur tutorial is so gud.. n the jpeg. is a very gud solution of making a model….thanxxxxxx
hy i do study multimedia so it s so helpfull for me to follow. thaks mr.
3 max
i am learner 3ds max6 help me
Well explained and easy to follow.
Cool.